Intro
Today we’re checking out the replacement for the keyboard I’ve been using since I reviewed it back in 2019. The Cooler Master Devastator 2 has been a loyal keyboard since but it’s seen better days and I wanted something more and I feel like I found that in it’s replacement the Razor BlackWidow Elite.
Full Review
Watch the overview video or keep reading the full article below
Table of Contents
Original Purchase Requirements
There are a couple of attributes of the Devastator 2 that I got used to, so when I started looking for a new keyboard there were a couple of things I was looking for.
First and foremost it had to be a full mechanical keyboard. The mem-chanical style of the Devastator 2 is nicer compared to the plain membrane keyboards but obviously it doesn’t compare to the real thing. So that’s a must have.
Second, I’m used to resting my fingers on the keys so the switches of the new keyboard would need a decent actuation force to avoid accidental keystrokes from resting my hand on the keys.
Third, a quiet switch would be nice. While the clickyness of mechanical switches is the hallmark of the tech I was hoping for something relatively quiet especially for an office setting.
Lastly, a backlight would be nice as well, I’m not looking for anything elaborate since the keyboard will be under the desk out of sight to enjoy anything more than some light for the occasional peak for a unique function shortcut.
Anything else would be a plus. I would also mention I’m more of a typist than a gamer but I still do the latter fairly often.
Purchase Choice
As my first true mechanical keyboard and without the ability to actually try one out in stores I did quite a bit of research online on different keyboards, their switches, and what to hopefully expect from each one. I looked at name brands, off brands, and everything in between. While the BlackWidow was on the list, at the time it was $170 which again for my first mechanical keyboard was a bit pricer than I was looking to spend, so I kept researching while keeping the BlackWidow in my wishlist. That was until the price dropped to just $99, at that price it felt like a no-brainer. Here’s why.
In-Depth Review
First off and most obvious the BlackWidow Elite is a full mechanical keyboard that can be equipped with one of Razor’s three switches, I went with the yellows. Which they describe as linear and silent. Of course by silent they mean silenter than most switches. To be honest if you type slowly and gently enough it can be completely silent but if you’re typing at full speed it is still quite audible, not suitable for most workplace settings unless you have your own office where you can close the door.
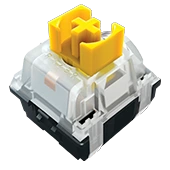
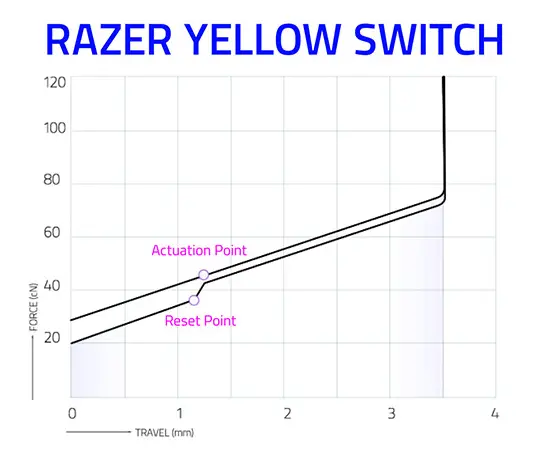
Razor’s yellow switches feature a 45 gram actuation force which apparently is on the lighter end of the spectrum, that being said I can still rest my fingers on the keys like I did with the Devastator 2 without worrying about accidental key presses which I found pleasantly surprising, I guess I have a lighter touch than I thought. The actuation point of just 1.2mm from the top means these switches are classified as ‘fast’ and with a full travel distance of 3.5mm I noticed it’s pretty similar to the Devastator 2 which I’ve become quite used to.
Switch Motion
While those numbers are seemingly meaningless if you’re not a coneser of mechanical keyboards, I can definitely say that if you do a lot of typing these switches are marvelous. The linear action means there’s no real feedback telling you that you’ve hit the actuation point but since you only have to go 1.2mm to register a hit you don’t need that extra feedback. At least I don’t think so.
The best way to see what’s actually happening with these switches is to check out these cross section animations. The yellow switches travel in one smooth motion between the keycap, slider, and contact leaves. This is in contrast to the other switches from Razor or MX where sliders are split in two to give you the tactile ‘bump’ or there’s a pronounced notch on the slider to give you the clicky noise. Different designs provide different types of feedback and noise which is why there are hundreds of switches to choose from now. All I know is, I now love these yellow switches.
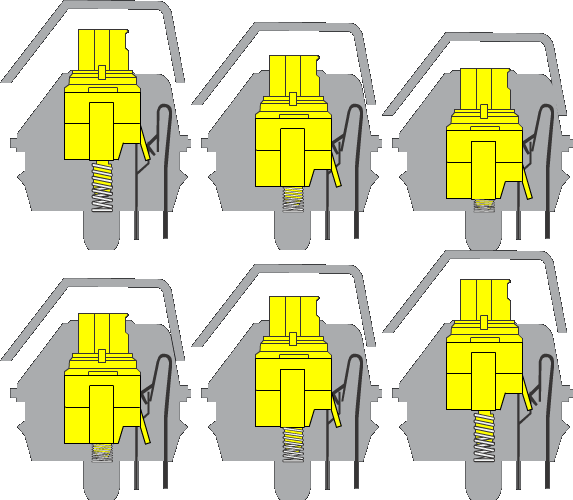
Linear and Silient
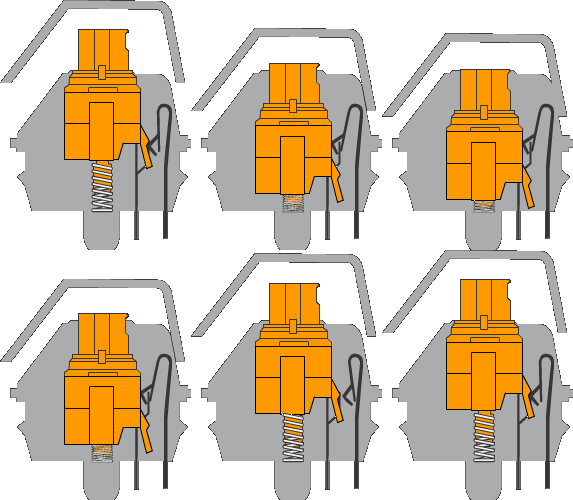
Tactile and Silent
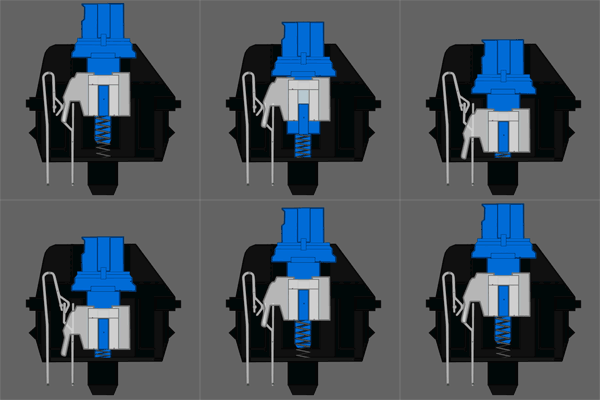
Tactile and Clicky
The stabilization of the caps is phenomenal. The space bar feels solid no matter where you hit it. Unlike practically all other keyboards I’ve used the individual caps do not move in place making it such a great feel to type on.
I can even quantify that my typing is faster with this keyboard. On the membrane and mem-chanical boards I maxed out at 60-65 words per minute but on the BlackWidow I can consistently get over 75 words per minute at 95% accuracy. A considerable increase for just changing the type of keyboard used. I can honestly say that it’s an absolute pleasure to type on the BlackWidow. I go out of my way to type because it feels that good. Maybe it’s because I’ve never experienced using a mechanical keyboard before but nonetheless I’ve never felt this way about a keyboard before. Your results may vary as all this stuff is very subjective but I’m fairly confident that if you type a lot you will like using this board.
The Extras
While the switches and typing experience are the best part of the BlackWidow there are quite a few other features that are icing on the cake and some negatives I’ll cover at the end.
RGB Lighting
Now I didn’t buy this keyboard for the RGB but I have to admit I really enjoy messing around with the Razor Synapse 3 lighting settings. Thanks to every key having its own fully addressable LED under the cap you can combine different effects together in the Chroma Studio to make some really interesting setups. Like this one I created where there’s a base wave of different hues of blue, then on top a reactive effect where when each key is pressed it changes color while at the same time creating a small ripple from the pressed key, so it looks like you’re tapping into the surface of a slow moving stream. The combination of effects is infinite. Unfortunately at home this is rather wasted since my keyboard roles underneath my desk but at work where it’s on top of my desk it’s a beautiful thing and yes, I absolutely bought a second one!
If you want to try out the custom lighting I setup you can download the ChromaEffects file from my site at the link in the description. Of course that’s assuming you are using the Chroma software.
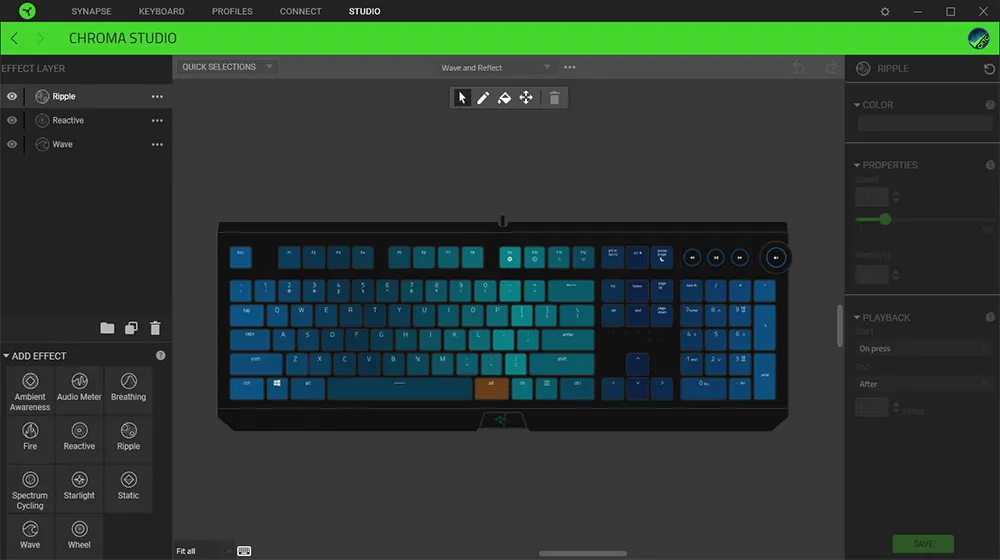
Chrome Studio file for gentle wave and reactive effects.
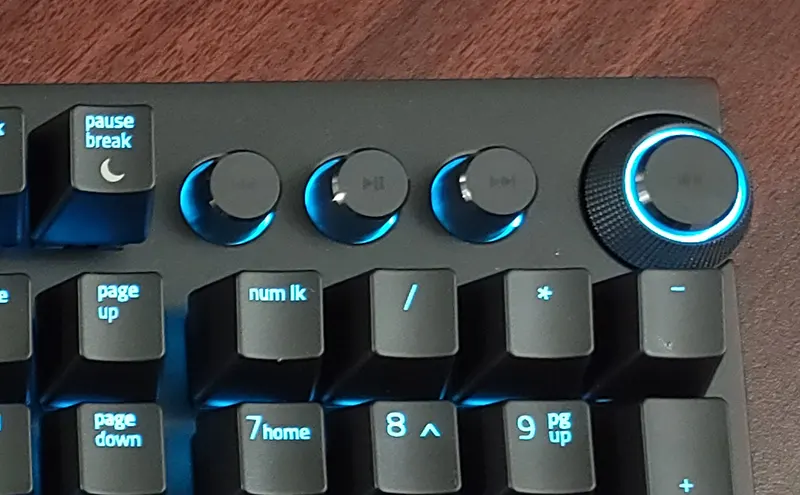
Media Buttons
Apparently, the position of the media buttons is a point of contention for some but for me they great where they are as I can easily move from the mouse to turn the volume dial. I also prefer the dial as opposed to up and down volume buttons. The media buttons are obviously not mechanical but I still wish they felt a little nicer. They are oddly hard to press and feel a little mushy compared to the rest of the keyboard but I only ever use the volume dial anyway so it doesn’t impact me.
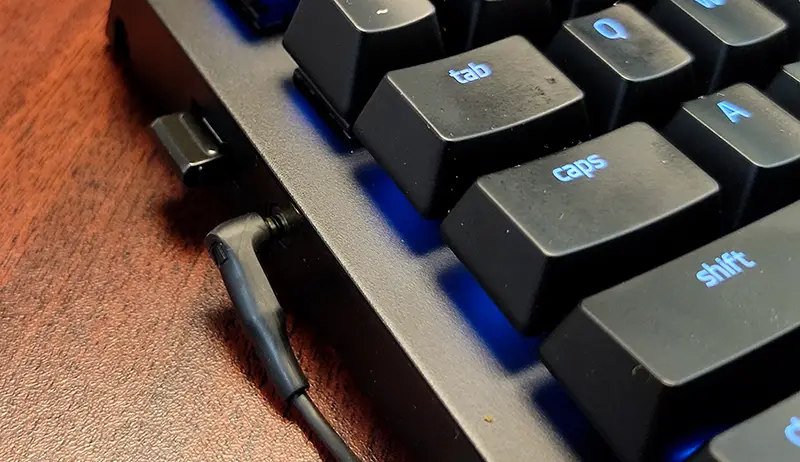
Audio and USB Passthroughs
A more interesting feature are the audio and USB pass throughs on the left side. Because of these two pass throughs the braided cable for the keyboard is thick since it’s actually inclosing three separate cables which split up near the end to plug into their respective ports. They are both really convenient if you have a reason to use them, at home I have my multi-card reader plugged in and at work I use the audio pass through for my headphones.
The audio pass-through is super convenient and while it works I did have to finagle the connector to get both channels to work at 100%. For my Sennheiser CX100s it looks like the connector is only partially inserted but this is where I have to leave it for the headphones to work properly. It’s not a big issue since they stay plugged in all the time but if I had to constantly plug and unplug headphones this would get annoying fast. I think it has to do with the fact that this port supports output and input.
Wrist rest
The BlackWidow comes with a wrist rest that attaches magnetically to the front edge of the board. If you don’t have a wrist rest at all this is a great option, firm but supportive. I personally don’t use it because I have a more robust wrist rest for both the keyboard and the mouse. Quick side note. I also swapped out the mouse that came with the Devastator 2 combo for a Logitech G502, infinite scroll the for the win!
MISC Goodies
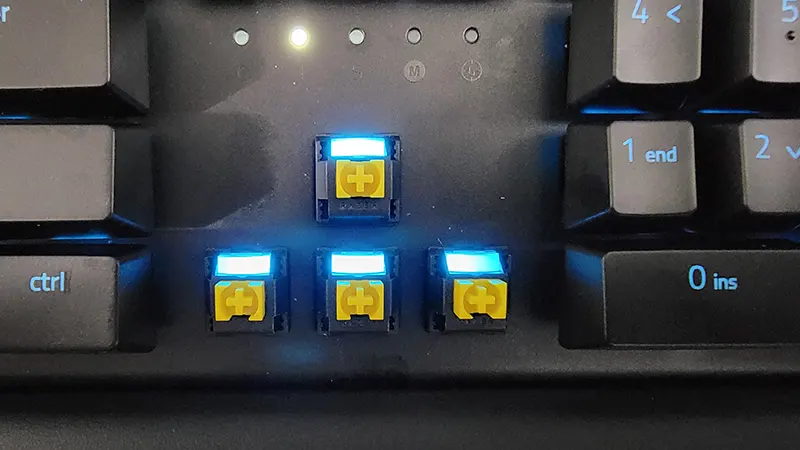
Removing the keycaps doesn’t require any tools. They slip right off and go back on just as smoothly and you can see where the LEDs are positioned, very cool.
It’s not strictly unique to this keyboard but unlike membrane keyboards where there’s a whole open compartment below the keys where all manner of disgusting stuff can gather below the keys, on the BlackWidow the switches are level with the deck making it easy to clean and stops foreign material from gathering under the keys.
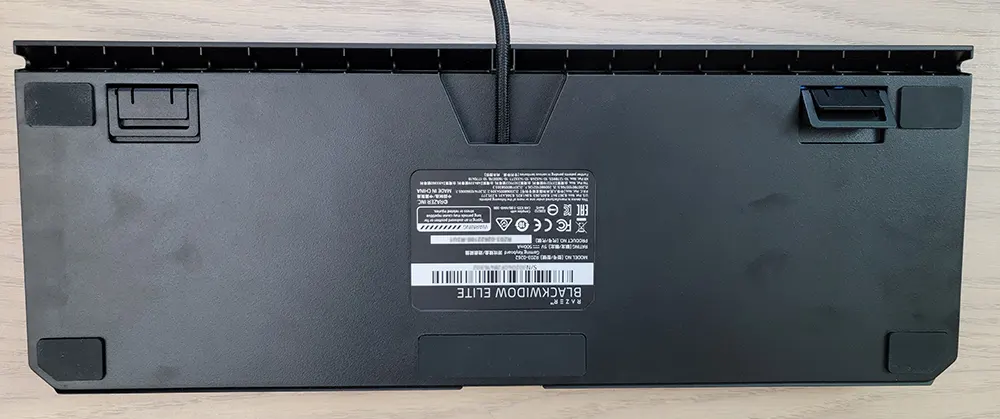
On the bottom, there are channels where you can route cables multiple ways and a set of pop-down feet with two heights to choose from.
Lastly, the BlackWidow is a hefty boy coming in at 3.7 pounds or 1.7 kilos that’s mostly thanks to the mechanical setup but also it’s aluminum chassis.
Lastlier it comes with a two year warranty.
Some Critics
Now I have been gushing about this keyboard this whole time but there are a couple things that do need to be pointed out.
For one, I wish you can change the indicator light colors located here. I always have num lock on and that one pure white light in a sea of tranquil color is annoying to say the least.
Something else I noticed is a metallic twang as if the switches are hitting the bottom of the metal chassis which echoes around the keyboard, see if you can hear it here. It’s more noticeable around the middle of the keyboard since there’s more empty space inside for the echos to propagate. It’s not always obvious and probably depends on what the keyboard is sitting on, the type of desk, and your surroundings.
Lastly It’s a little annoying you have to have the Razer Central app open for the custom lighting effects to be active. I thought in the marketing for this thing it said the profiles were saved directly to the board. I’ll have to figure that one out. On top of that if you use an alternate method to log into Razor Central you have to login every time you turn the computer on. I ended up making a Razor account directly with them from which I can turn on automatic login. Not sure if it’s just me, let me know down in the comments.
Conclusion
Even with those couple of negatives I have to say I highly recommend this keyboard to anyone but especially those of us who type all day.
That’s it for this review. If you liked it please share so others can find this content in the future and maybe even pick a BlackWidow up for yourself.
- YELLOW MECHANICAL SWITCHES FOR QUICK EXECUTION — Enjoy instant, rapid-fire smooth inputs that are just as quiet thanks to built-in sound dampeners

