

3D printing put a factory on my desk
It still amazes me: a machine that fits on a desk, turning an idea into a real, solid object you can hold. 3D printing is letting people everywhere make, fix, and upgrade things at home that used to be out of reach. I’m learning it out loud, one print at a time, on a Creality Ender 3 V3 SE.
Making things, no factory required
For most of history, making a physical object meant a factory, a mold, or a room full of tools. 3D printing quietly changed that. A machine that fits on a desk can now turn a digital file into a real, working object in a few hours, for a few cents of plastic. That is a genuinely new thing, and it is why people everywhere are hooked.
Snapped a knob off the dryer? Print a new one. Need a bracket that nobody sells? Design it and print it. Want a toy, a tool, an organizer, or a replacement part for something long discontinued? Odds are someone already shared the file for free, and if they have not, you can make it yourself. It is fixing, making, and tinkering all at once, and the barrier to start has never been lower.
A desk that can make almost anything
Three reasons a spool of plastic and a printer changes how you deal with the physical world.
Fix what breaks
Replacement parts for things you would have tossed or waited weeks to order. A cracked clip, a missing knob, a discontinued piece: model it or download it and print it that afternoon.
Make what doesn’t exist
Custom brackets, mounts, organizers, tools, gadgets, and gifts. If you can picture it or model it, you can hold it, with no factory and no minimum order.
Build on everyone else
A worldwide community shares its designs for free. You start from someone else’s work, tweak it to fit, and share yours back. That is most of how I learned.
My printers, from Monoprice to the Ender 3
I don’t claim to be an expert. I’m learning this hobby out loud, one print at a time, and I think the mistakes are worth as much as the wins, so I share both. The point was never the machine. It is everything the machine lets me make.
I started years ago on a budget Monoprice, first a Maker Select and later an MP10 Mini. They were cheap, imperfect, and exactly the right way to learn: I fought with bed leveling, botched plenty of prints, and slowly figured out how all of this works. When the MP10’s endstop sensor finally gave out, a couple of years had passed and consumer printers had come a long way, so I went looking for a modern upgrade that was still beginner and budget friendly.
That is how I landed on the Creality Ender 3 V3 SE, my current printer and the one behind almost everything on this page. It is faster, easier, and far more forgiving than anything I started on, which means less time fighting the machine and more time actually making things.
A great on-ramp: the Ender 3 V3 SE
If you’re after a first printer, this is the kind of machine that makes the hobby click. Beginner and budget on paper, a genuine joy in person.
Fast where it counts
Max print speed jumps to 250 mm/s, up from the 100 mm/s of my old MP10. Prints that used to tie up the bed for an afternoon come off in a fraction of the time.
It levels itself
A CR Touch probe maps the bed across 16 points and trims the Z-axis as it prints, so no more manual leveling. A dual Z-axis with synchronized belts keeps the gantry square. It worked right out of the gate, no coaxing.
Beginner-budget value
Around $220 retail, and $150 on the promo I caught. Creality is a far more common name than Monoprice, so parts, print profiles, and help are easy to find the moment I need them.
Every print on this page comes off a Creality Ender 3 V3 SE, sliced in Cura. The full unboxing, setup, voltage-switch gotcha, and first-print breakdown is in the review down below.
Then I started modding it
A fast printer with a tall, light gantry has quirks. Fixing them is half the fun, and every fix turns into a file you can download.
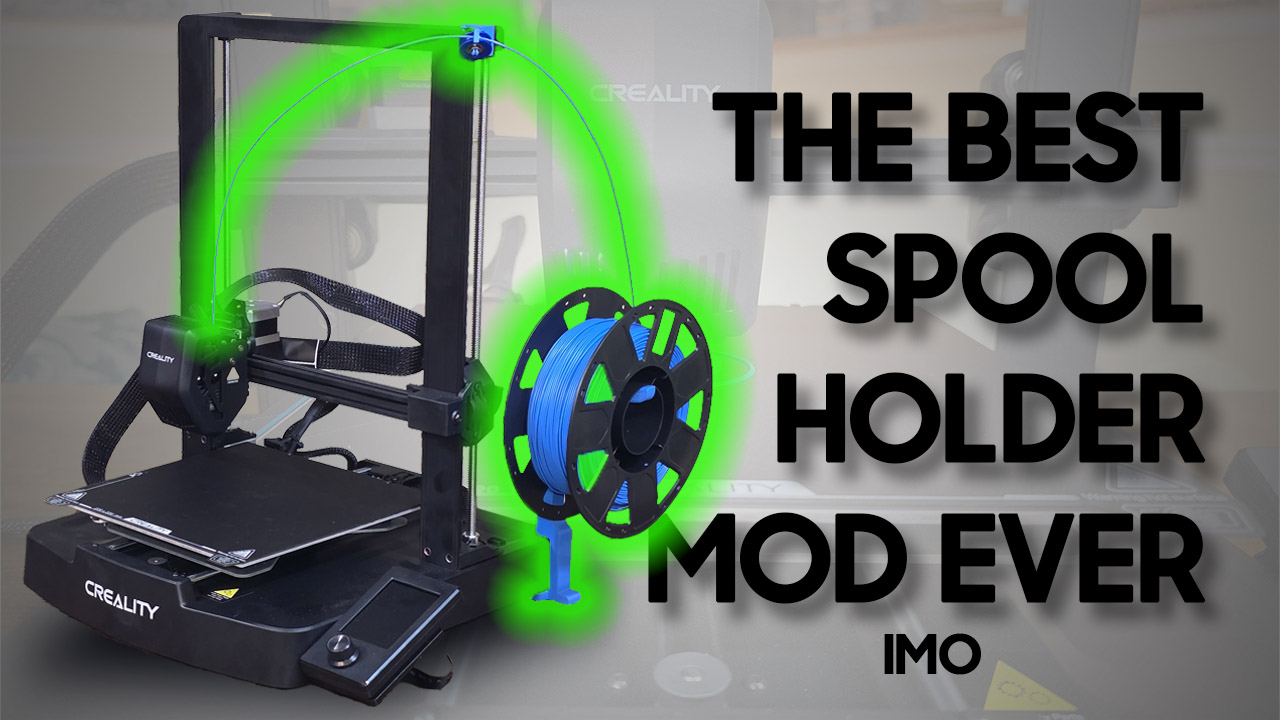
The side-mount spool holder
On fast moves the top-mounted spool shook like a blender on top of the printer, feeding vibration straight into the frame. This one-piece holder moves the spool to the side with no screws and no tools: it hooks around a rubber foot and the printer’s own weight pins it down. A self-centering V keeps the spool tracking, and a beveled lip lets it spin freely without bearings.
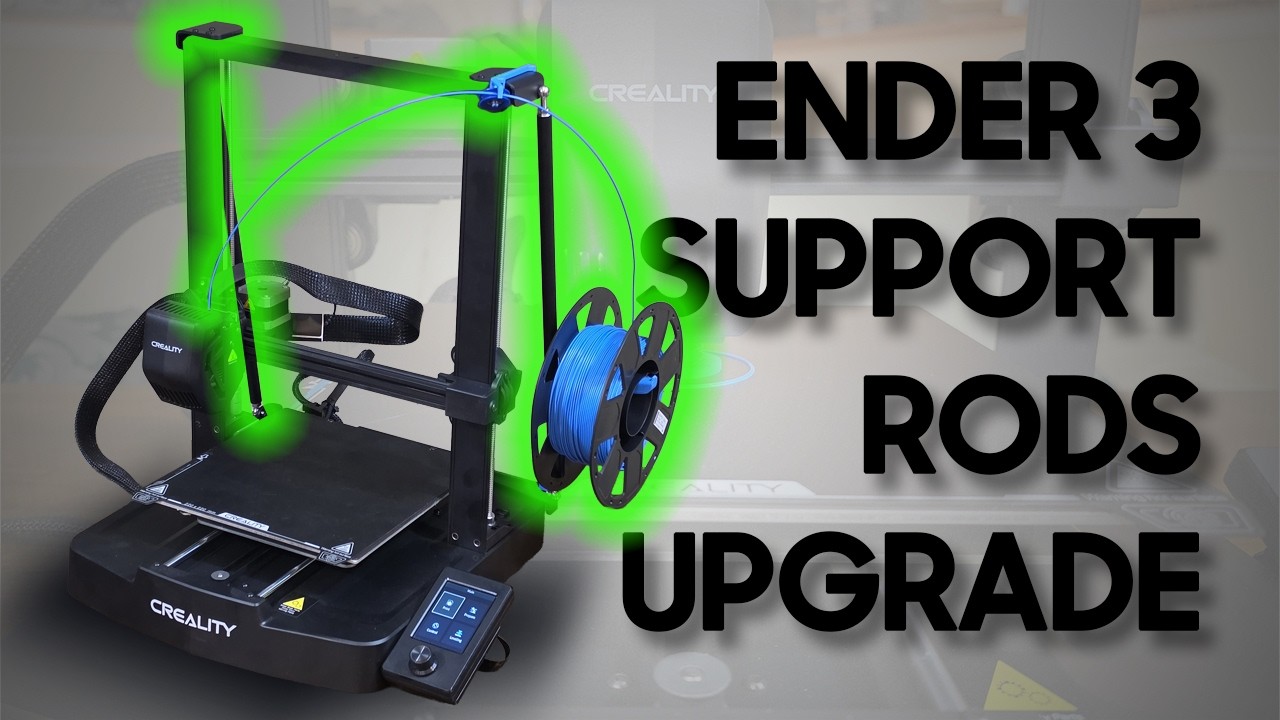
Support rods for the wobble
Push the speed and that tall Z-axis gantry starts to sway like a mast, leaving wavy, out-of-place layers near the top of a print. A triangulated support-rod kit braces it from the back and steadies the whole frame, with a custom SR1 spool holder reworked to fit the new hardware. I found the breaking point first with a honeycomb stress test at 220 mm/s, then killed it.
Print my mods yourself
Everything I design for the printer, I share. Both libraries are free, print-ready, and grow every time I build something new.
My original Ender 3 V3 SE mods and models, hosted on the community that got a whole generation into printing. Free STLs, no account needed to download, printed and tested on the machine you see above.
Browse on Thingiverse
The same designs on Printables, with tuned print profiles so you can send them to your slicer and go. Follow along there and new mods land in your feed the moment they are published.
Browse on PrintablesBoth profiles hold the exact files behind the mods above, from the side-mount spool holder to the filament guides and the SR1 support-rod holder. Print them, remix them, and let me know how they turn out.
3D printing guides & mods
Reviews, upgrades, and print files as I learn this hobby out loud. Start with the Ender 3 V3 SE review, then the mods. New guides show up here automatically as they go live.
Want to talk shop?
There’s always another mod on the bed and another print in progress. Grab my files up above, check out the exact gear I print with, or just reach out and say hi. I’m glad to hear about it.