One Cura setting makes the top surface of a print dramatically smoother by running the hot nozzle back over it, like ironing a shirt. Here is how to turn it on and the exact values I use.
Editor's note (July 2026): Ironing has been in Cura since version 2.7 (fall 2017) and the settings below still apply in the current Cura 5 releases. Only Monotonic Ironing Order is newer, added in Cura 5.0. I tested this on a Monoprice MP10 Mini and a Maker Select V2, both discontinued now; the feature itself works on any Cura-supported printer.
Ironing runs the hot nozzle back over the finished top layer to smooth out the lines, exactly like ironing clothes. Turn on Expert settings, check Enable Ironing under Top/Bottom, and use these values: Zig Zag pattern, 0.1mm line spacing, 10 percent flow, and 20mm/s speed. It adds some print time, but the top surface comes out dramatically smoother.
One checkbox and four values for glassy top layers.Ironing is a Cura setting that has a big impact on any model where the top-facing surface needs to be as smooth as possible. As the name suggests, it smooths the top layers by physically ironing the material down: the hot nozzle runs back across the previous layer, flattening out imperfections, just like running an iron over a shirt. It was introduced in Cura 2.7 back in the fall of 2017 with a few basic options and has been improved on since.
The ironing options are hidden until you show all of Cura's settings. To reveal them:
Once ironing is enabled, several more options appear beneath it. Those are where the results are made.
These are the values I have found work best for me. You may need to adjust them for your own printer, but they are a solid starting point.
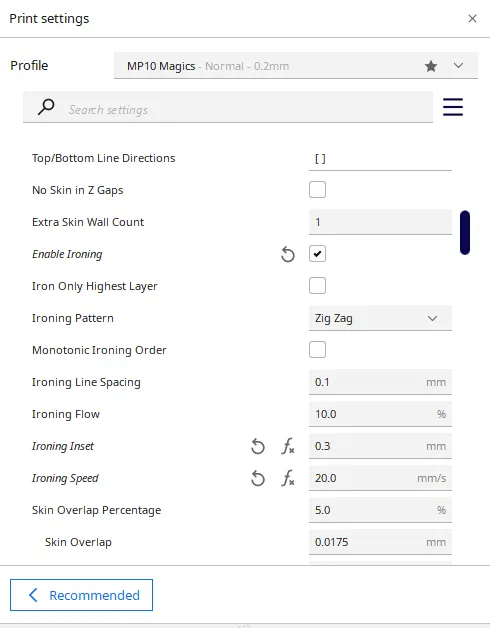
| Iron Only Highest Layer | Off. Leaving it unchecked means every flat top surface gets ironed, not just the single highest one. |
|---|---|
| Ironing Pattern | Zig Zag. The other option is fine, but Zig Zag comes out cleaner. |
| Monotonic Ironing Order | Off. New in Cura 5.0. I have not found a use case for it yet, though that may change. |
| Ironing Line Spacing | 0.1 mm. How much each pass overlaps the last. This value smooths well without adding a ton of time. |
| Ironing Flow | 10 percent. You still extrude a little filament to fill gaps for a smoother result, but keep it under 15 percent to avoid clogging, and never set it to 0. |
| Ironing Inset | Default. How close to the edge it irons. The closer you go, the more likely you create a lip or rim over the edge that you then have to clean up. |
| Ironing Speed | 20 mm/s. How fast it irons. Going a little slower gives better results but takes longer, and 20mm/s is a good balance. |
In Cura's preview mode you can watch it simulate the ironing: after the last layer finishes, the nozzle goes back over it in much smaller passes, which looks noticeably smoother when you zoom out. The preview also shows the added time. On my demonstration model, a simple set of steps, the print went from 24 minutes without ironing to 31 minutes with it. That cost depends entirely on how much flat top area a model has.
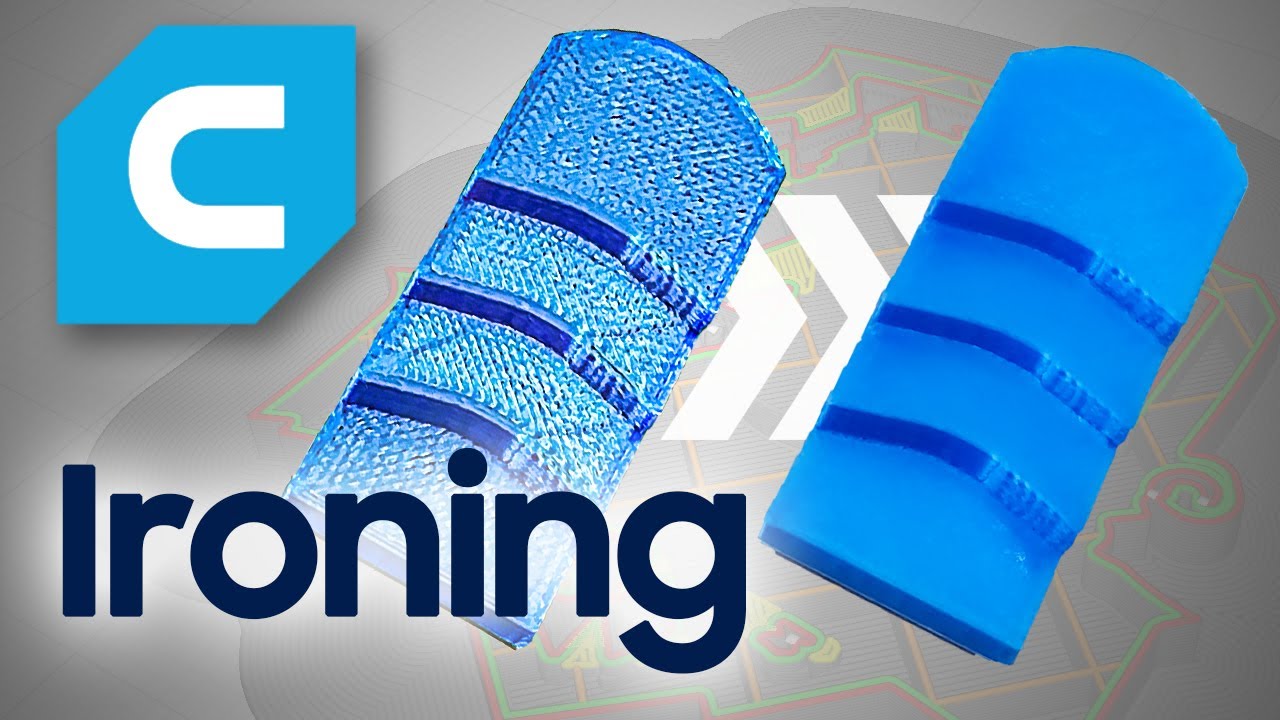
On that stepped demo model the difference is night and day: without ironing you can clearly see every top-layer pass on each step, and with it enabled they nearly vanish into a smooth surface. On a more detailed model, a raised Gryffindor house crest, the impact shows up everywhere, in the background, on the diamonds, and especially on the lettering. It is amazing what such a simple idea does for a print whose main focus is its top face.
Ironing is a Cura setting that smooths the top-facing layers of a print by running the hot nozzle back over the finished layer, flattening out imperfections like ironing a shirt. It was introduced in Cura 2.7 in 2017 and works on any Cura-supported printer.
The values I use are a Zig Zag pattern, 0.1mm ironing line spacing, 10 percent ironing flow, and 20mm/s ironing speed, with Iron Only Highest Layer left off so all flat surfaces get ironed. You may need to adjust slightly for your own printer, but those make a solid starting point.
Yes. Ironing makes an extra smoothing pass over the top layer, so it adds time based on how much flat top area the model has. On my demo model the print went from 24 minutes without ironing to 31 minutes with it, but a model with little flat top area adds far less.
Around 10 percent. You still want to extrude a little filament while ironing to fill gaps for a smoother result, but keep the flow under 15 percent to avoid clogging, and never set it to 0.
Use it on models where a flat top surface is the main visual focus, like a plaque or a crest, where it makes the biggest difference. It still helps anywhere there are flat top-facing surfaces, so there is little downside beyond the extra print time.
Ironing is most helpful on prints where the top face is the star, like that crest, but it is worth enabling anywhere you have flat top-facing surfaces. It is a simple idea with a big payoff. I pair it with the same Cura setup from my Blender-to-Cura workflow, and Cura first showed up in this series back in episode 2. Hope you find it as useful as I have.
Disclosure: This post contains affiliate links. As an Amazon Associate I earn from qualifying purchases, at no extra cost to you. CK Tech Check is 100% ad-free: no banner ads, no ad tracking. Affiliate links like these and my YouTube channel are what keep the site running.