Intro
It’s been some time since episode 7 and needless to say a few things have changed that will impact the future of the series, hopefully for the better.


Full Review
Watch the overview video or keep reading the full article below

Table of Contents
Series Updates
If you haven’t been keeping up with recent developments or are new to the channel I’ve switched both the software I use to create 3D models and the printer I use to print those models. Originally we were using the desktop version of Trimble’s SketchUp to make our 3D models but recent changes in both SketchUp and other modeling software I’ve made the move to use Blender for everything 3D CAD.
If you’ve never used Blender and specifically if you’re a SketchUp user I have an ongoing series teaching beginners how to use Blender. The series focuses on the transition from SketchUp to Blender going over their similarities but more often their differences and how to overcome ingrained habits to learn this new powerful tool. Read the first part of Learning Blender after SketchUp
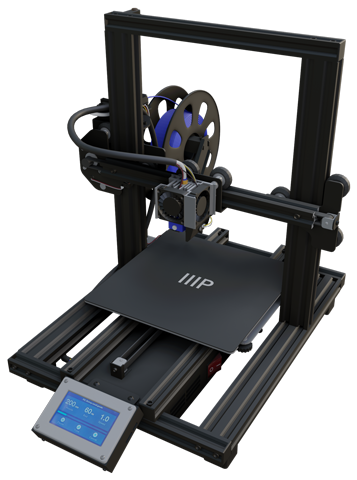
The next big change is the namesake of this series. While I still have and use the Monoprice Maker Select V2, due to a series of events I picked up a newish printer. The Maker Pro 10 Mini is still a Monoprice product but let’s say it’s a few steps ahead of the V2 and is now my go to printer. If you haven’t seen my review and first impressions of the MP10 read Part 1
Blender Workflow
With all of the changes out of the way let’s get into what this episode is about. The switch to using Blender brings up a few changes to the workflow, for the better. Right away simply saving 3D models for printing in Blender is easier since exporting to STL (the most common 3D file extension) is built into Blender and doesn’t require an extension or plugin like it did with SketchUp and as mentioned in another episode with SketchUp’s transition to being online only exporting to STL is practically impossible so Blender is the way to go.
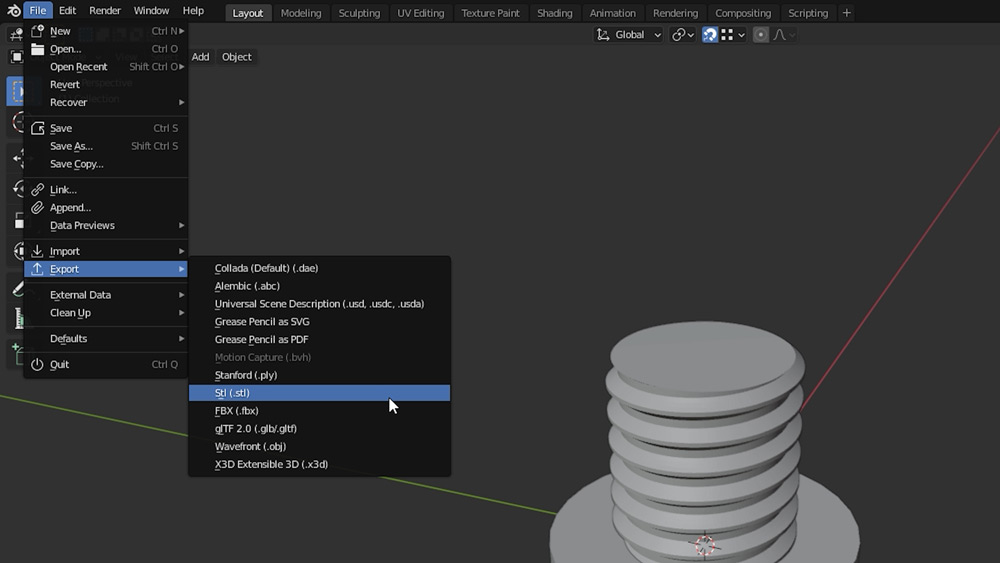
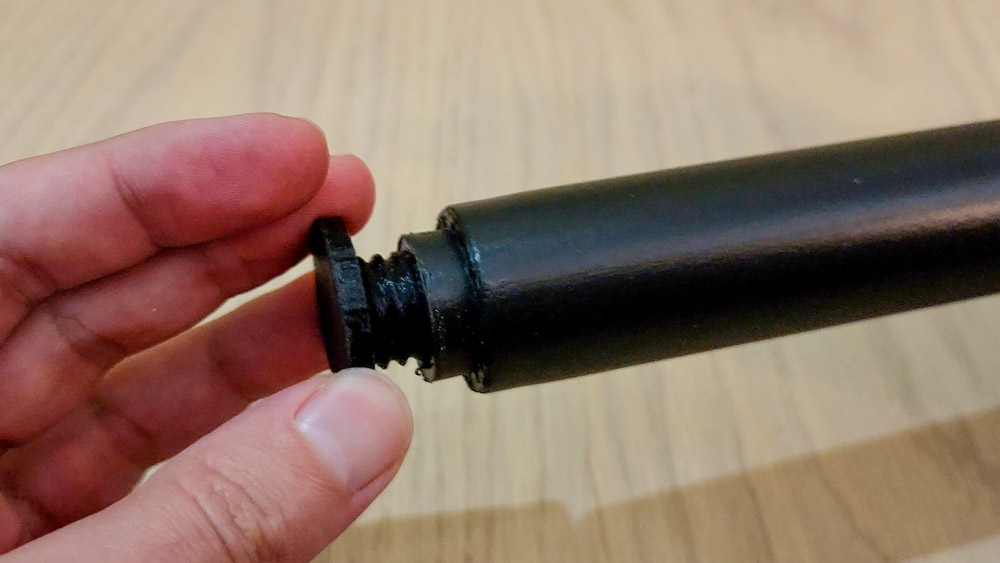
Here we have a simple model I made for some shelving units I bought recently. I had a couple vertical supports left over which needs these end caps to secure the top shelves in place.
Exporting to STL is extremely simple. Go up to File, go down to Export, and select STL from the export list. In the export window give it name and click export. There are few things to remember when creating models in Blender that will be exported for 3D printing. I’ll go over those details in the next episode so make sure to Subscribe so that you don’t miss out on that when it’s published.
Working in Cura
Now you have your model in the STL format which we can use to import it in our slicing program.
I am still using Cura to slice up and save our models into the GCODE standard to use in 3D printing. Of course since episode 7 I have updated Cura to 4.10 which has an improved interface and some quality of life improvements all around. I did run into one problem in Cura and that is the lack of a profile for the MP10 Mini. For some reason only version 4.0 had a profile for the MP10 which didn’t get carried over to future versions of Cura. I have no idea why this is the case. It seems a little weird that it was included in one version and not in the subsequent versions.
Fortunately it’s fairly easy to add the MP10 to the printer list in Cura. The fastest way to add any new printer is to click on the default printer name here next to the Open file icon. Then select Add Printer. Under Add a non-networked printer scroll down until you see the list item called Custom and select it. Under this option select Custom FFF Printer. Then in the right column give the Printer a name and click Add.
Setting up a New Printer
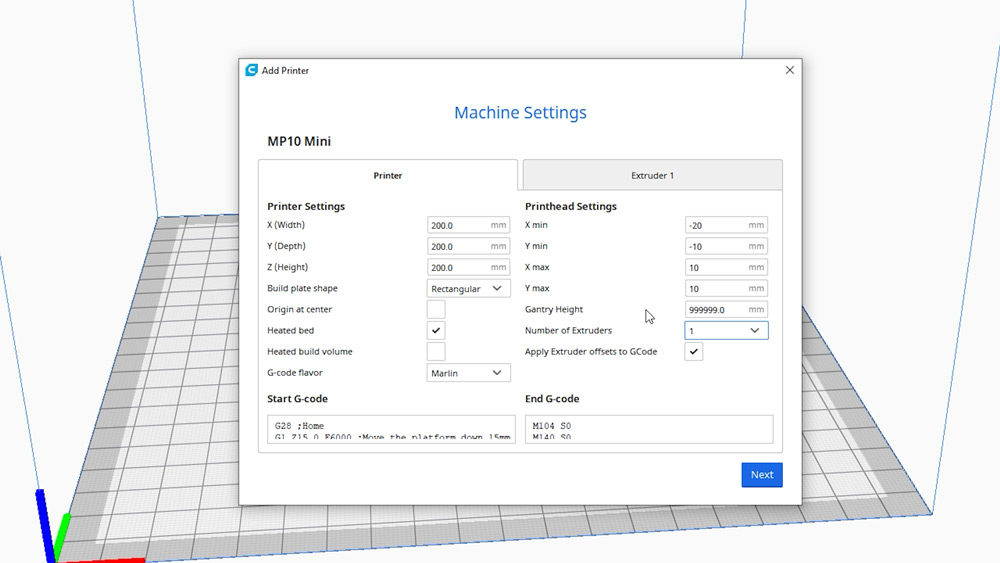
In the Machine Settings screen that pops up next enter the values for your printer. Here are the settings for the MP10 Mini. Most of these values you’ll know just by reviewing the spec sheet but the two sections at the bottom of the printer tab called Start G-code and End G-code will need some more explanation.
These two pieces of code run before and after every print respectively. This code contains instructions such as move nozzle to home position, extrude filament, cooldown bed, etc. The default values should be fine but if you’d like the factory spec code I’ll have it available on my site at the link in the description to easily copy and paste at your leisure along with all the other values you’ll need to set up the MP10 Mini. As a note if you haven’t seen the MP10 Mini review video, the only difference between the regular MP10 and the Mini is the height of the Z-axis, 400mm or 15.75 inches for the regular MP10 and 200mm or 7.87 inches for the Mini, all the other values are the same for both printers.
Printer
| Printer Settings | |
|---|---|
| X (Width) | 200 |
| Y (Depth) | 200 |
| Z (Height) | 200 |
| Build plate shape | Rectangle |
| Origin at center | No |
| Heated Bed | Yes |
| Heated build volume | No |
| G-code flavor | Marlin |
Start G-code
G28 ;HomeG1 Z15.0 F6000 ;Move the platform
down 15mm
;Prime the extruder
G92 E0
G1 F200 E3
G92 E0
| Printhead Settings | |
|---|---|
| X-min | 20 |
| Y min | 10 |
| X man | 10 |
| Y max | 10 |
| Gantry Height | 30 |
| Number of Extruders | 1 |
| Shared Heater | No |
End G-code
G91G1 F1800 E-3
G1 F3000 Z10
G90
G28 X0 Y0 ; home x and y axis
M106 S0 ; turn off cooling fan
M104 S0 ; turn off extruder
M140 S0 ; turn off bed
M84 ; disable motors
Extruder
| Nozzle Settings | |
|---|---|
| Nozzle Size | 0.4 mm |
| Compatible material diameter | 1.75 mm |
| Nozzle offset | 0.0 |
| Nozzle offset Y | 0.0 |
| Cooling Fan Number | 1 |
Finalizing the Workflow
From here the rest of the process is the same as before. Select slice, review the results, even play the path that the print head will take printing each layer, this is a really cool feature. After spending an inordinate amount of time watching the print preview, you can save your print-ready GCODE file.
After a short print we have our new piece and watch it fit perfectly into this support, it’s a beautiful thing. I doubt I’ll ever get tired of being able to print my own components especially when they are this useful.
Conclusion
This is the workflow I’ve been following for the last few months. If you have any suggestions or questions don’t hesitate to leave a comment below or reach out to me on my website.