
Creality Ender 3 V3 SE: Fast, Affordable, and Actually Beginner-Friendly
My Monoprice MP10 mini finally gave out, so I went hunting for a budget printer that was still a real upgrade. The Ender 3 V3 SE assembled in well under an hour and nailed its very first print with zero tuning. Here is the full setup and first-print review.
Plays via YouTube. Google may set cookies when the player loads. Privacy policy
The short version
The Creality Ender 3 V3 SE is a genuinely easy first 3D printer. It assembles in well under an hour, the CR Touch auto leveling came back all green on the first pass, and it printed a usable part with zero tuning straight out of the box. Picked up during a promo, it is a big step up from an older budget machine like the Monoprice MP10 mini. The only real gripe out of the gate is a wobbly spool holder.
Verdict: an easy first printer to recommendWhy I upgraded from the Monoprice MP10 mini
This review was a long time coming. My trusty Monoprice MP10 mini finally stopped cooperating: the axis lost track of where it was and could never start a print. The culprit was a faulty stop sensor, an easy enough fix that I will get to eventually, but since it had been a while, I decided to see what else was out there. Could I find another beginner and budget friendly printer that was still a real upgrade from the MP10? After some research, one machine kept catching my eye.
The Creality Ender 3 V3 SE stood out for a few reasons, starting with the brand and a spec sheet that read like a clear step up from the MP10 mini. I managed to grab one during a promo, so it was a no-brainer, and even at its usual price it is great value. The non-SE version has better specs, but it costs more than twice as much, so maybe someday. For now I wanted to stick to a beginner budget. It also helps that Creality is a more familiar name in this space than Monoprice, so if I ever need parts or run into an issue, I expect them to be easier to find.
Disclosure: I bought the Ender 3 V3 SE with my own money, and this review reflects my real setup and first prints. This post also contains affiliate links. As an Amazon Associate I earn from qualifying purchases, at no extra cost to you.
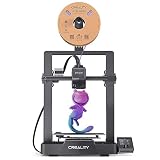
The printer tested
Creality Ender 3 V3 SE
A 250 mm/s budget 3D printer with CR Touch auto leveling and a dual Z axis: the exact machine behind every print in this review.
Monoprice MP10 mini the old printer
- 100 mm/s top print speed
- Single Z screw shaft
- Manual bed leveling
- 200 × 200 × 250 mm build area
Ender 3 V3 SE the upgrade
- 250 mm/s top print speed
- Dual Z axis with synced timing belts
- CR Touch auto leveling
- 220 × 220 × 250 mm build area
What comes in the box
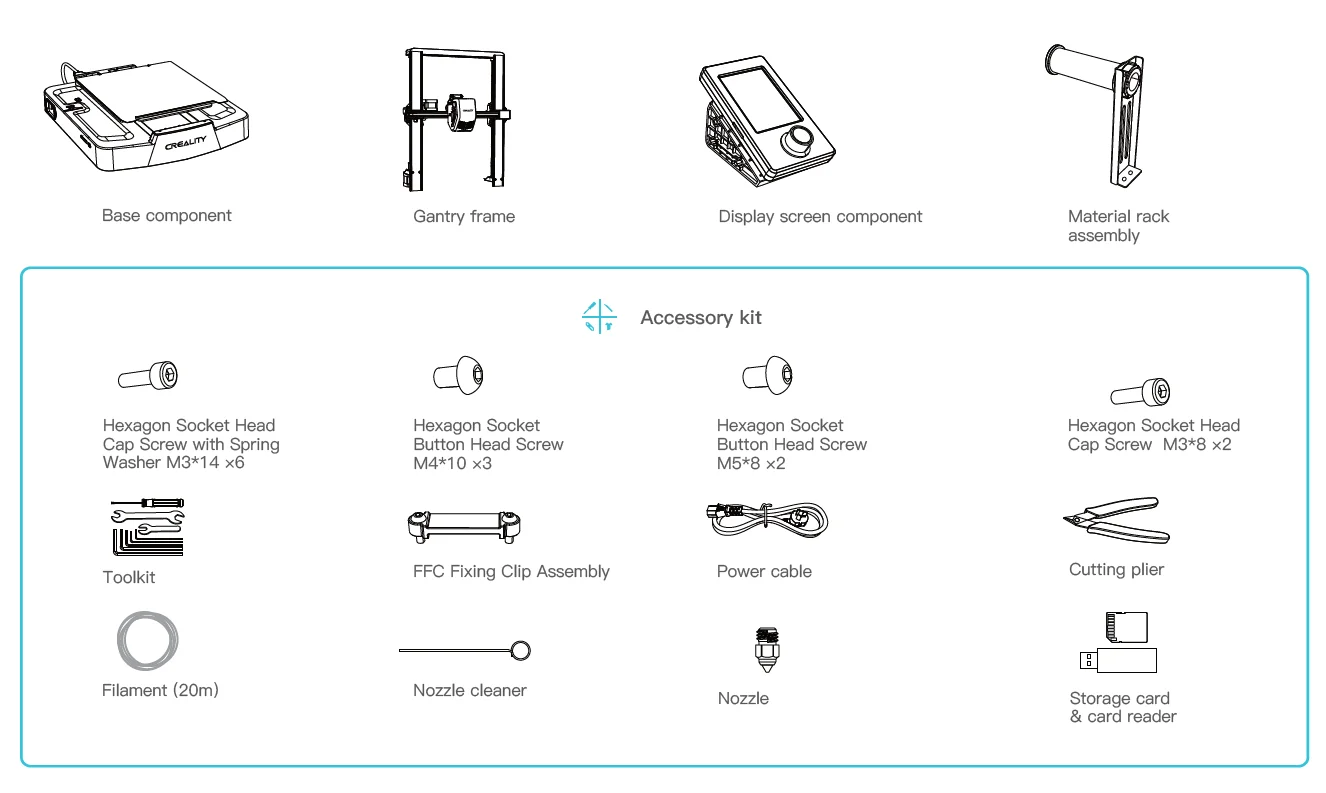
After lifting off the top foam layer, you are greeted with an assortment of components right away. There is a standard C13 power plug, which is nice to see instead of a proprietary supply, and the control unit, which is not a touchscreen but is easy enough to drive with the knob. There is a bog standard spool holder that I suspected I might want to replace later, more on that below. One bag holds the installation manual, a filament nozzle cleaner, a little packet of stickers, and the warranty sheet.
A second zip lock bag has some sample Creality filament, a bag of tools with Allen keys, wrenches, and a small screwdriver, plus an SD card reader and a generic full size SD card. There are a few more bags of assorted screws for assembly, and a nice surprise: a filament cutter. It has no locking mechanism, which would have been a bonus, but it was thoughtful to include. There is even a spare nozzle in the mix. A generous set of extras for a budget machine.
Assembly: base, gantry, and control unit
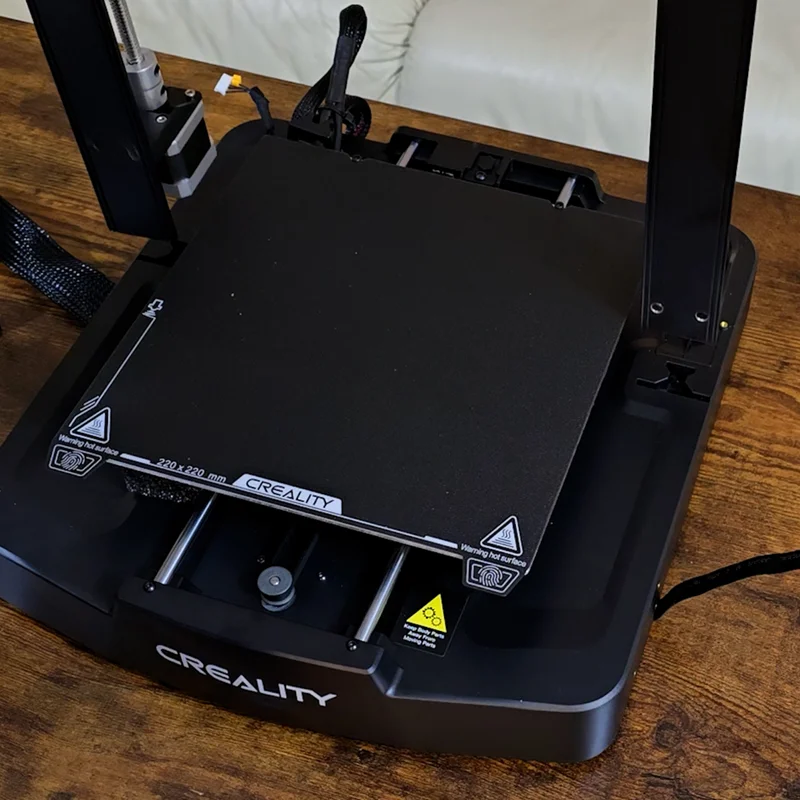
Under the accessory tray sit the two main components, the Z axis gantry and the base, and I like them a lot. It feels more solid than the MP10 mini, partly because it reads as one big, well finished piece. The braided power and data cables make a good first impression, and even though the base cover is plastic, it is good quality plastic with a nice finish. My only worry is that all those surfaces will catch dust easily.
The first step is dropping the Z gantry into the base. What I like here is that the gantry slides into slots and holds itself in place while you drive the screws, so you are not balancing the base and the gantry at once. It is a small quality of life touch you only use once, but it makes the whole thing feel solid before a single screw goes in. Each little baggie is labeled well: the base takes six M3 by 14 screws, three per side. The Allen keys make quick work of it, and honestly a screwdriver would be harder in that tight space. With the screws in, this thing feels extremely solid, no issues at all.
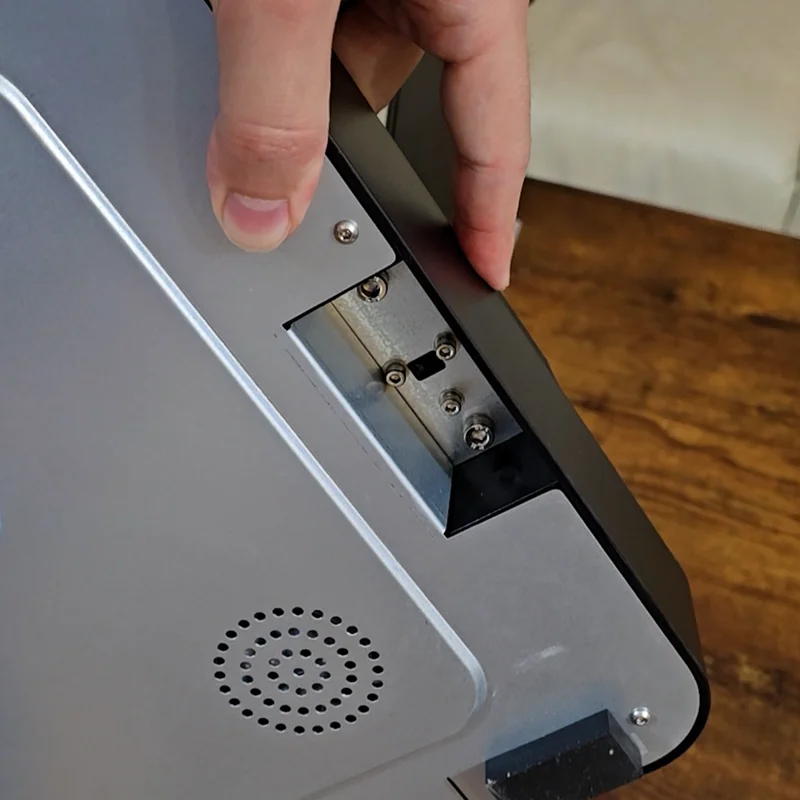
Next comes the control unit, held by three screws. It has grooves that line it up with the base, so you can position it and not fret about alignment as you screw it in. Three screws feels like overkill, but the result is rock solid. After that is the spool holder, the one piece you do have to hold in place while it screws on, though it is no trouble.
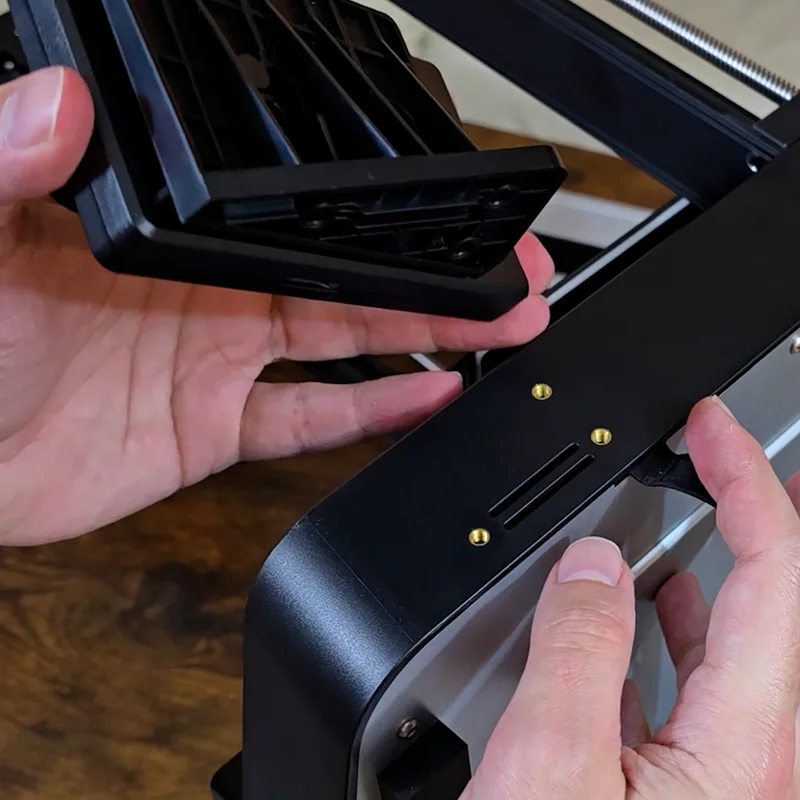
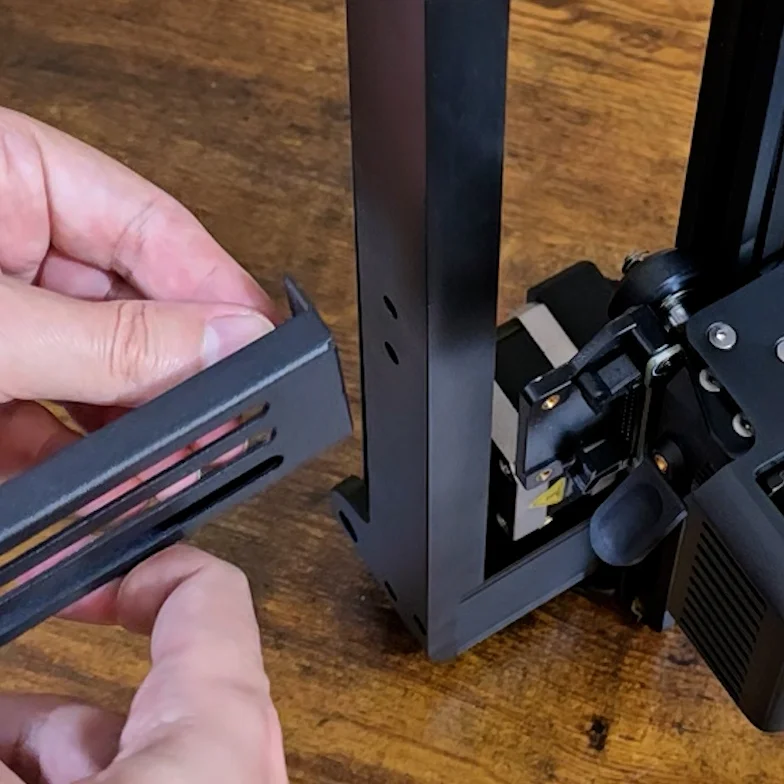
Wiring the Ender 3 V3 SE
Now the fun part, plugging everything in. First is the extruder's main data and power cable. This printer has a clever groove along the gantry to hold the cable, with a specific spot on the cable meant to seat there. I slid it into the bottom groove and gave it a pinch to pop it into the top groove. Once seated it feels secure, and it is nice that the cable has a home instead of flopping around mid print. That braided cable really does feel well made.
Out of the box the print head sits at the very top of the gantry. I am not a fan of moving it by hand, so seating the ribbon cable is a little finicky, but it is doable. Release the locking tabs by pushing them outward, then push the cable ribbon down until it clicks into place. Plug the cable into the motor at the top, which comes right off the braided ribbon, then plug in the cable for the screw guide motor at the bottom.
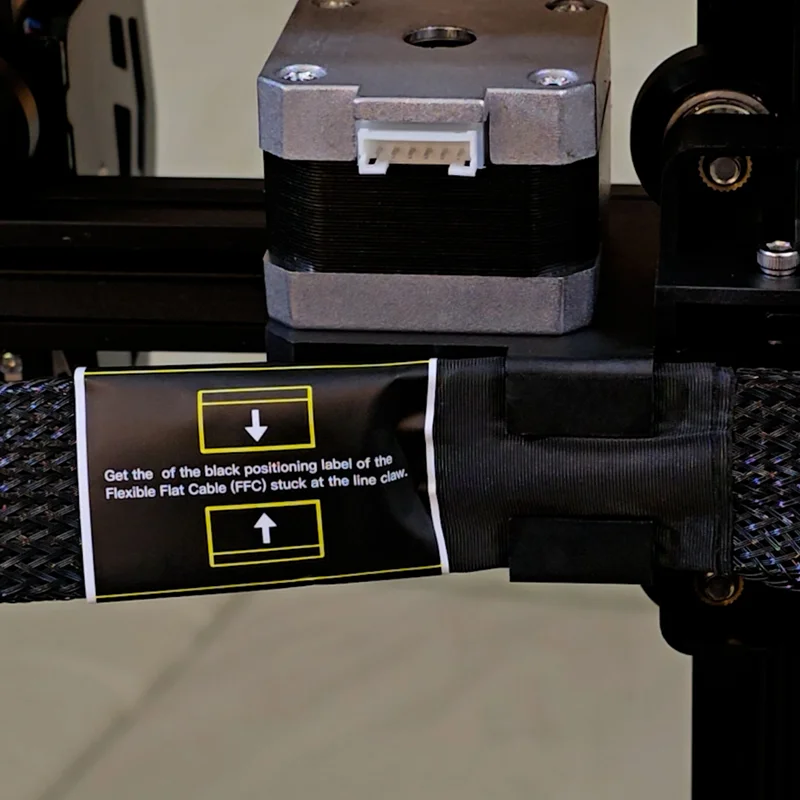
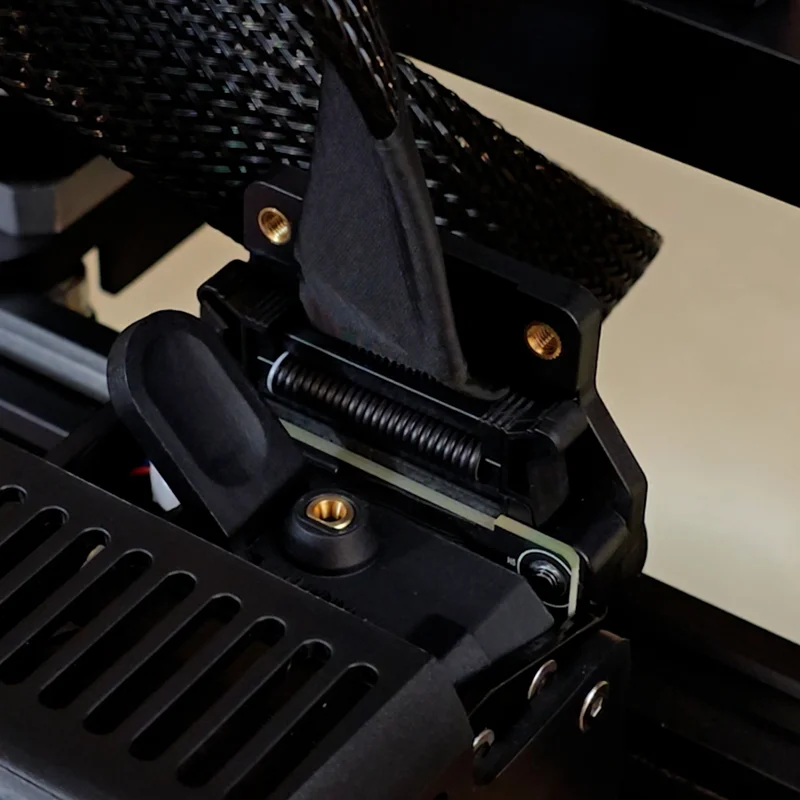
The control unit is removable, which makes plugging it in much easier before you pop it back into place. To load filament, there is a small tab that releases the clamp so you can slide the filament right in, then trim the end with the included cutter. It is pre angled at 45 degrees for convenience, though it still has no way to lock closed, which is mildly annoying.
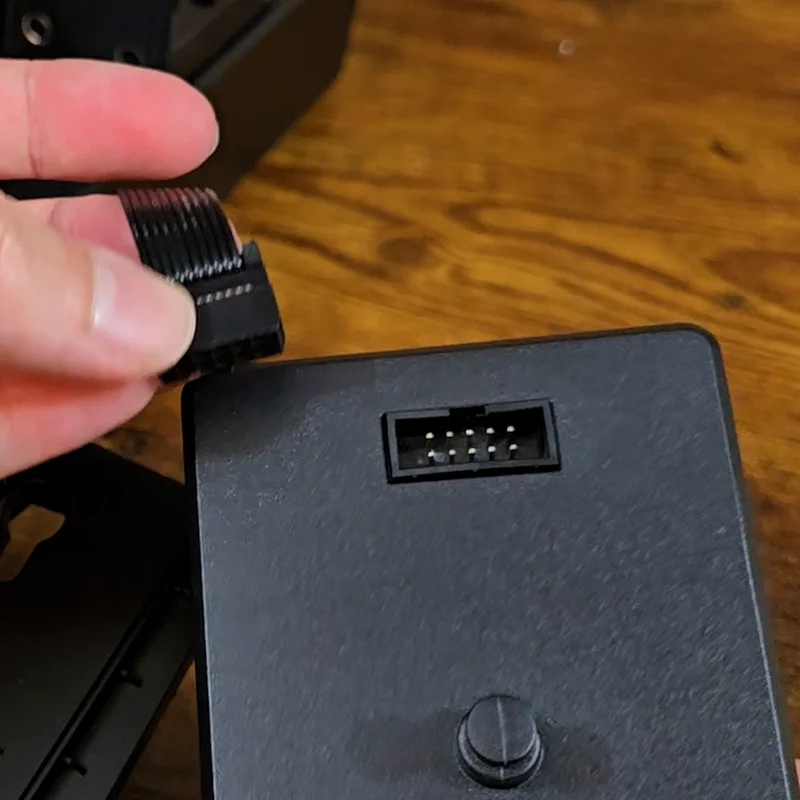
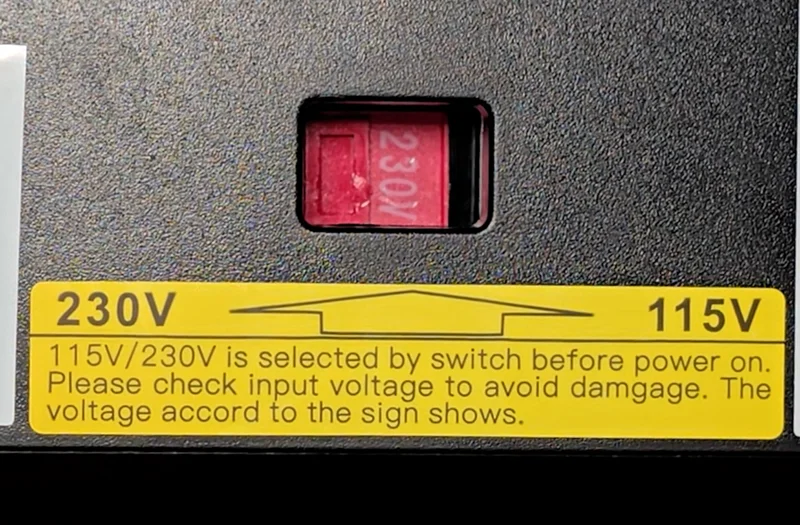
Check the voltage first. The power supply ships set to 240 volts, so if you live in the States, flip the switch to 115 before you power on, or the printer will power cycle every time it tries to heat up. This totally did not happen to me. I just happened to read about it afterward, for no reason at all. The switch is fiddly, so you will want a tool like an Allen key to reach in and push it over.
Auto leveling with the CR Touch
With everything assembled, you can power on, pick a language, and let it auto level. It takes a moment to warm up, but the process is genuinely cool to watch. The printer maps 16 sectors, or touch points, and gives you a readout flagging any that are out of spec. I was way too amused by the probe poking in and out as it worked. It is the little things.
That probe is the CR Touch sensor, which physically taps the bed to read its surface. It calculates the bed's tilt and irregularities, then dynamically adjusts the Z axis during printing to keep a consistent distance between the nozzle and the bed. I am curious how reliable it stays over time compared to the ultrasonic sensor on the MP10 mini, which I had to replace once.
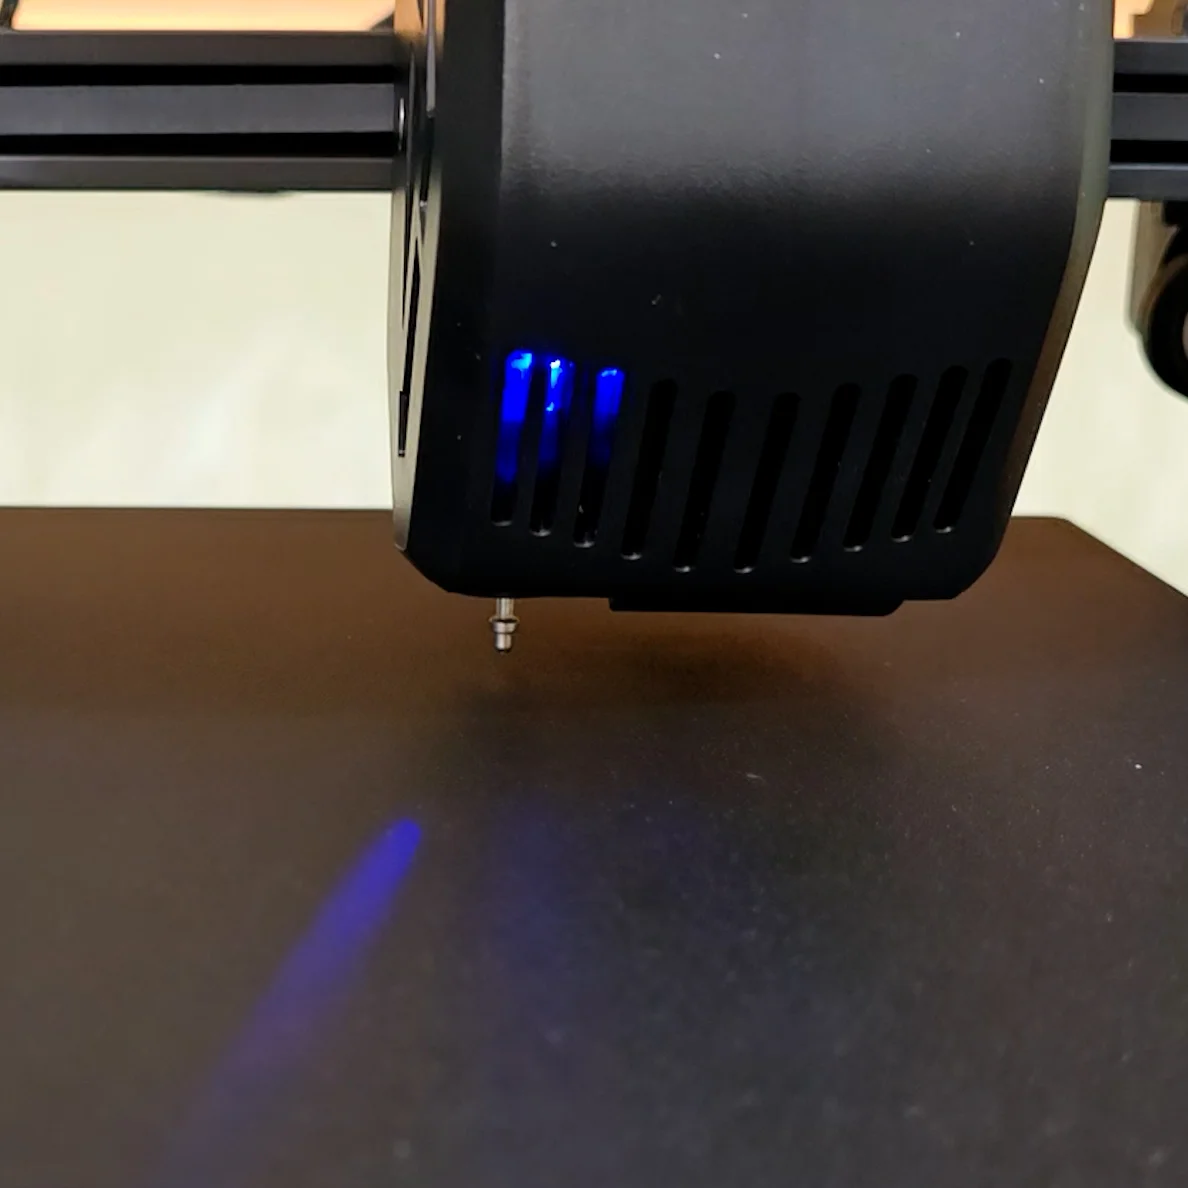
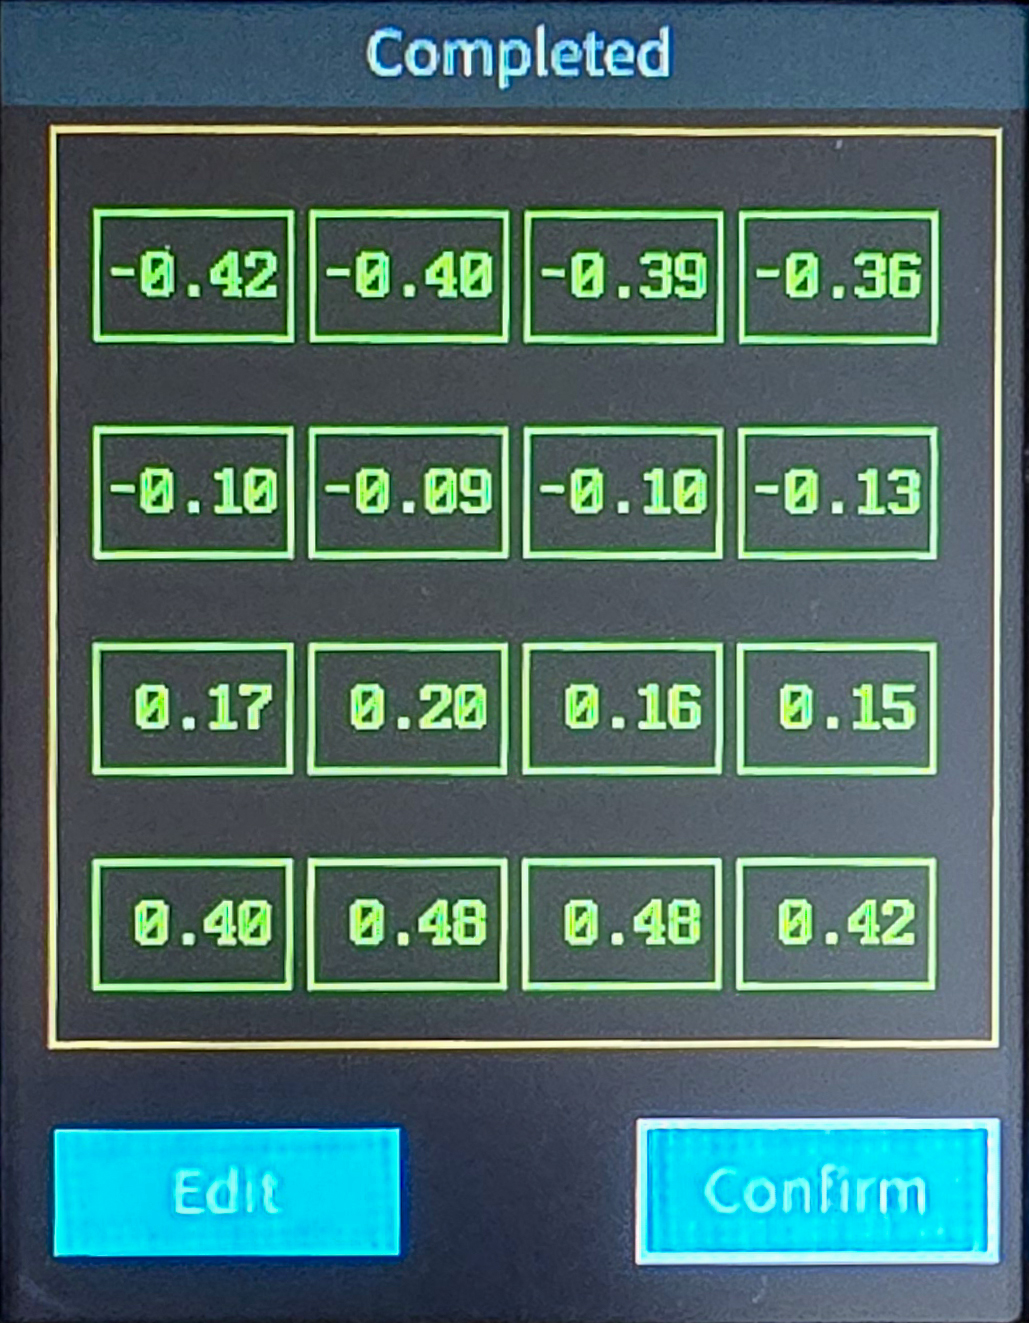
Once leveling finishes, you get the readout with all 16 touch points and their measurements. Mine came back all green, though you can still see the build surface tilts up slightly toward the front. Per the manual, blue boxes are slightly out of spec and red boxes are way out, though it is not clear how you would correct a red one. All green here, so it is good to go. The assembly really was easy. I expected more of a fight, and instead it was straightforward, and the whole machine feels solid. It looks good too, even if aesthetics should not drive a purchase like this.
Skip the micro SD slot. The control unit has a micro SD slot, but you cannot really use it: you have to remove the control unit to insert a card, and the card then scrapes against the base as you reseat the unit, so it is easy to damage one. Luckily the other side of the base has a spring loaded full size SD slot plus a USB C port to connect straight to a computer. The 8GB card that ships with the printer is preloaded with a setup video, the manual, a material guide, and a cat test model.
The first print off the bed
So what did I print first? Not the included cat, not a Benchy, not my Cubeception model. It was a replacement IKEA furniture screw I had needed for almost a year and never gotten around to. Even at low quality it turned out great, with no tweaked settings, just the default Cura profile and the printer's defaults.
It took under 20 minutes at 20% infill and a slower 180 mm/s, which is the default speed. For a low quality piece I love how it came out, and it threads perfectly into the furniture leg it belongs to. It is not flawless: you can see a Z seam running up one side. Cura 5.9 added a new Scarf Seam setting we can test later to soften that, but even as is, this screw drives right into the leg. For flat tops there is another Cura trick worth knowing: the ironing feature, which re-melts the top layer glass-smooth. I love that the printer just worked, no fuss, no fiddling. My other printers needed real coaxing before a first print, especially with bed leveling. None of that here.

Printing a Benchy
For anyone new to 3D printing, a Benchy is a small printed tugboat designed to test a printer's performance. It is packed with tricky features like overhangs, bridges, fine details, and smooth surfaces, which makes it the go-to benchmark for calibrating and showing off a machine. It also happens to look cute, so you do not have to toss it. Grab the standard, no frills model from the Benchy page on Thingiverse, open it in your slicer, I am using Ultimaker Cura 5.9 as of January 2025, and make sure your printer profile is active. The V3 SE was already in the print manager, which was handy. Slice it, save to the SD card, and print. It should take about an hour at default settings.
One thing that jumped out during the print was how much the spool wobbled, especially on quick accelerations. It was genuinely nerve wracking, and it went straight onto the fix it list.
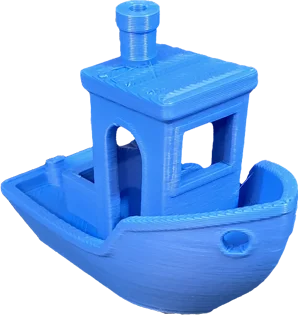
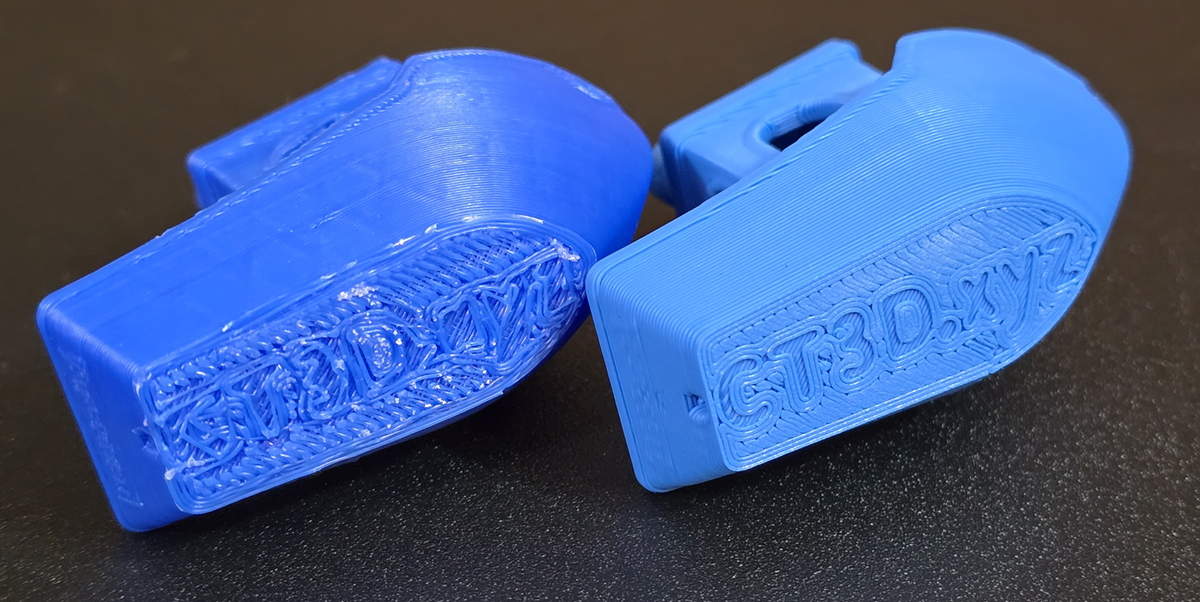
At exactly 48 minutes, done. Overall, not bad at all. This was low quality, a 0.28mm layer height, all defaults. The standout issue is that Z seam again, fairly pronounced. There is some light stringing inside the cabin, mostly near the bottom, which is curious. But there is no drooping on the front window overhang, the keyhole definition is nice, and layer to layer I do not see many issues. The text on the bottom is impeccable, clear as day. Not perfect, but a very good baseline. Next to the last Benchy I printed on the MP10 mini, it wins by a mile. That older Benchy used a different filament and looks like a hot mess by comparison. The Creality's definition is better in nearly every way, from the window and door frames to the chimney, everything looks smoother.
What shines, and what still needs work
After the first prints, here is where the Ender 3 V3 SE lands. Plenty to love out of the box, and a short punch list to work through.
The punch list still to fix
- Stock spool holder wobbles badly on fast moves
- Pronounced Z seam on the first Benchy
- Light stringing inside the Benchy cabin
- Fiddly 115V voltage switch
- Micro SD slot you cannot reach without pulling the screen
What shines out of the box
- Assembles in under an hour and feels rock solid
- Flawless first print with zero tuning
- CR Touch auto leveling came back all green
- Impeccable bottom text and clean overhangs
- A big step up from the MP10 mini at a budget price
Frequently asked questions
Is the Creality Ender 3 V3 SE good for beginners?
Yes. It assembles in under an hour with labeled screw bags and slide-in gantry slots, and its CR Touch sensor auto levels the bed for you. In this review it printed a usable part on the very first try with no tuning, which is exactly what a first-time user wants.
How fast is the Ender 3 V3 SE?
It tops out at 250 mm/s, roughly two and a half times the 100 mm/s of an older budget printer like the Monoprice MP10 mini. The default print profile is more conservative, around 180 mm/s, which trades a little speed for better quality.
How much does the Ender 3 V3 SE cost?
It sits firmly in the budget tier of 3D printers, and it drops even lower during promotions, which is when I grabbed mine. Because pricing changes often, check the current price on the live Amazon listing for the latest.
Does the Ender 3 V3 SE have auto bed leveling?
Yes. It uses Creality's CR Touch sensor, which physically taps 16 points across the bed, then adjusts the Z axis during printing to keep the nozzle a consistent distance from the surface. My first leveling pass came back all green.
Do you need to change the voltage on the Ender 3 V3 SE?
If you are in the United States, yes. The power supply ships set to 240 volts, so flip the switch to 115 before the first power on, or the printer will power cycle whenever it tries to heat up.
Why does the spool wobble on the Ender 3 V3 SE?
The stock top-mounted spool holder can sway on fast accelerations, which is common on this frame. A side-mounted spool holder or a set of vibration support rods largely fixes it.
The verdict after the first prints
So far this feels like a real upgrade from the MP10 mini, and I am genuinely happy with it. It needs a little work, but it is a great starting point, and a budget printer that is easy to recommend, especially if you catch a promo.
The punch list is short: tame that awful spool wobble, chase down the Z seam, and dial in retraction and extrusion to cut the light stringing inside the cabin. I have already gone after the wobble with a couple of mods, a side-mounted spool holder and a set of vibration support rods, if you want to follow along. I am excited to keep pushing this printer with new prints and mods, so let me know what you want to see next.