You bought the SSL certificate and updated your URLs, but some visitors still land on the insecure version. Here is how to force every visitor onto HTTPS, the one-click way and the manual way.
Editor's note (July 2026): Both methods below still work. One naming change is worth knowing: the plugin this guide recommends, Really Simple SSL, was renamed Really Simple Security and now bundles extra hardening, though its one-click SSL activation is unchanged and still free. Two more things have changed since 2017: the .htaccess rule works on Apache and LiteSpeed servers but not on Nginx, which needs a redirect in its own server block instead; and WordPress core has shipped a native HTTPS status and a one-click Update your site to use HTTPS button in Tools → Site Health since version 5.7, so many sites can migrate without any plugin at all.
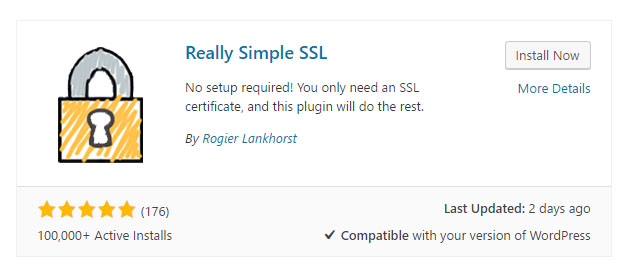
The internet defaults to HTTP, so an SSL certificate alone does not force the secure version on. You have to redirect. The fastest route is the free Really Simple SSL plugin: install it, activate it, and click Activate SSL!. Prefer no plugin? Drop one .htaccess rule at the top of the file and every request 301-redirects to HTTPS. Both do the same job.
An SSL certificate is a must if you want to show visitors that your site is trustworthy. So when you go through the trouble of getting one and updating your URLs to HTTPS, you want that padlock to show for everyone, not just the people who happen to type it in. The catch is that almost no one types https:// into the browser. Without it, your visitors and customers get pointed at the insecure version of your site, certificate or not.
The reason is simple: the protocols of the internet default to HTTP. If a request does not explicitly ask for the secure version, it gets served the plain one. So to make HTTPS universal you have to force the matter with a redirect. There are two clean ways to do that.
The quickest solution is a plugin. Install Really Simple SSL (now called Really Simple Security) from the WordPress plugin library, activate it, and press the single button labelled Activate SSL!. That is the whole process. The plugin detects your certificate, flips the site over to HTTPS, and sets up the 301 redirect so every visitor lands on the secure version from then on.
If you would rather not add a plugin, you can do exactly what it does with a few lines of code. This route needs access to your server and a little comfort with file management. Open your host's CPanel, go to the File Manager, and navigate to the public_html directory. Find the .htaccess file there. It is often hidden by default, so enable "show hidden files" if you do not see it, then add these rules at the very top of the file:
RewriteEngine on
RewriteCond %{HTTPS} !=on [NC] [OR]
RewriteCond %{SERVER_PORT} !443
RewriteRule ^(.*)$ https://%{HTTP_HOST}%{REQUEST_URI} [R=301,L]
That rule checks whether the request came in over a secure connection. If it did not, it rewrites the address to the https:// version of the same URL and returns a 301 permanent redirect, so browsers and search engines remember the secure address for next time.
Back up first. A mistake in .htaccess can take the whole site offline with a 500 error, so copy the file's current contents somewhere safe before you edit. This rule is for Apache and LiteSpeed hosting. If your host runs Nginx, the redirect belongs in the server block instead, so ask your host or use the plugin.
The plugin essentially automates what those manual .htaccess edits accomplish, so the end result is the same redirect either way. If you want the fastest, safest path and do not mind one more plugin, Really Simple SSL is the obvious pick, and it now doubles as a light security layer. If you prefer to keep your plugin list short and you are comfortable in the File Manager, the single .htaccess rule does the job with zero ongoing overhead.
Whichever you choose, finish the same way: clear your website cache and any caching-plugin cache, then open the site in a private or incognito window and confirm that typing the plain http:// address bounces you to https://. Testing in a fresh private window matters, because your normal browser may have already cached the secure version and hide a redirect that is not actually working for new visitors.
Because the internet defaults to HTTP. A certificate makes the secure version available, but it does not force it. Unless a visitor types https://, which almost no one does, they get the insecure version. You need a redirect to send every request to HTTPS.
Install the free Really Simple SSL plugin, now named Really Simple Security, activate it, and click the Activate SSL button. It detects your certificate and sets up the 301 redirect for you, with no code to write.
Add a redirect rule to the top of your .htaccess file in the public_html directory. The rule checks whether the connection is secure and, if not, rewrites the request to the https:// version with a 301 redirect. This works on Apache and LiteSpeed servers.
Not necessarily. Since WordPress 5.7 there is a native HTTPS status and a one-click "Update your site to use HTTPS" button under Tools then Site Health. For many sites that is enough, though a plugin or an .htaccess rule is still handy when you want a guaranteed redirect.
Two usual reasons: caching and your own browser. Clear your site cache and any caching-plugin cache after making the change, then test in a private or incognito window so an already-cached secure page does not mask a redirect that is not really firing for new visitors.
Getting the certificate is only half the job. Forcing the redirect is what actually shows the padlock to everyone who visits, no matter how they typed your address. Pick the plugin for a one-click setup or the .htaccess rule to stay plugin-free, clear your cache, verify it in a private window, and you are done.
Either path gives you the same result: a site that is HTTPS for all visitors, all the time. That is exactly the trust signal you paid for when you bought the certificate.
Disclosure: This post contains affiliate links. As an Amazon Associate I earn from qualifying purchases, at no extra cost to you. CK Tech Check is 100% ad-free: no banner ads, no ad tracking. Affiliate links like these and my YouTube channel are what keep the site running.