NVIDIA Canvas: turn rough doodles into photoreal landscapes
Canvas paints with materials instead of colours, and lets an AI model fill in what a mountain or a lake should actually look like. Here is the full workflow, from a first brush stroke to an exported image.
Prefer to watch this one?
There is no video for this tutorial, but I cover creative tools, GPUs and AI workflows on the channel. Subscribe to catch new tutorials the moment they go live.
The short version
NVIDIA Canvas is a free app that turns blocked-in shapes into convincing landscape images. You paint with materials, grass here, water there, mountains on the horizon, and the AI renders each region and blends the boundaries. You do not need to be able to draw. You do need an RTX card. Fair warning: it is genuinely hard to put down.
Free, still worth an afternoonIs Canvas still around? Yes
Editor's note, July 2026. I wrote this when Canvas 1.1 had just landed. NVIDIA still offers the app and it is now at version 1.4, still free and still carrying a beta label. The big addition since is Panorama mode, for generating 360 degree environments, which needs a little more memory than the standard mode. The workflow below has not meaningfully changed, so the tutorial still holds. Two details I have not re-verified on 1.4 are the export resolution and the fixed square canvas, both noted in the downsides near the end. Check those in the current build before planning around them.
Canvas turns doodled shapes into practically photorealistic landscapes using AI. Download it from NVIDIA Studio and follow along.
Finding your way around
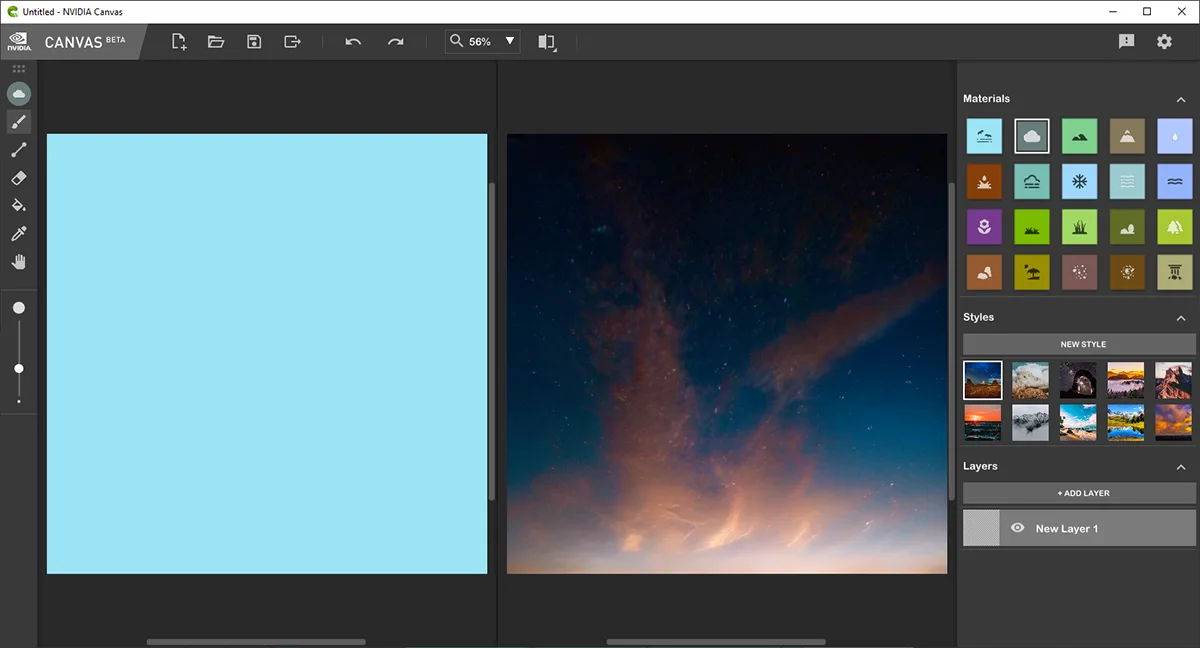
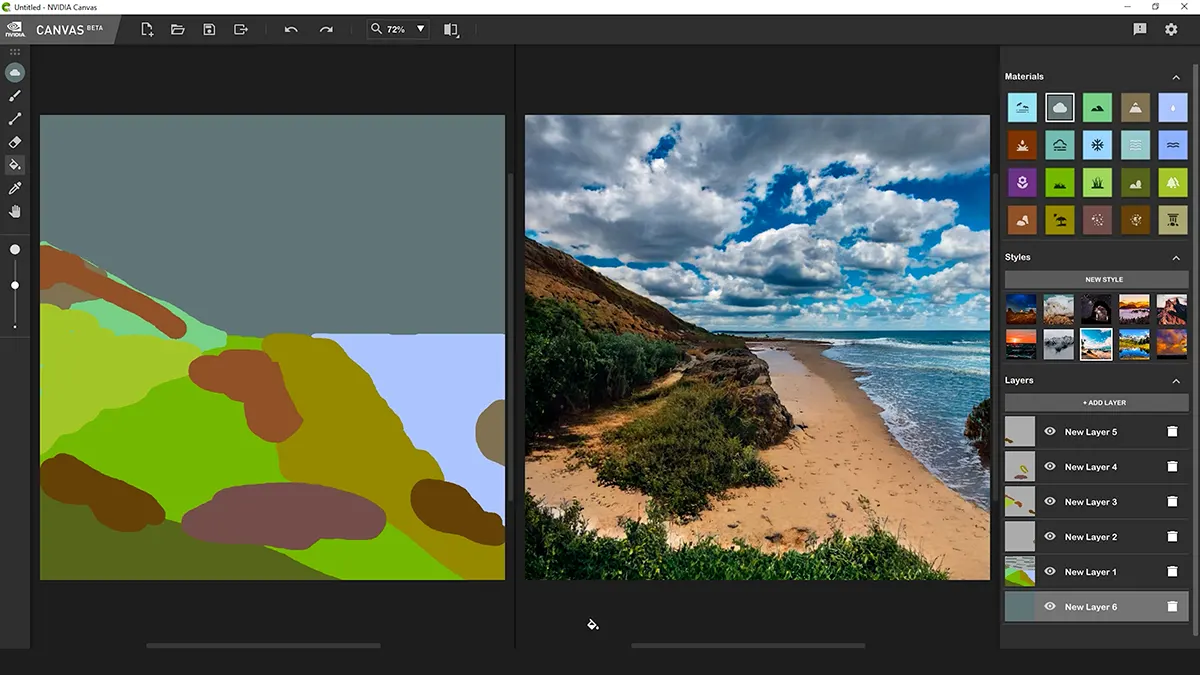
The first thing you notice on launch is the two side by side canvases. The left one is the Segmentation Map, and you will see in a moment why it is called that. The right one is the Output Image, where the finished result appears. You can actually draw in both.
The left toolbar holds the brush, eraser, line tool and size selection. Along the top are file options, undo, redo, navigation, and over on the right, feedback and settings. Most importantly, the right hand column holds the Material Palette, Styles and Layers, and we will work through each of those as we go.
How Canvas actually works
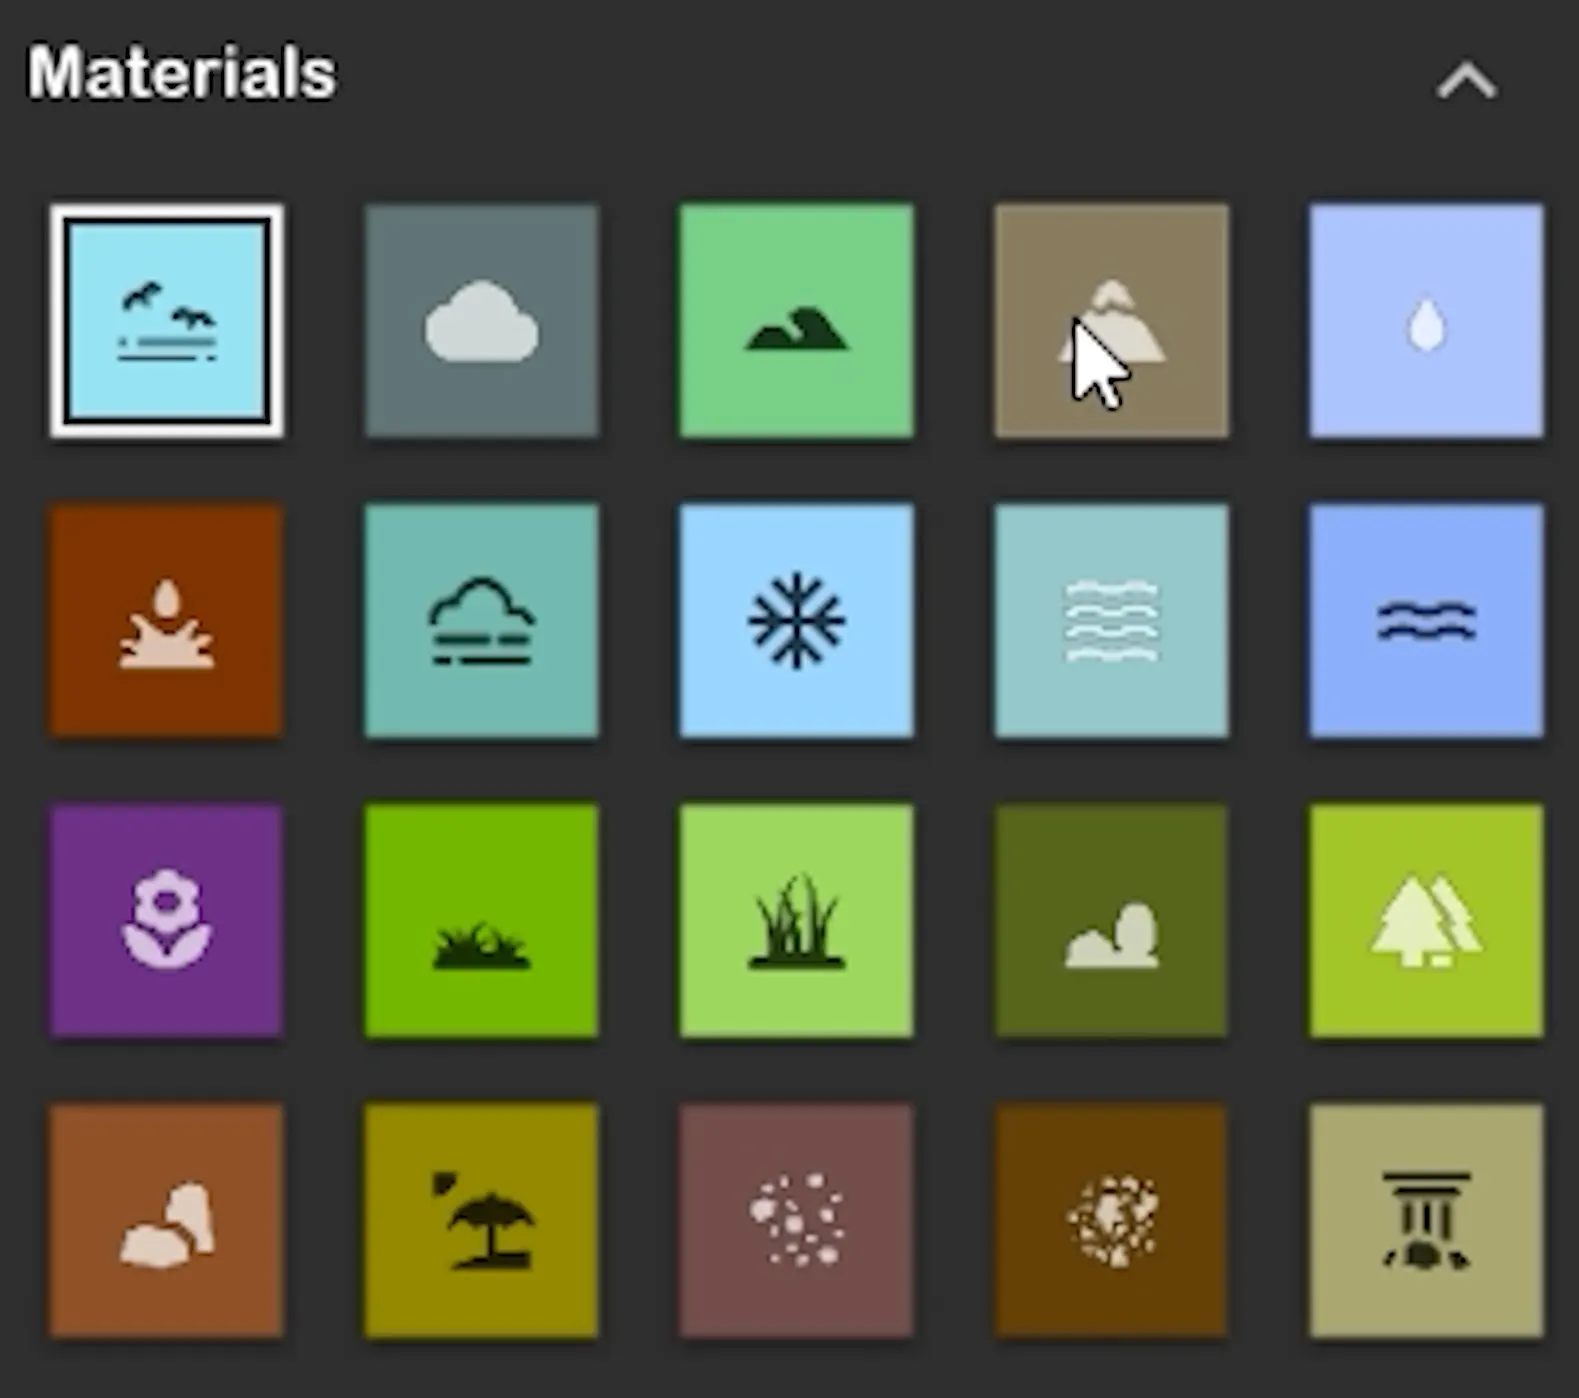
You choose what to paint from the Material Palette. There are twenty materials, running from sky and clouds through to water and grass. Conceptually you are not choosing a colour, you are choosing what an area is, and the program renders the appropriate texture. That is the segmentation part.
The clever bit is the boundaries. When you draw two materials next to each other they blend, but not in the way you are used to where two textures simply fade into one another. Canvas works out what the transition between, say, sand and water should look like, and renders that instead.
Building a landscape from scratch
Select the Brush tool, choose the grass material, and draw a line across the middle of the Segmentation Map. Worth pointing out that the canvas starts filled with the Sky material, which is why an image is already generating before you have done anything.
- Lay the ground. Switch to Fill and fill the bottom half with grass. You now have a meadow on a clear day.
- Add water. Back to the brush, choose the water material, and draw a triangle over the grass in one corner. The meadow now runs down to a lake.
- Raise a horizon. Draw another triangle overlapping the horizon using the Hill material.
- Fill a corner. Add a triangle of Bush material in the bottom corner.
- Make a beach. Draw along the waterline with Sand. Do not be afraid of wavy lines, they make it look more natural.
- Give the sky something to do. Add Cloud material across the sky. I usually start with rough lines, but do whatever you like, and change brush size whenever you want.
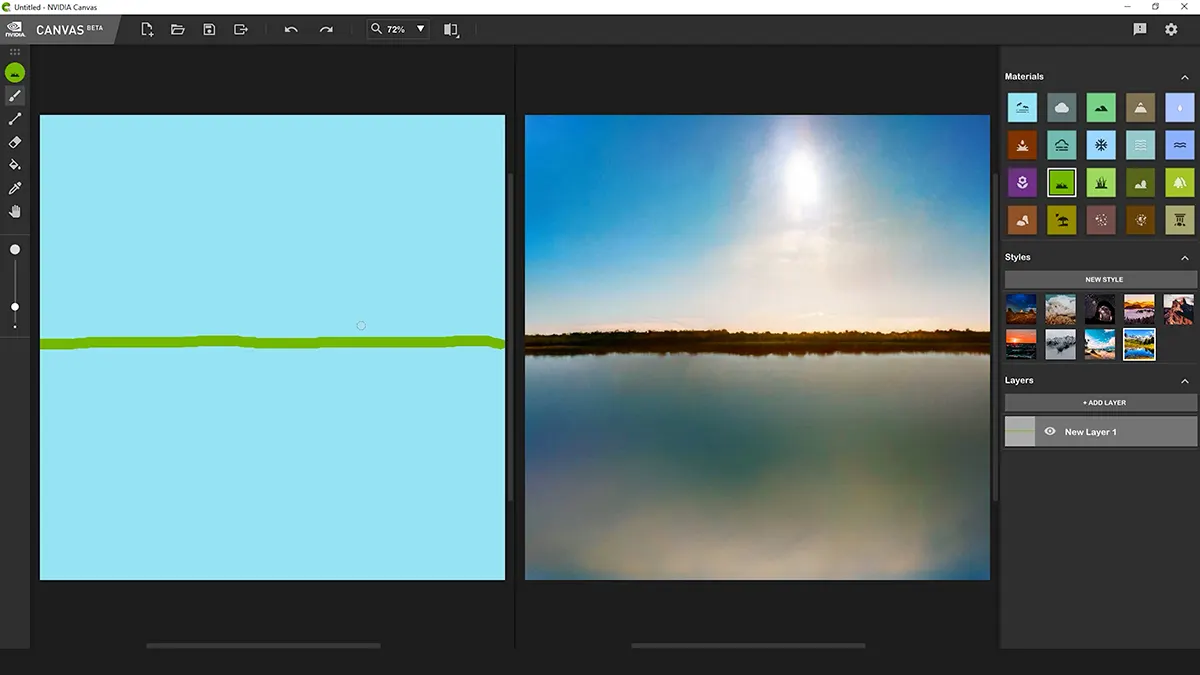
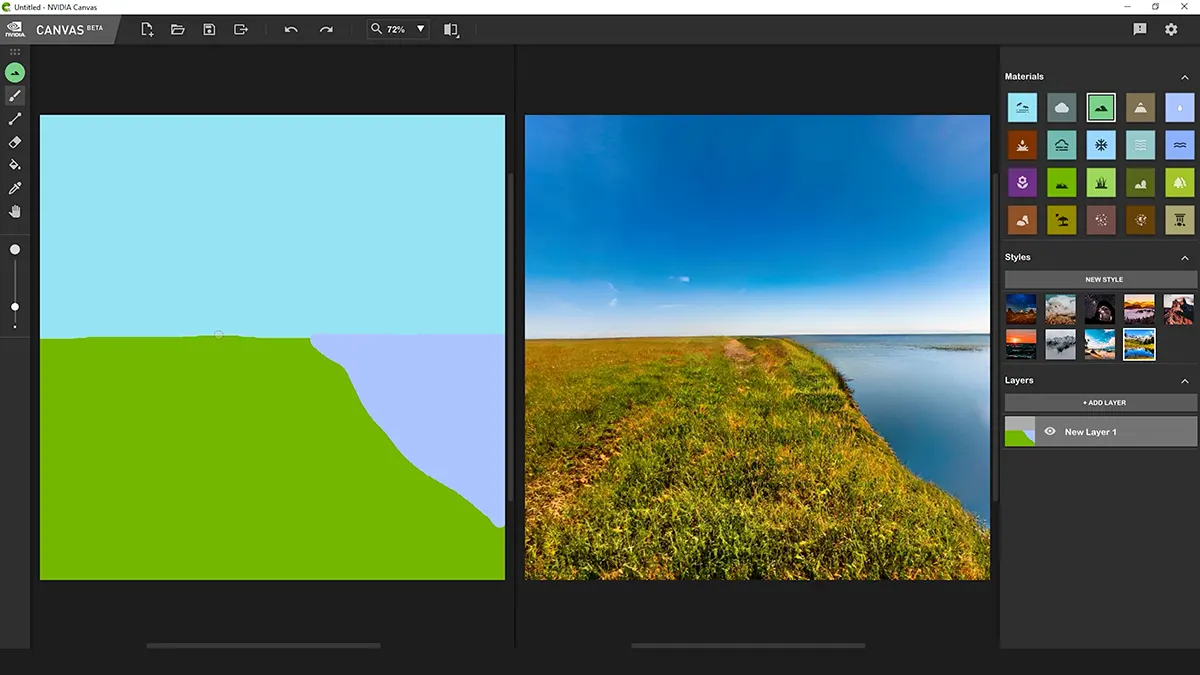
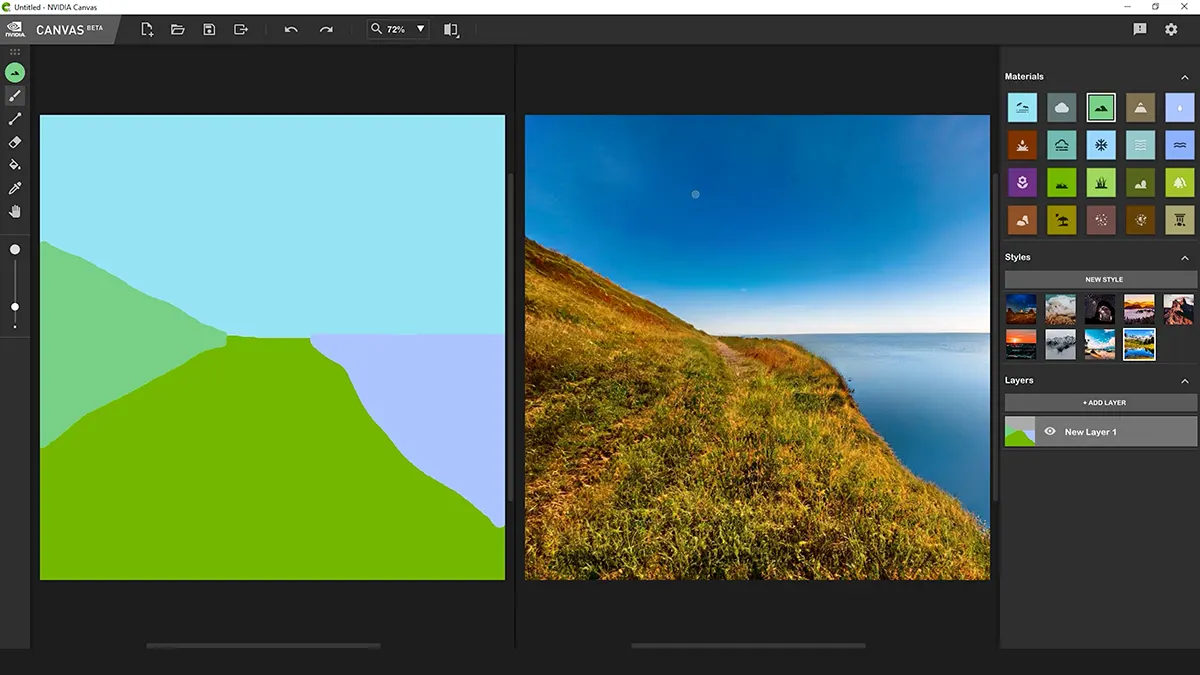
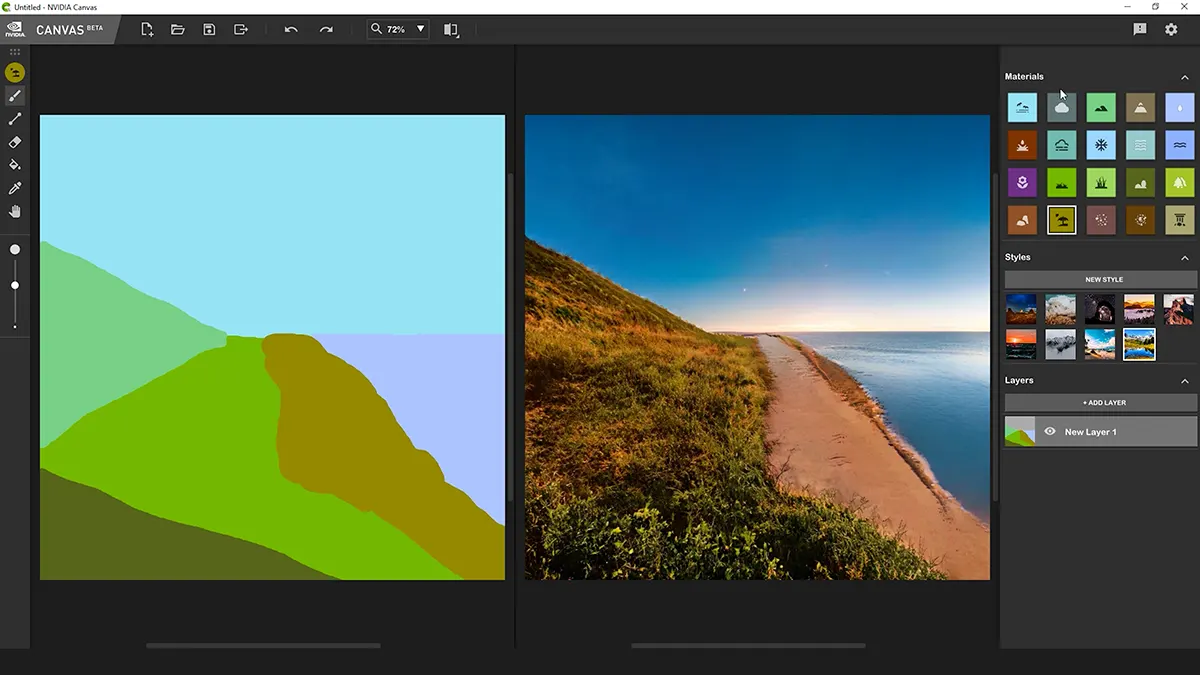
Look at that, it is practically done. You can of course keep going, and I find that adding more elements increases the realism as long as you place them the way nature would. Forest on the hills, some rock, a stream.
Styles, and uploading your own
With a decent base down, my advice is simply to play. Add mountains, rocks, a stream, and undo the last few actions whenever something does not land.
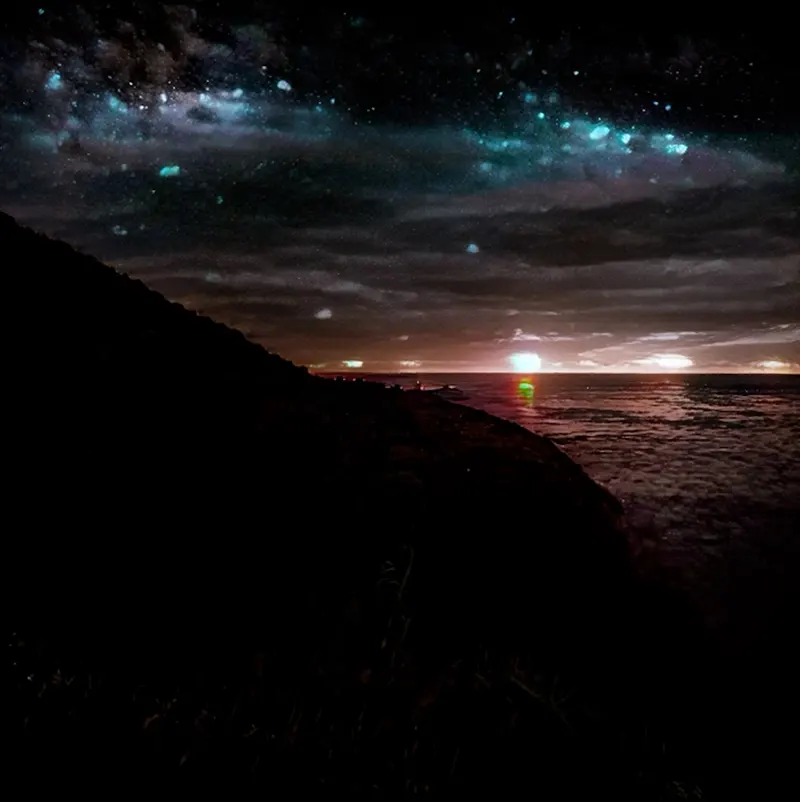
Now the Styles section. Each style carries its own colour profile, lighting and mood, applied automatically to the whole project. Want a night scene? Use the third style. Early morning? The first. There are plenty of defaults to work through.
The genuinely clever part is that you can upload your own image as a style. Canvas takes the colour palette and profile from that image and applies it to your scene, which gives you an enormous amount of creative latitude, because practically any photograph can become a style guide.
Layers and exporting your work
Layers let you split materials apart so you can hide or show parts of the scene and edit one element without disturbing the others. I have found that putting the cloud material on its own layer from the start makes it much easier to get the sky right later, even if everything else shares a single layer.
When you are happy, hit Export in the top toolbar. You get two options. PSD gives you the doodle and the final result as separate layers, which is what you want if the image is heading into Photoshop or Lightroom for a bit of extra polish. PNG is the one to share with friends. You can also save normally, which writes to NVIDIA's own Canvas file format.
Where Canvas falls short
A couple of limitations were worth knowing when I tested this, and both are worth re-checking on the current version since they are the sort of thing a point release tends to address.
Export size. Exports were capped at 1024 by 1024 pixels, which is a little small for my taste. Fine for the major social platforms, but do not expect much detail when you zoom in.
A square canvas. The canvas is square with no way to change the layout, so if you know you want a wide shot you have to compose with the knowledge that you will be cropping the result later.
It still helps to have an eye. The AI does a great deal of the work, but you still need some sense of perspective and composition to get a decent image. That said, once you start playing it becomes close to child's play to turn out impressive results and slightly alarm yourself. Speaking of which, if you have kids, nieces or nephews who like drawing landscapes, this is a wonderful way to take their imagination somewhere new. Best keep the AI overlord conversation for another day.
Frequently Asked Questions
Is NVIDIA Canvas still available?
Yes. NVIDIA still offers Canvas as a free download from its Studio site, now at version 1.4 and still labelled beta. It has not been discontinued.
What do you need to run NVIDIA Canvas?
An NVIDIA RTX graphics card, driver version 522.06 or later, and Windows 10. Standard mode wants 4GB of RAM and the newer Panorama mode wants 6GB.
Is NVIDIA Canvas free?
Yes, it is a free download. The only real cost is the hardware requirement, since it will not run without an RTX card.
Do you need to be able to draw to use NVIDIA Canvas?
No. You block in rough shapes and tell the app what each region is, and it renders the detail. A basic sense of perspective and composition helps, but drawing skill is not required.
What file formats can NVIDIA Canvas export?
PSD and PNG. The PSD keeps your segmentation doodle and the generated result on separate layers, which is useful if you are taking the image into Photoshop afterwards.
Just go and play with it
My honest suggestion is to try it yourself and have some fun. Be warned that you will get pulled in quickly. I lost at least four hours to it the day I installed it and came out the other side with dozens of designs.
Years on, it remains one of the more approachable pieces of AI tooling around, precisely because it does not ask you to describe anything. You paint where things go, and it handles the rest. Once you have a finished landscape out of it, Magnific AI is what I reach for to upscale it and add the extra detail.
Disclosure: This post contains affiliate links. As an Amazon Associate I earn from qualifying purchases, at no extra cost to you. Affiliate links like these and my YouTube channel are what keep the site running.