A quick side project. To film a print without shaky footage, the camera has to move with the bed. So I designed a mount that snaps into a hidden channel under the print plate.
Editor's note (July 2026): A short one from my 2017 journey on the now-discontinued Maker Select V2. The mount is specific to this printer's bed, but the design approach (find a feature to grip, iterate for clearance and stability) applies to any custom mount. I shared the finished model on Thingiverse and Trimble's 3D Warehouse. If you are starting fresh, see the current-printer link at the end.
To get smooth footage of a print, the camera needs to move with the bed, not sit still while the bed slides around. Sticking a camera to the print surface is a bad idea (the heat wrecks adhesive), so I designed a mount that clips into a smooth channel on the underside of the bed plate. It holds a GoPro steady, rides along for the whole print, and pops off when you need the bed clear.
Move the camera with the bed, not against it.After the big Z-brace upgrade in episode 4, here is a quick side project. I had wanted to record my prints since day one, because watching an object grow from nothing over a couple of hours never gets old. The trouble is that both the bed and the extruder are moving the whole time, so a fixed camera makes for terrible footage. The camera really needs to travel with the print bed.
The obvious approaches all failed. Sticking a camera to the print surface wastes precious build space and means peeling it off every time you calibrate, and with the bed hitting 60 degrees Celsius any adhesive turns into a gummy mess. My first try, a metal bracket clamped to the corner set screws, gave wobbly footage, was a pain to remove, and actually loosened the set screws mid-print. Time for a proper design.
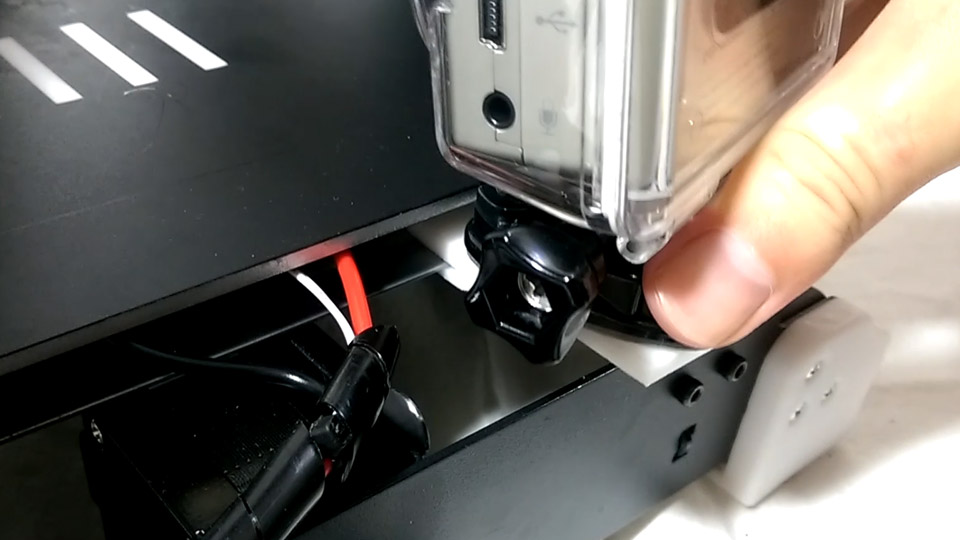
The inspiration came from a simple camera-arm design by the YouTube creator Purkkaviritys, which slides onto a print bed. Adapting it, I spotted something handy on the Maker Select: the bottom plate of the print bed has a smooth round channel running all the way around, about 1.5cm (0.6 inches) in from the edge, probably there for rigidity. Perfect to grip.
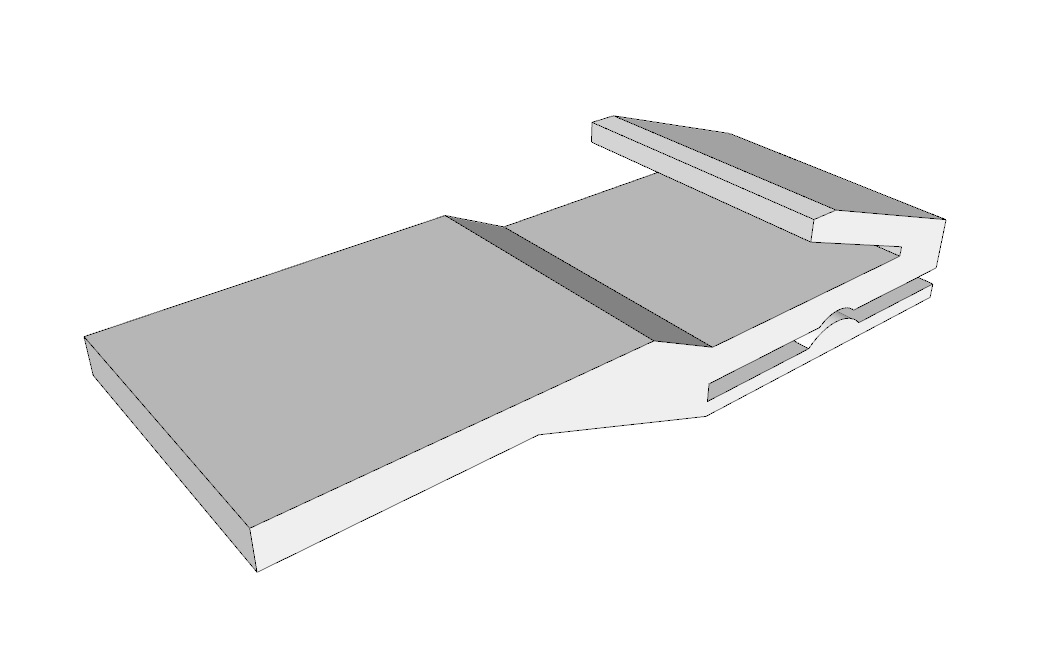
That channel became the anchor for what I named the Monoprice Maker Select V2 Camera Mount System, or MMSV2-CMS. Instead of relying on adhesive, it snaps into the groove. A few design passes sorted out the clearance between the bed and its support, widened the base for stability, and added an arm that wedges between the two plates to hold everything firm. The final mount is 80.7mm long, 16.7mm tall, and 31mm wide, and prints in about two hours. A stock GoPro mount attaches to it with a bit of 3M double-sided tape, angled slightly inward toward the print.
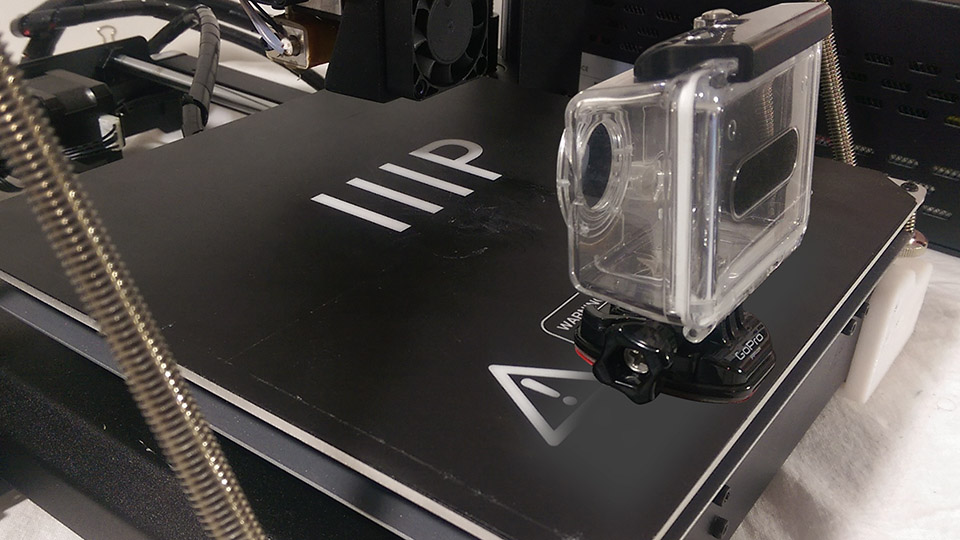
Clipped in, the mount felt genuinely sturdy and resisted sideways movement, so even at high-speed playback the vibration was barely noticeable. The one hiccup: the arm warped a little from the bed heat, though not enough to matter. I later found that a strip of aluminum foil on top of the arm reflects enough heat to stop the warping entirely. I uploaded the finished design to Thingiverse and 3D Warehouse so anyone can grab it and tweak it for their own setup.
Mount the camera so it moves with the print bed rather than staying fixed while the bed slides around. A mount that clips to the bed keeps the camera and the print in a constant relationship, which is what makes time-lapse footage look smooth.
The bed heats to around 60 degrees Celsius, which turns most adhesives into a mess. It also wastes build space and has to come off for every calibration. A clip-on mount that grips a frame feature avoids all three problems.
Look for an existing feature to grip. On the Maker Select the bed's underside has a smooth channel running around it, so I designed the mount to snap into that groove, then iterated for clearance and stability instead of relying on glue or screws.
Heat from the bed can soften and warp a printed part that sits close to it. A simple fix is a strip of aluminum foil on the exposed surface to reflect the heat, or print the part in a more heat-resistant material like ABS.
I uploaded the MMSV2-CMS design to Thingiverse and Trimble's 3D Warehouse, so you can download it free and modify it for your own camera or printer. It is shaped specifically for the Maker Select V2 bed channel.
This was a fun little detour that solved a real annoyance, and it is a good example of design-thinking on a printer: rather than fighting the moving bed, I used one of its own features to hold the camera. The footage from every print since has been all the better for it.
Back to upgrades next. Episode 5 tackles part cooling with the DiiiCooler mod, and it made the biggest single jump in print quality yet.
Disclosure: This post contains affiliate links. As an Amazon Associate I earn from qualifying purchases, at no extra cost to you. CK Tech Check is 100% ad-free: no banner ads, no ad tracking. Affiliate links like these and my YouTube channel are what keep the site running.