Time to benchmark and upgrade. Episode four prints the famous 3DBenchy to measure quality, then installs a Z-axis brace to kill the gantry wobble that was hurting tall prints.

Editor's note (July 2026): Part of my 2017 3D-printing journey on the now-discontinued Maker Select V2. The 3DBenchy is still the universal calibration print, and gantry braces are still a common upgrade for open-frame printers of this style. Modern machines are far more rigid out of the box, though. If you are starting today, see the current-printer link at the end.
Before modding a printer, print a 3DBenchy so you can measure any improvement. Mine showed the printer's weakness: the tall gantry wobbles when the bed and head move fast, which softens detail on tall prints. The fix is a Z-axis brace: printed mounts and two threaded rods that triangulate the gantry to the base. It is a long print and a fiddly install, but the after Benchy came out visibly cleaner.
Benchmark first. Then brace the gantry.With my first custom parts printed in episode 3, it was time to start upgrading the machine itself. But you cannot tell if a mod helped without a before and after, so first I printed a benchmark. The 3DBenchy, a little tugboat, is the most popular calibration print there is, deliberately full of tricky geometry (overhangs, bridges, fine text, smooth curves) that exposes any weakness in your setup. Grab it from 3dbenchy.com or Thingiverse and print it at normal quality, 20% infill, no supports. Mine took about two hours.
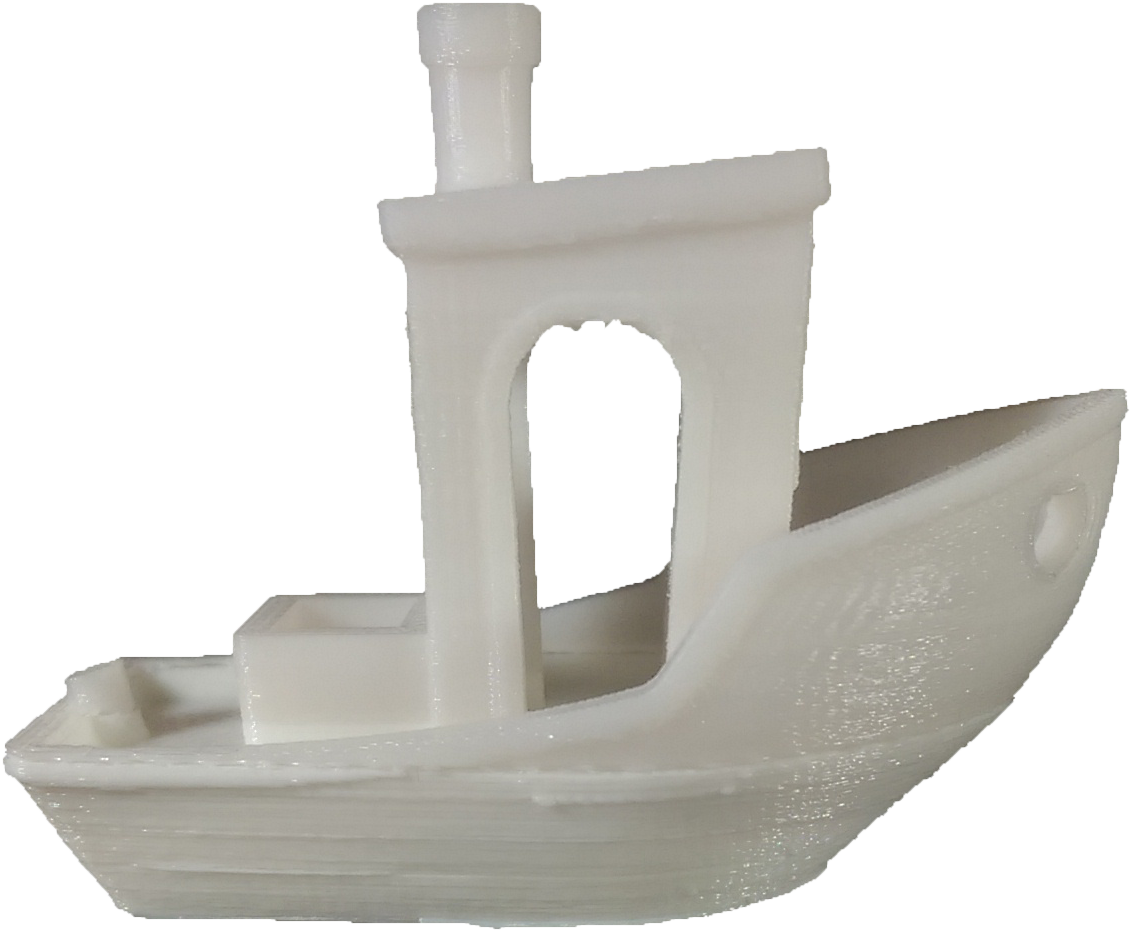
A happy accident made my first Benchy extra informative: I ran out of generic PLA partway up and switched to Worksteel high-precision PLA, leaving a visible quality line across the hull. The generic filament showed artifacts and stringing; the Worksteel section printed clean deck lips with no stringing in the cockpit. Only the bridges over the doorway and windows stayed a little rough. A good reminder that filament quality matters as much as the machine.
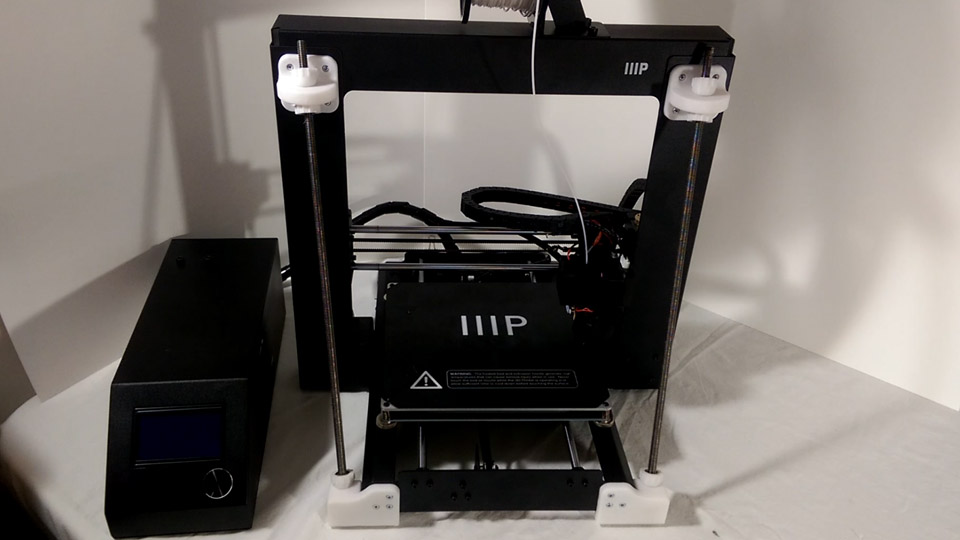
Watch this printer work and you notice the tall gantry visibly sways when the bed and extruder change direction quickly, and it gets worse with a full, heavy spool sitting up top. That wobble blurs detail, especially on anything tall. The classic fix is a Z-axis brace: a diagonal support running from the top of the gantry down to the base, which triangulates the frame and stops it rocking.
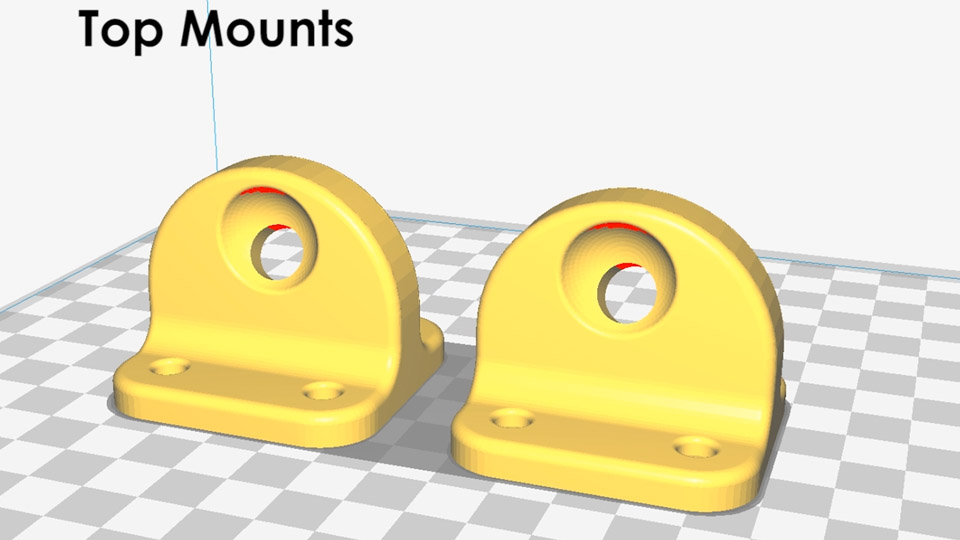
All the printed parts come as a single Thingiverse package, seven pieces in all (top mounts, bottom mounts for the fasteners, back feet, and the ridged thumb-fasteners the design calls BallsMk2). They are honestly over-engineered, taking around 16 hours and 44 meters of filament to print at normal quality and 20% infill. Worth it for a permanent stability upgrade.
Cleanup is minimal: snap the support pillars out of the thumb-fasteners with a small screwdriver or pliers, and lightly file the screw holes on the bottom brackets with a round needle file. Then gather the hardware:
Threaded rod usually comes in 3-foot lengths, so one rod cut in two does the job; most hardware stores will cut it for you, or an angle grinder makes a cleaner cut than a hacksaw. A pre-cut hardware kit was also sold by 3D-printing stores if you would rather not source it all yourself.
Straight away the gantry feels far more solid to the touch. For a fair comparison I printed a second Benchy from a single roll of filament, so there were no mid-print material changes to muddy the result. It came out cleaner than the first: a slightly smoother roof, sharper deck-lip definition, with the top arcs and bridges roughly the same. This is one of the most worthwhile upgrades you can make to a printer of this class.
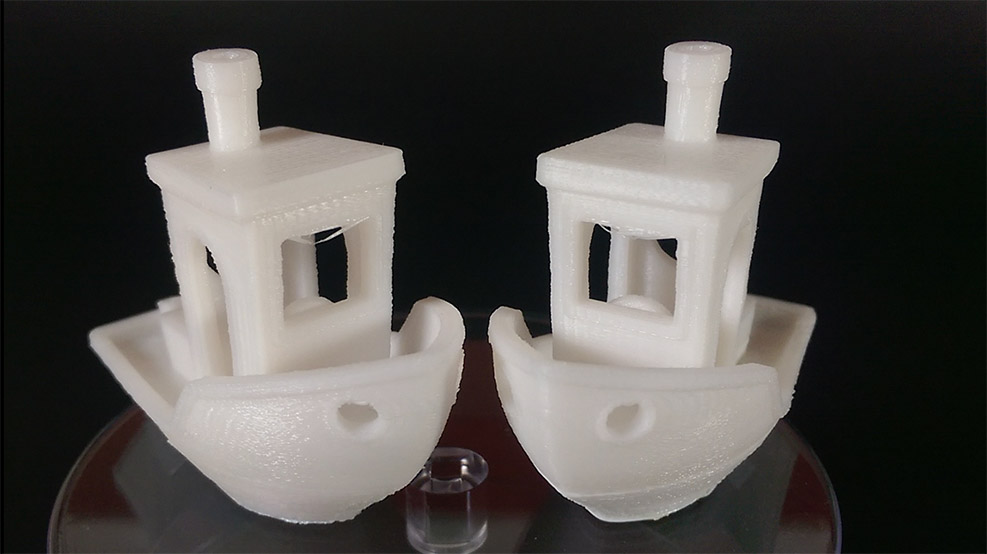
The 3DBenchy is a small tugboat model designed as a calibration print. It packs in overhangs, bridges, fine text, and smooth curves, so how well it prints tells you a lot about your printer's tuning. It is the standard before-and-after test when you change something.
It adds a diagonal support from the top of the gantry down to the base, triangulating the frame so it stops swaying when the bed and head move quickly. Less wobble means sharper detail, especially on tall prints.
Yes. On one Benchy I switched brands mid-print and the difference was obvious: the cheaper generic PLA left artifacts and stringing, while a higher-precision PLA printed clean deck lips with none. A good machine still benefits from good filament.
About 16 hours for all the parts, using roughly 44 meters of filament at normal quality and 20% infill. The pieces are over-engineered, but that is fine for a permanent structural upgrade you print once.
Two 410mm lengths of 8mm threaded rod, twenty M3 x 10mm screws, six 8mm nuts, two 8mm locking nuts, and some rubber or felt pads. Threaded rod comes in 3-foot lengths, so one rod cut in half is enough.
Two lessons this episode. Always benchmark before and after a change so you actually know it helped, and a Z-brace is one of the highest-value upgrades for a wobbly open-frame printer. Between better filament and a stiffer frame, my prints took a clear step up.
Next, a quick side project I had wanted to do since day one: filming the printer at work without shaky footage. Episode 4.5 designs a camera mount that rides along with the bed.
Disclosure: This post contains affiliate links. As an Amazon Associate I earn from qualifying purchases, at no extra cost to you. CK Tech Check is 100% ad-free: no banner ads, no ad tracking. Affiliate links like these and my YouTube channel are what keep the site running.