Printing other people's models is fun for about a day. Episode two is where I start making my own: designing a test piece, exporting an STL, and slicing it into G-code with Cura.
Editor's note (July 2026): Two things have changed since 2017. First, the Maker Select V2 is long discontinued (see the modern-printer link at the end). Second, I no longer model in SketchUp: the free SketchUp Make desktop app is gone, and the web-only free version cannot install extensions. I switched to Blender, which is far more powerful and exports STL out of the box. The Cura slicing workflow below still applies to any STL, and Cura is now on version 5. I have left the SketchUp steps as they were, for the record.
To print your own designs you need two tools: a CAD program to make the model and a slicer to turn it into printer instructions. Back then I modeled in SketchUp (with an add-on for STL export) and sliced with Cura, which converts the STL into the G-code the printer reads. Pick the Prusa i3 profile, import your STL, set scale and infill, save the G-code to an SD card, and print. These days I model in Blender, but the slicer half is unchanged.
Model to STL, STL to G-code, G-code to print.With the printer assembled and its first prints done in episode 1, the next step was making my own designs. The Maker Select has no proprietary design software, which is the point. Any CAD program that can save to a format the printer's toolchain reads will work; in practice that means exporting an STL. I have used Google SketchUp since it launched around 2000, building spaceships, floor plans, satellites, and furniture, so 3D printing finally let those models come to life.
An important update if you are following along today: the free SketchUp Make desktop app is no longer offered, and the web-only free version cannot install the extension you need for STL export. That is a big reason I moved to Blender, which is immensely more powerful and exports STL with no add-on at all. If you are choosing a modeling tool now, start there. The rest of this episode, the slicing side, applies no matter what you model in.
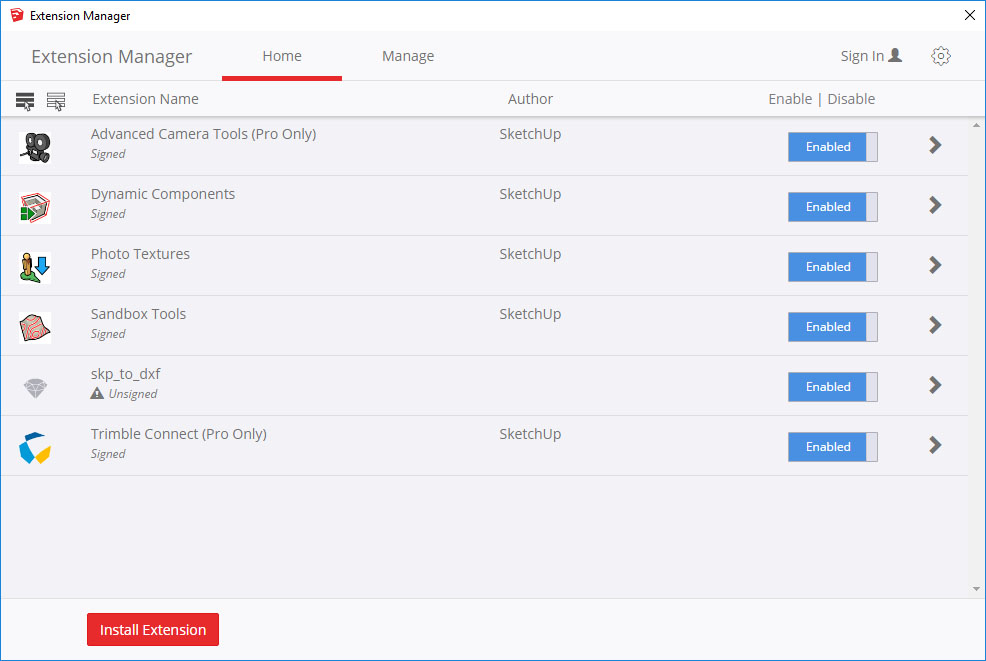
SketchUp's free version cannot export STL on its own, but the community fills the gap with a free extension. Download its RBZ file, then in SketchUp go to Window → Extension Manager, click Install Extension, pick the downloaded file, and accept the warning about it being unsigned. That adds an STL export option to the menus.
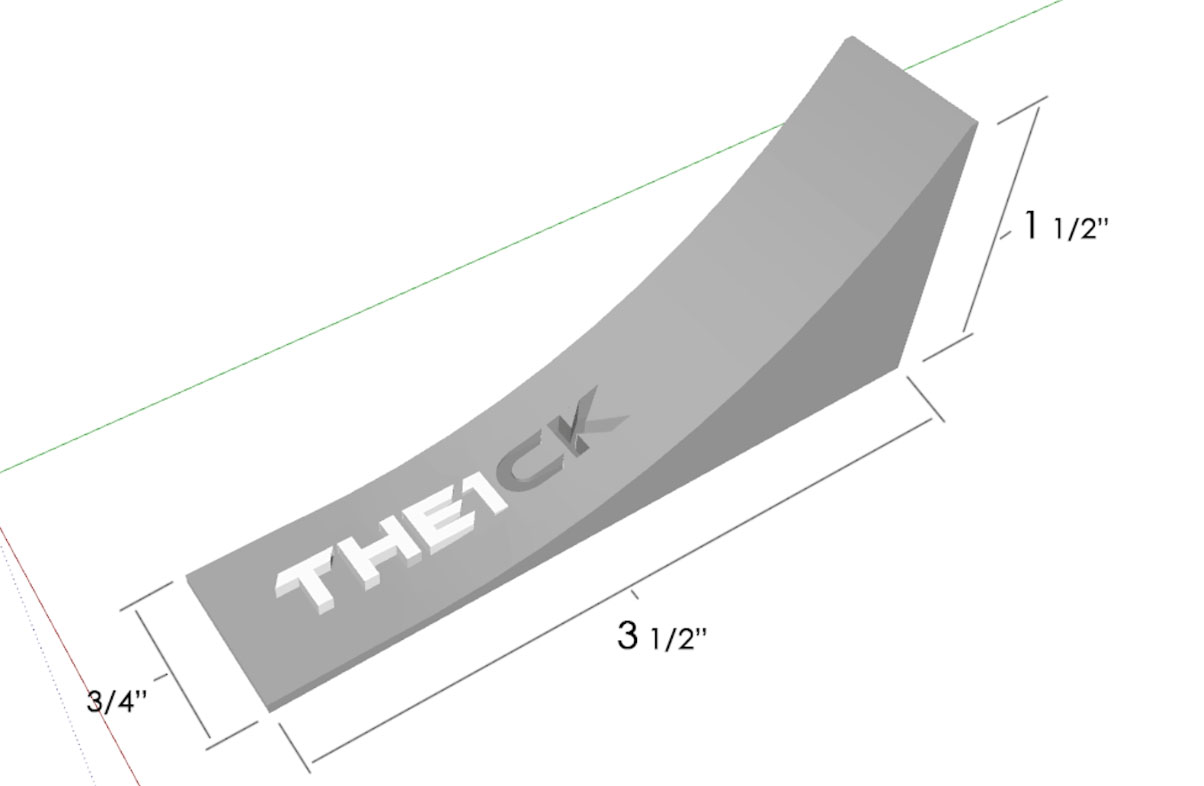
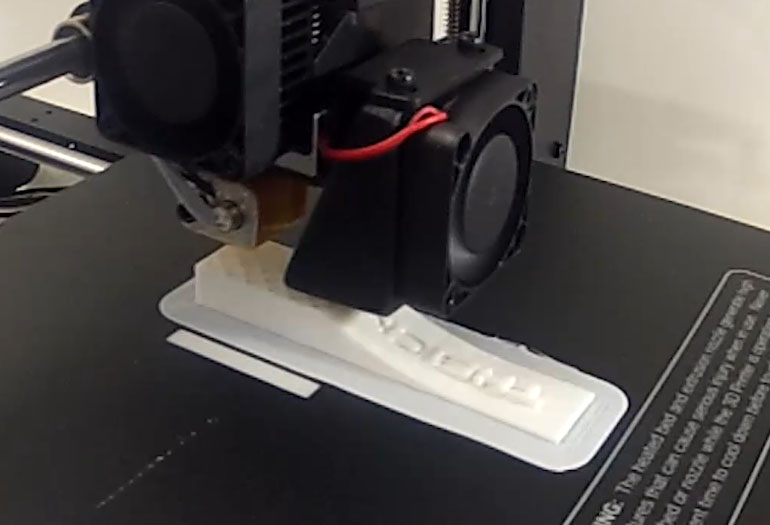
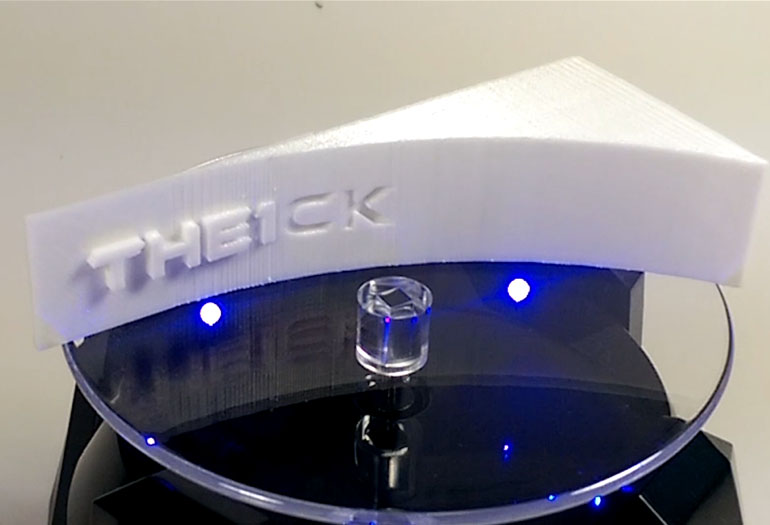
To see what the printer could do, I designed a test piece with a large swooping curve and a mix of raised and recessed lettering, the kind of detail that casts a nice shadow under angled light. It came out 0.75 inches wide, 3.5 long, and 1.5 tall. Modeling in inches was an oversight that came back to mildly annoy me at the slicing stage, as you will see.
The export itself is quick: save the native SKP file first, then use the extension's export option, select the whole model, choose inches (or better, millimeters), pick STL from the dropdown, and save.
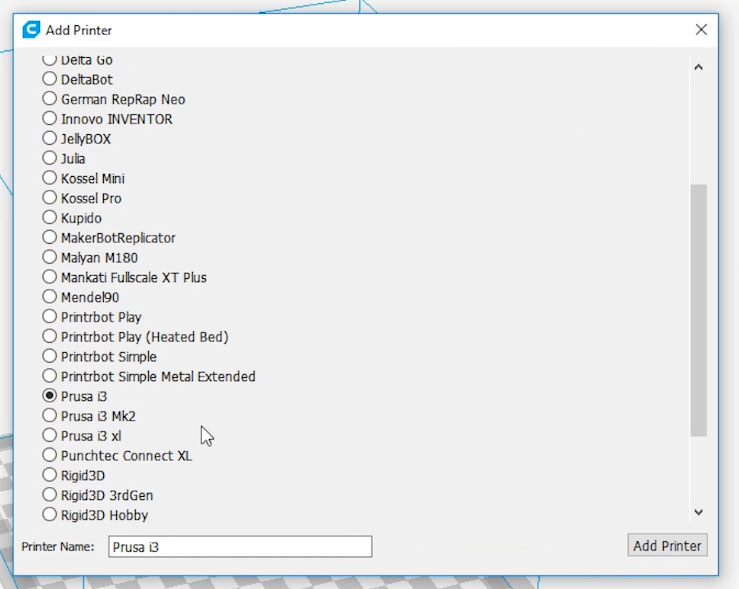
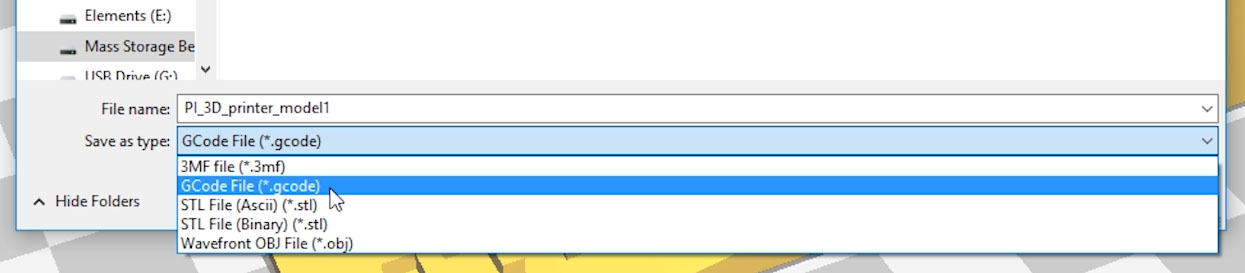
An STL only describes the model's surfaces; the printer needs G-code, the layer-by-layer instructions. Cura is the free program that makes the conversion, recommended by Monoprice and available from Ultimaker. On first launch, choose the Prusa i3 as your printer, since the Maker Select is based on it and shares the same nozzle width, bed size, temperatures, and speeds.
Import the STL with the Open File icon. This is where my inches mistake bit: the model came in at 0.75mm, nearly invisible, so I scaled it up to 19.05mm (the real 0.75 inches) and centered it on the plate. Cura then estimates the job: with default settings mine showed about 1.5 hours and 3.5 meters of filament, though solid infill would have pushed it to roughly 4 hours and almost 8 meters. When it looks right, save the G-code to a file with a name you will recognize, and copy it to the SD card.
Preheat, load the SD card, pick the file, and watch. I honestly was not sure whether bouncing between two CAD ideas and three file formats would cause a problem, but it printed fine. Two small lessons showed up in the result. The shallow gradient of the curve printed with a visible stair-step pattern, which sanded out nicely. And the recessed letter K came out shallower than I modeled it, whether that was something to fix in the model or just the limit of this printer's detail, I could not say for sure.
Two things: a CAD program to make the model and export an STL, and a slicer to turn that STL into G-code the printer reads. Here that was SketchUp for modeling and Cura for slicing, though I now model in Blender.
Not on its own in the free version. You install a community STL export extension through Window then Extension Manager. The free desktop SketchUp is also gone now, so many people use Blender instead, which exports STL with no add-on.
A slicer converts your STL model into G-code, the layer-by-layer instructions the printer follows. You set things like scale, infill, and quality, and Cura estimates print time and filament use before you export.
Choose the Prusa i3. The Maker Select V2 is based on it and shares the same nozzle width, bed size, temperatures, and speeds, so the profile works without changes.
Usually a units mismatch. I modeled in inches, so a 0.75 inch part came into Cura as 0.75mm and was nearly invisible. Scale it to the right size, 19.05mm for 0.75 inches, or model in millimeters from the start to avoid it.
That is the whole pipeline: design, export an STL, slice it to G-code, print. Two different programs and a couple of file formats sound fiddly, but once you have done it once it is second nature. And there is nothing quite like holding a thing you drew on a screen an hour earlier.
Next I push the printer's detail to its limits with a genuinely tiny part. Episode 3 is all about printing keyboard keycaps and wrangling support structures.
Disclosure: This post contains affiliate links. As an Amazon Associate I earn from qualifying purchases, at no extra cost to you. CK Tech Check is 100% ad-free: no banner ads, no ad tracking. Affiliate links like these and my YouTube channel are what keep the site running.