Intro
If you want to do something more than printing the models included with the printer you are going to need to get into using computer-assisted design programs. Again one of the reasons I bought the maker select is that is doesn’t have proprietary design and encoding software. This means you can use pretty much any 3d cad program that allows you to save into the format that the printer can read which in this case is GCode.
Full Overview
Watch the overview video or keep reading the full article below
Table of Contents
My 3D CAD Background
I was really looking forward to this specific feature because it means I could possibly use Google / Trimble SketchUp to create my models. If you are not familiar with Google SketchUp I would definitely check it out. It is an amazing CAD program that is incredibly easy to learn and allows you to create pretty much anything your imagination can come up with. Even if you don’t have a 3d printer but are interested in making 3d models I wouldn’t hesitate to start playing around with it.
SketchUp was released back in August of 2000 and that’s pretty much how long I’ve been using it, of course until now I would just use it to make completely random things like spaceships, floor plans, satellites, furniture, etc. But now it’s time to make those models come to life!
Blog Update - SketchUp Software Update
Unfortunately, the free version of SketchUp Make that could have been downloaded is no longer available through Trimble. Only the Pro version has a desktop app. The free version is only available online which removes the ability to install extensions. Personally I have switched to Blender as my go-to for CAD work. Blender is immensely more powerful to the level that it's used in large production films but it still easy to get started in. Best of all for 3D printing, you get the ability to export to STL out of the box!
Extension Install
Before I started on this project I wanted to make sure I could create and export models in the right format. Unfortunately, the basic free version of SketchUp does not do this but luckily thanks to the amazing SketchUp community there is an extension that will allow you to export models as STL files. I know this isn’t gcode but it’s a step in the right direction, we’ll get to the gcode part in a second.
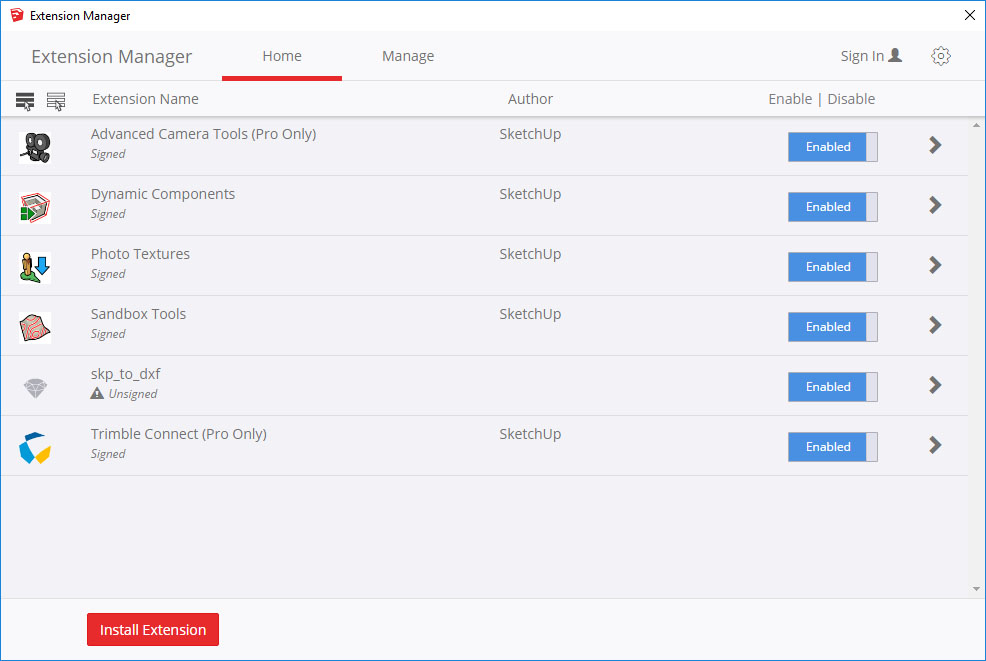
It’s extremely easy to install the extension, simply go to this LINK and download the RBZ file. In SketchUp 2017 go to the Window menu and select Extension Manager, when the new window pops up click the button at the bottom that says Install Extension and simply select the RBZ file you downloaded. That’s it! The extension is installed; it may give you a warning saying the extension is unsigned but you can ignore it. These steps are different for older versions of SketchUp so I would highly recommend updating.
New Printer Test Model
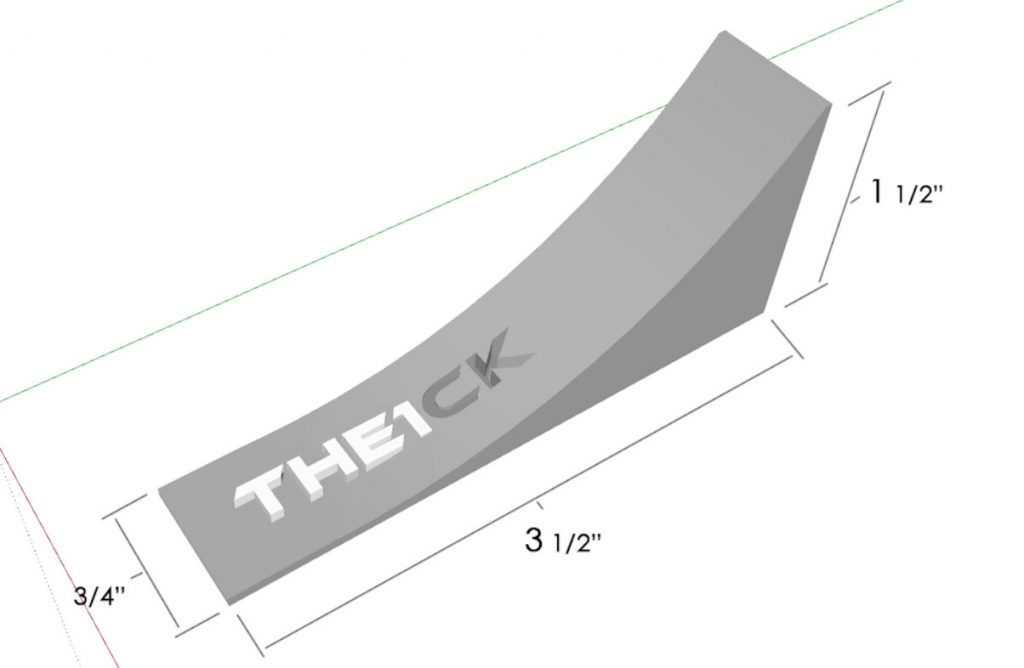
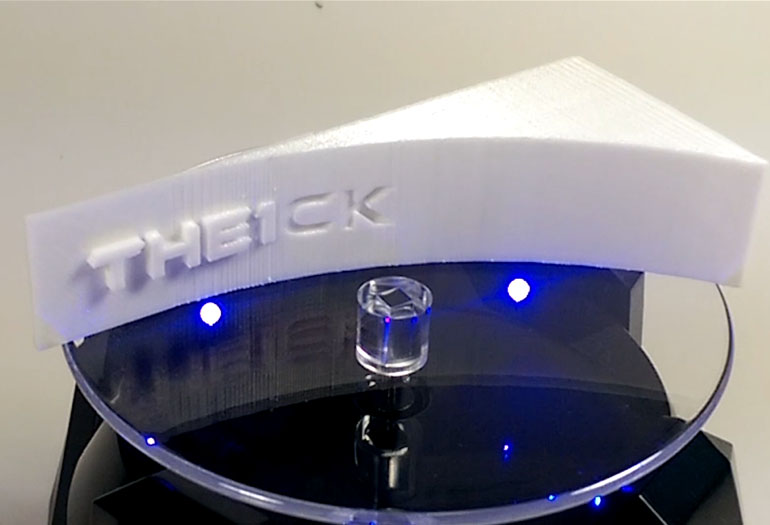
Now go ahead and create the new model. Since I’m new to the world of 3d printing I wanted to keep it simple but I also wanted to do some testing to see the limitations of the printer, so I went with a design like this. A couple of things I wanted to test was how well the maker select would recreate this large swooping curve and how defined the lettering would come out in the final product. As you can see some of the letters are raised while others are recessed. I thought this would give the final product an interesting shadow effect under certain lighting.
Make sure to clean up any faces or stray lines that are not needed, to make sure the final format is easy to interpret for the next step.
The overall dimensions of this model are 3 quarters of an inch in width, 3 and a half inches long and one and a half inches tall. Using inches was an oversight that will come back to mildly annoy me.
With the model done in SketchUp, we first save it into the native SKP file format for future edits, then to use the extension we installed earlier go to the Tools menu item and select Export to DSF or STL. In the first dialog box you can tell it to save the entire model, hopefully, you got rid of any stray elements in the work area. Then since I used inches, I’ll export it in inches. In the next window select STL from the drop-down menu and finally save it to whatever directory is good for you.
Cura – the middleman
So now we have an STL file which basically represents all the faces of the model we just made. Now it’s time to make that STL into a Gcode file that the maker select can use. This step is really simple. We need to download and install a program called Cura. There are plenty of other programs that can do the same job but since it was recommended by Monoprice and is really easy to use not to mention free, it’s a no-brainer.
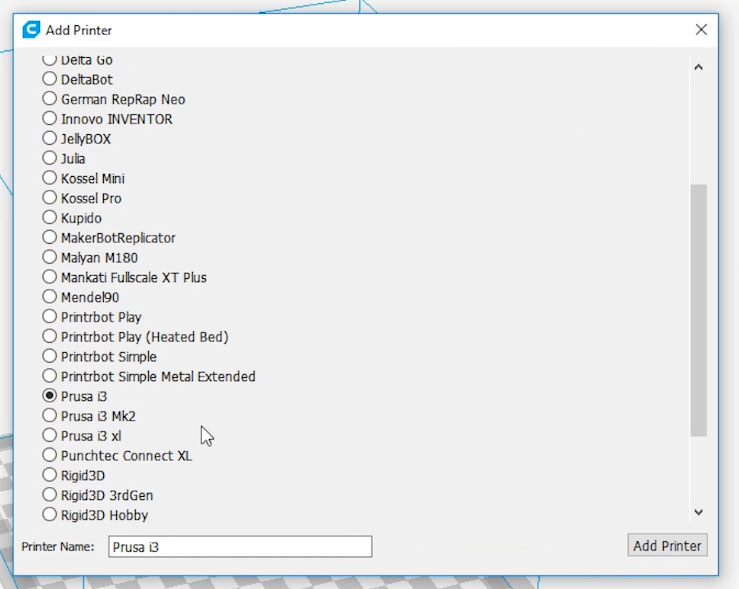
To get Cura you can use this LINK or simply Google Cura CAD program, which will bring up the Ultimaker website, the creators of Cura. After you download, install, and open it up for the first time Cura will ask you what printer you are using. Since the maker select is not listed just choose Prusa i3 which is the printer that the maker select is based on. The nozzle width, bed and extruder temperatures, print speed, etc are all the same. The only difference is the work area. The maker select’s print area is a bit bigger, another selling point, I haven’t figured out how to change this since the printer settings are fixed. It’s not a problem in this case because the model is not that large.
Final Steps
To import the model just select the Open File icon in the top left and find your STL file. This is where using inches to build the model came back to annoy me. The default measurements for Cura are in millimeters so the model came in at 3 quarters of a millimeter in width which is really tiny, I thought it didn’t even import until I zoomed ALL the way in. I haven’t figured out how to change this default measurement yet. If you know how please leave a comment and thanks.
This wasn’t as big a deal since all I had to do was use the scale tool to enlarge the model so that it would be 19.05 millimeters in width which is equal to 3 quarters of an inch. Then I centered it and that’s pretty much it. Of course, you can mess around with all the settings for the model and printer but for this test I just left everything at default, with a light infill and normal quality. I really like that it tells you how long it will take to print and how much filament it will use. For my model a little over 1 and a half hour to print and 3 and a half meters or 11.7 feet of the filament. Just as an example if I were to set the infill to solid, in other words, make it a completely solid object it would take 4 hours and use almost 8 meters or 26 feet of the filament. That’s pretty insane.
Here are the last two steps, first save it as a Cura project locally than click on save to file button on the bottom right and select the Gcode extension if it is not already selected and save it with the easily recognizable name. If you have the micro SD card plugged into your computer save it to the home directory, otherwise just copy it over when you are ready.

Print and Done!
Now it’s time to print this thing. Preheat the printer, mount the SD card, select the file to print, and sit back and watch the magic!
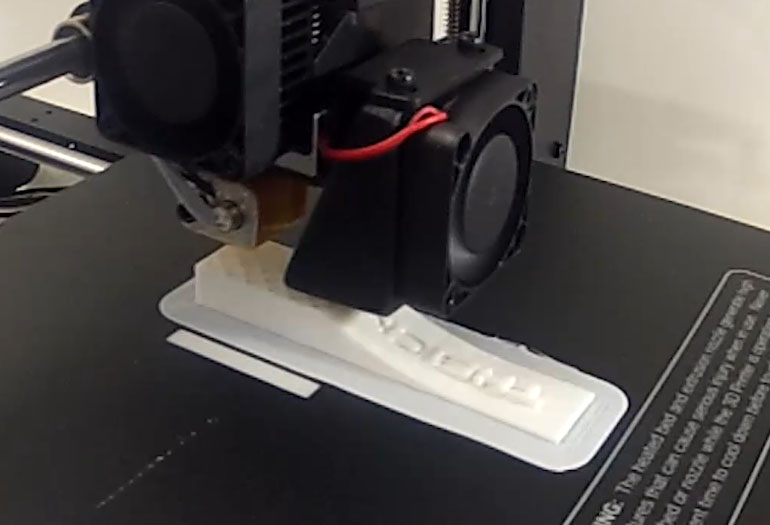
To be honest I had no idea how this would turn out. I wasn’t sure if the printer settings would be 100% or if having the model be interpreted by two different CAD programs using three different file extensions would cause any issues. At this point, I couldn’t do anything but wait. I’ll speed it up.
Here is the final product and I’m very happy with it. Of course, it’s my first model and it didn’t completely fail so I’m excited either way.
A couple things I did notice is that at the lower part of the curve where the gradient is shallow you can see the “step” pattern but I actually don’t mind because it does smooth out further up the curve and a little sanding will smooth it out more. The one more noticeable thing is that the letter K is not as recessed as it was modeled. Not sure if I could have done something different to the model to make this part turn out better or if it’s a limitation in the level of detail the printer can create. More testing is in order for sure.
The Conclusion
Well, that is it for episode 2, I’m really excited to keep exploring the world of 3d printing and to bring all of you along with me. I’ll be doing some more testing over the next couple weeks. Next time I’ll work on some practical models that I can use around the house or at work.

