Intro
In this episode, I want to focus on our filament supply, specifically how the filament gets from the spool to the print head.

Full Overview
Watch the overview video or keep reading the full article below

Table of Contents
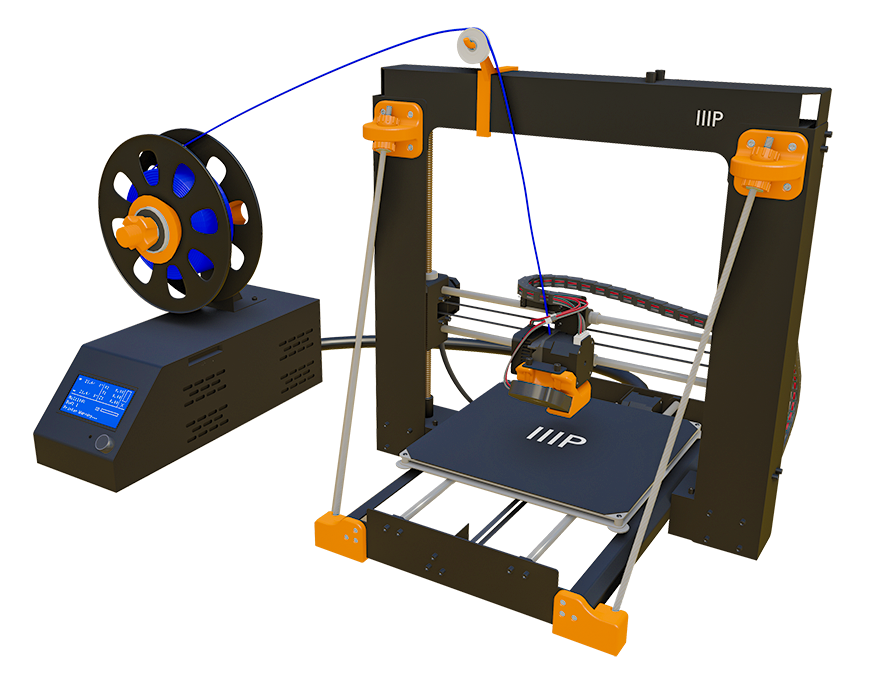
The Current Setup
The typical out of the box spool holder, for most printers in this price range, consists of a spindle that the spool sits and spins around on. The spindle is either attached directly to the side of the printer to an upright that can be located on or near the printer.
The problem with this setup is that it relies on the feeder motor overcoming the weight of the spool and the friction of the holder. To try and not delve too far into the math of figuring out rolling friction coefficients or using an equation to determine the torque need to overcome the moment of inertia, I came up with a simple way to show how much force it takes to get the spool going using some steal marbles.
Experiment
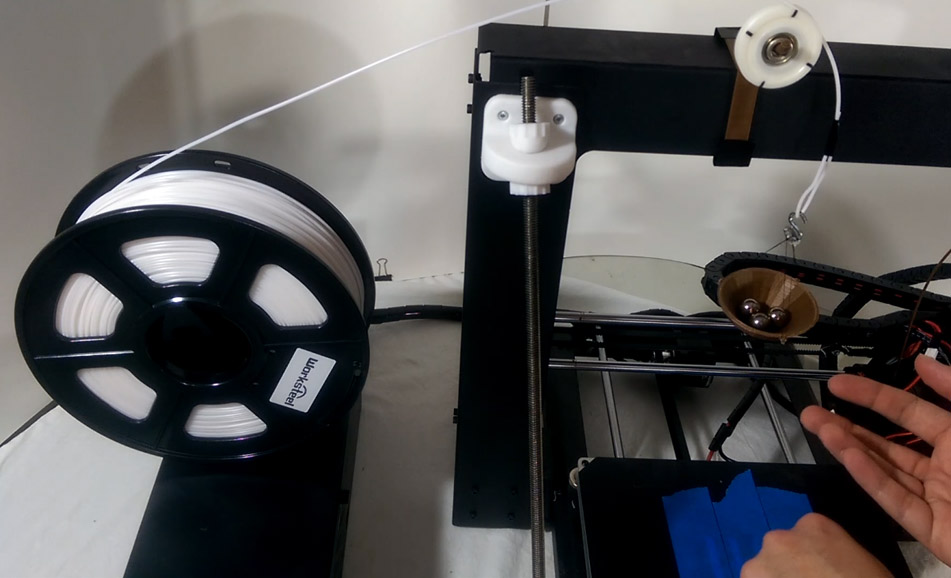
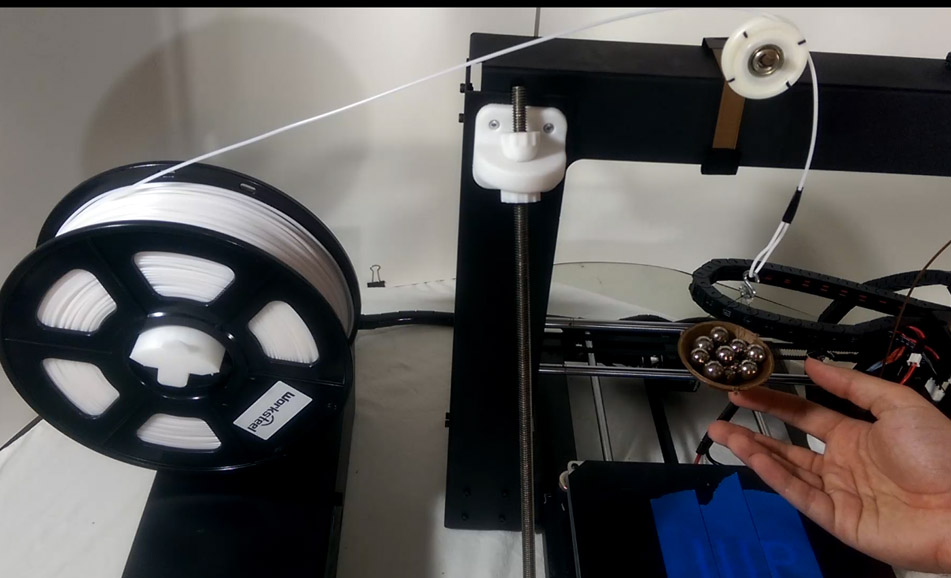
The setup is simple, I printed a small basket to put all the marble in. I attached the basket with some thread to an S-shaped hanger that then hung from the end of the filament line which I just folded back on itself to make a nice hook. All we want to see is how many marbles it takes to get the basket from the top of the printer frame to the bottom. The more marbles it takes the more force is required for the feeder motor to move everything. For all, you number crunchers out there each marble weighs on average 8.5grams or 0.3ounces.
I’m using a brand new spool so all 1kg of weight is in play here. As we start adding marbles, the filament tightens up, around the 7 to 9 marble mark we see the weight of the basket starts to move the spool but just not enough to free it all the way. Finally, at 11 marbles the spool starts spinning and we have our benchmark for the stockholder. I ran this little experiment a few times and got an average of the same name, 11 marbles which basically equals 93.5 grams or 3.3 ounces
While this may not seem like a ton of weight, during a print the spool gets pulled on by the feeder motor hundreds if not thousands of times. If we learned anything from the last episode where we had to basically glue down the feeder gear set screw this constant fighting with the spool is not a good thing and could theoretically lead to a premature failure of the motor.
New Mods
That being said our goal today is to make it as smooth as possible for the feeder to pull the filament from the spool to its ultimate destination, our print. To do this we are going to install two mods, one to replace the stock spool holder and another smaller filament guide, which you already saw in action during the experiment. In the end, we want to be able to move the spool with less than 11 marbles, hopefully, a lot less.
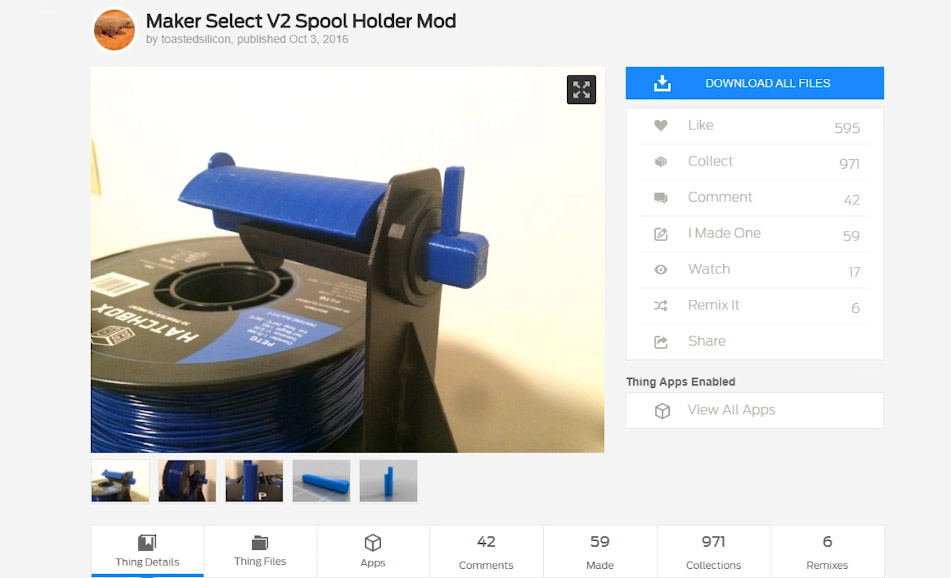
At first, I wanted to try a simple holder mod, so I printed Thingi 1805457 by toastedsilicon. I chose it because again it was simple; it’s basically a sleeve the sits in the groove on the underside of the stockholder spindle that provides a larger surface for the spool to spin on compared to the stock setup which I thought would perform better because the weight is distributed across a larger area. Unfortunately, I ran into two problems. First, the mod moved around in the groove which led to the spool settling back after being spun forward a little over and over again. Secondly and more importantly, it took 14 marbles to start moving freely, so it was time to move on. I already felt like I wanted to try something different maybe something with some nice smooth ball bearings but also one where I can still use the stockholder upright.
My Design
So I set out to design my own. I started by looking at a bunch of other designs on thingiverse, some simple some really complex, some really cool looking and some not so much. After reviewing many other designs I knew right away a couple things I wanted to incorporate in mine. First is the ability to support spools with different inside diameters by sandwiching the spool between two cone-shaped holders. Secondly, I wanted an easy way to fasten the pieces using a nut and bolt style system.
In the end, I incorporated pieces from three other designs.
- I got the idea for the cone-shaped holders from Undeviljur – Thingi 1546811
- The nut and bolt design from Foreverwinter – Thingi 1241566
- The idea for the bearing placement from Neilmig – Thingi 1805648
Of course, I added some of my own touches to make it all work together.
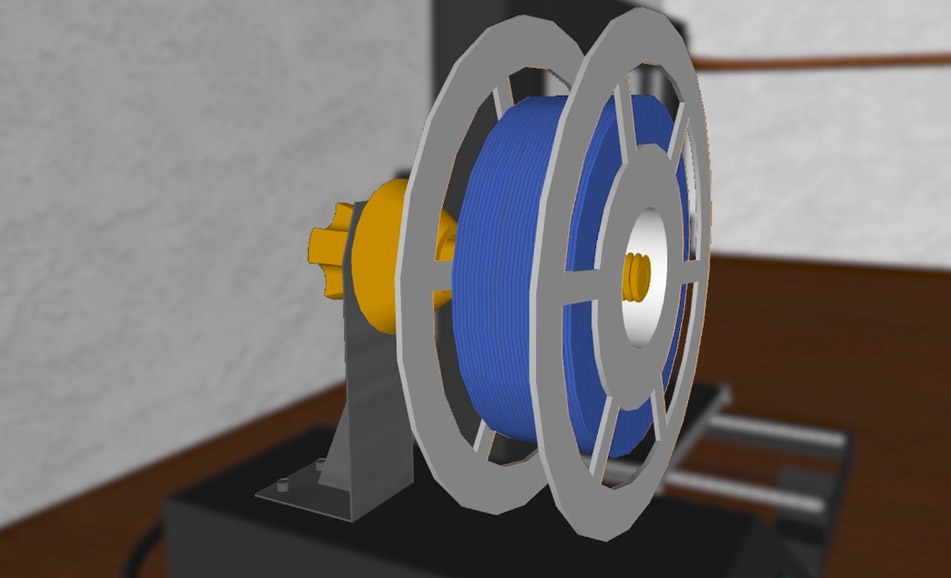
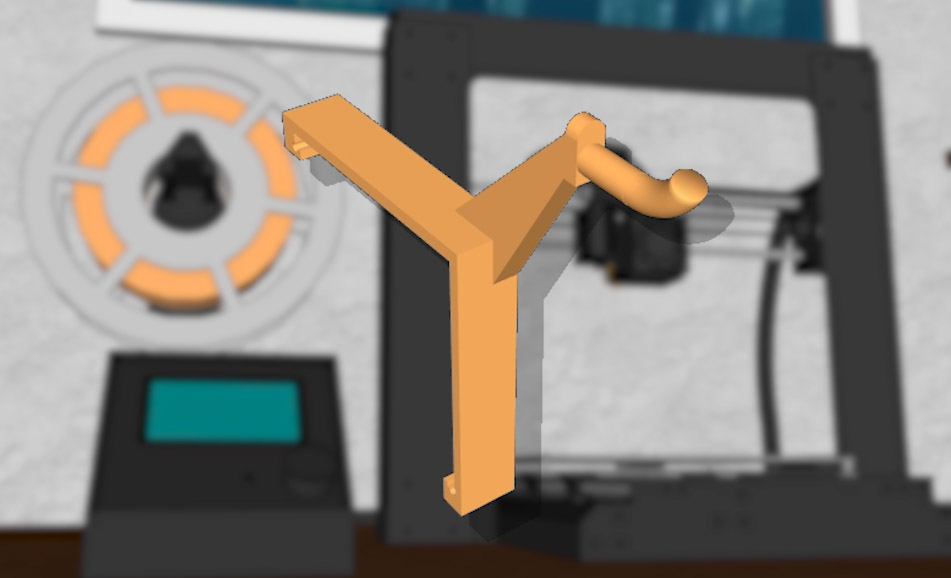
Here is the final design. I know I’m being a little vain saying this but I think it’s awesome. A quick overview, there are five pieces that make up this design, the spool holder spindle…..two spool holder cones….. a large fastening nut…..a small fastening nut….. and finally the piece de resistance two deep groove enclosed ball bearings, more on that last one in a second.
All these pieces come together like this, the spindle and large fastener attach to the stock upright. The two cones with the bearings embedded in them slide onto the spindle sandwiching the spool, and lastly, the small fastener keeps it all in place. The small fastener and this small ridge on the spindle are sized to press only against the inside casing of the bearing, which is why it sticks out from the holders, allowing the rest of it to spin unencumbered.
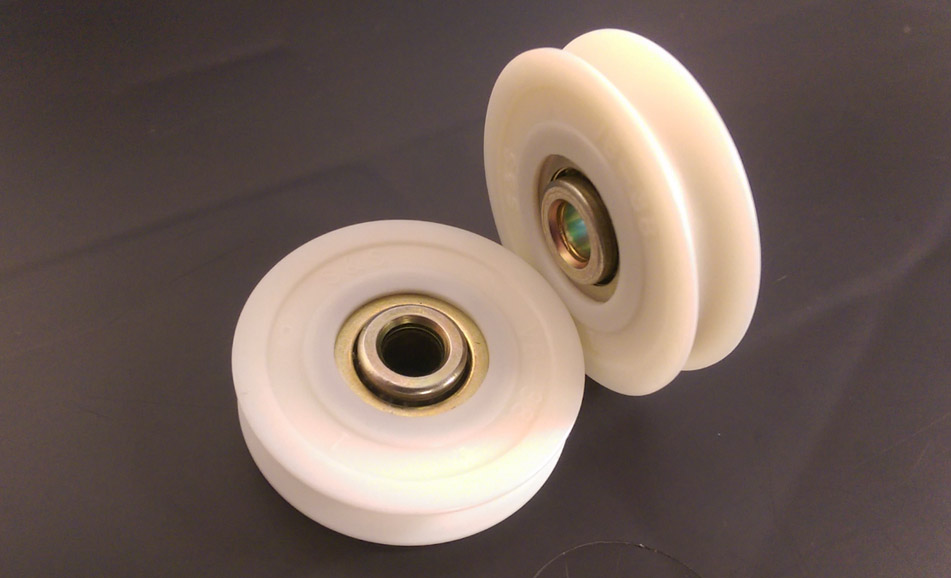
The Bearing
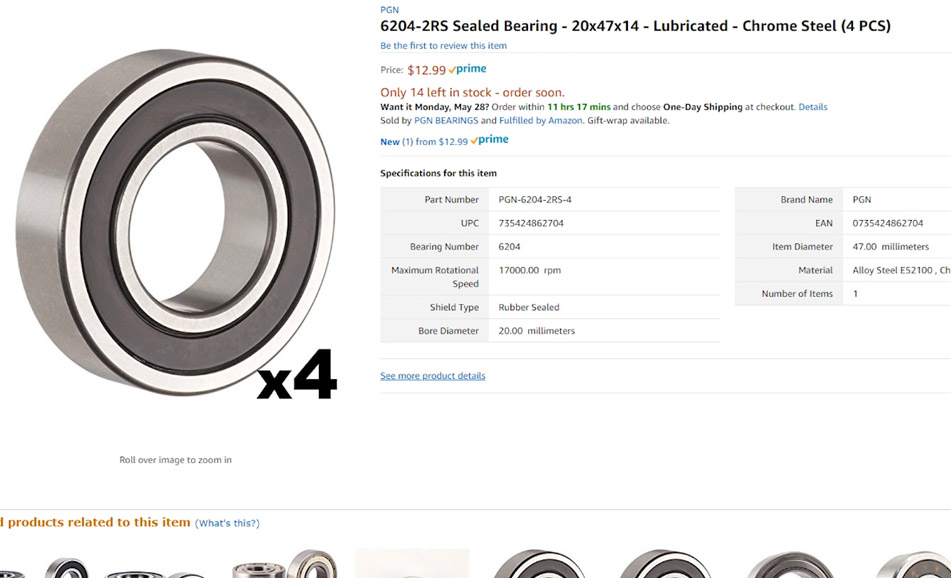
Now, the bearing itself is a PGN 6204-2RS enclosed and lubricated deep groove ball bearing with a dynamic load capacity of 2000lbs. Yes, it’s very much overkill for just a spool holder but I chose this bearing for two main reasons. First, it is the perfect size with an inside diameter of 20mm, outside diameter of 47mm and a width of 14mm which makes sure the spindle is large and thus strong enough to hold everything up. It’s also just the right width so that the holders don’t lean inward and scrub against the spindle. The second reason was price, at the time I bought a pack of 4 for just $10. The 2 pack was $8 for some reason. Normally these kinds of bearings cost $15 each but all these prices are constantly fluctuating. Link to the one I used will be in the description.
Ultimately this all means that this thing spins like it’s on ice and while it does have a few more pieces than other designs it’s still simple and elegant. I especially love the large threads and easy to grip fasteners, it just makes everything easier to work with ongoing. Swapping out the spool takes no time and with support for spools with inside diameters from 35mm to 65mm every standard and some, not so standard size spools will fit on this mod. Not to mention the spindle and holders can be resized pretty easily to accommodate different sizes bearings.

Final Piece
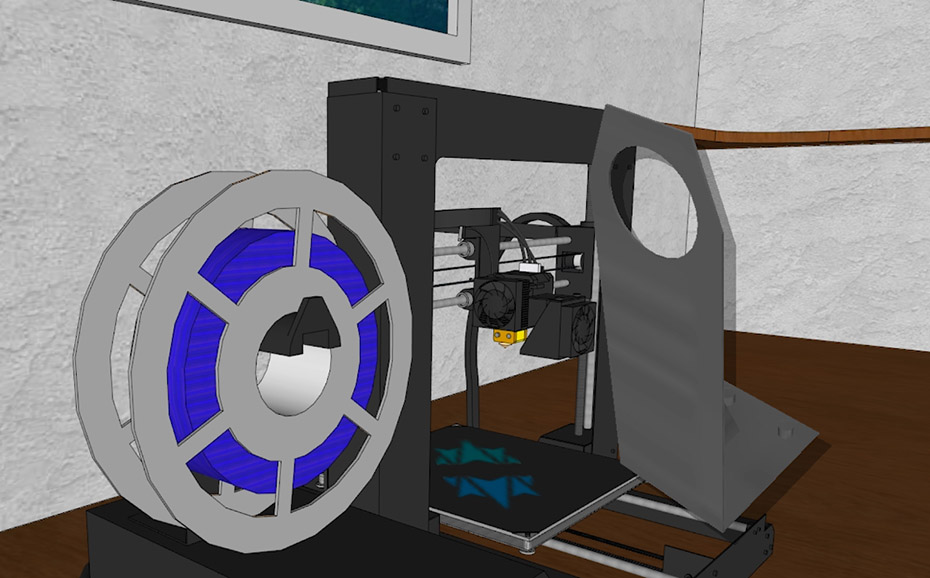
With the spool holder mod sorted there is just one more piece to complete this project. That’s the filament guide. The filament guide does just as the name implies. It guides the filament to its ultimate destination in the smoothest way possible. This is especially important in my setup since I have the spool mounted on the control unit that sits next to the printer. Which means without the guide the filament will scrub against the brace mod we installed in episode 4.
Filament guides come in all kinds of designs but as always I like to keep it simple. I borrowed the snap-on-frame design from Suzujoji – Thingi 1792034 and modified the actual guide to add some extra height and a small hook that a roller can be slid on to without sliding off during printing. The little-grooved roller is from a patio door hardware kit, which you can find at any home improvement store. I got a pack of two from ACE Hardware for $4. Again this roller just allows the filament to move around unencumbered. With this snapped onto the frame and the roller in place the project setup is done.
Now it’s time for the ultimate test, how many marbled does it take to move? Let’s watch 1 2 3 4 5, oh a little movement and 6. Only 6 marbles and we are rolling. I ran this test a few times and got the same results. I think this is an amazing outcome. Almost half the weight of the stockholder gets this mod moving. I don’t think we could have gotten better results without going overboard on the design.
During an actual print, everything moves incredibly smooth, no lurching from the feeder pulling on the filament and watching the roller on the filament guide go back and forth is mesmerizing and really shows how much the filament moves during normal printing, something that’s not inherently apparent normally.
Outcome
I believe we have definitely achieved our goal. To be honest, at the end of the day I enjoyed the process of researching a problem, designing a solution, and implementing it even more than the final product.
You can download the files for this mod on Thingiverse at the link in the description.
I hope this episode inspires you to look at designing your own models to accomplish problems you see around you. It’s something that we should all strive to do no matter what your profession is.