The MP10 Mini is built. Now we fire it up: load filament, tour the touchscreen, and print a Benchy and a detailed cityscape head to head against the Maker Select V2. The out-of-the-box results are striking.

Editor's note (July 2026): This is part 2 of my 2021 MP10 Mini review, and the printer is discontinued now. It was my go-to machine for a good while. If you are shopping for a beginner printer today, I use and recommend the Creality Ender 3 V3 SE, which has full automatic bed leveling. See the link at the end.
Out of the box, the stock MP10 Mini clearly beat my modified Maker Select V2. Both a Benchy and a tricky Atlanta cityscape came out smoother, better defined, and with far less stringing, and they printed faster. The standout features are the assisted bed leveling and being able to nudge the nozzle height mid-print from the touchscreen. Those two things made the MP10 my new go-to printer.
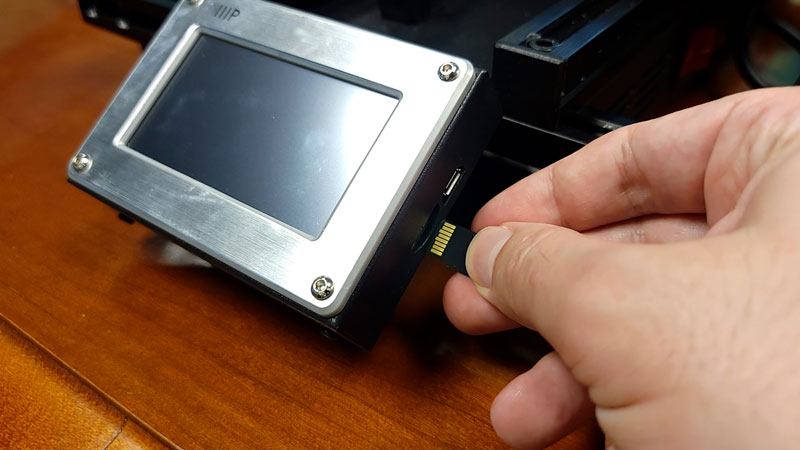
Stock MP10 Mini, smoother and faster than a modded V2.In part 1 we assembled the MP10. Now let's turn it on. First, the included micro-SD card, which is spring loaded here rather than the V2's simple slide-in. Like the V2, it goes in connectors up. That orientation always feels weird to me even though it is common, but the spring-loaded slot is an upgrade.
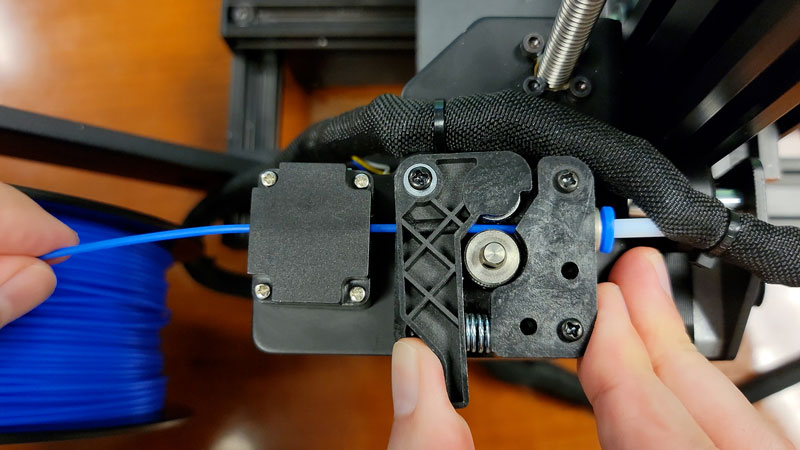
Loading filament is where things change a lot from the V2. I skipped the tangled included spool for a fresh 1kg roll. You feed the filament through a block that houses the filament sensor, then into the feed motor, which now sits on the vertical frame instead of on top of the print head. Partially squeeze the release lever as you feed, but not all the way, or you will push the tip away from the next opening. Then comes the fiddly part: you feed the filament down a tube that leads to the nozzle, feeling your way until it stops. A small bump tells you it has reached the nozzle.
I have mixed feelings about this setup. I like that the feed motor lines up directly with the spool and the tube keeps the filament off other components, but swapping filament is trickier than the V2 because you cannot see how much is left in the tube. My old smooth spool holder mod may still help here.
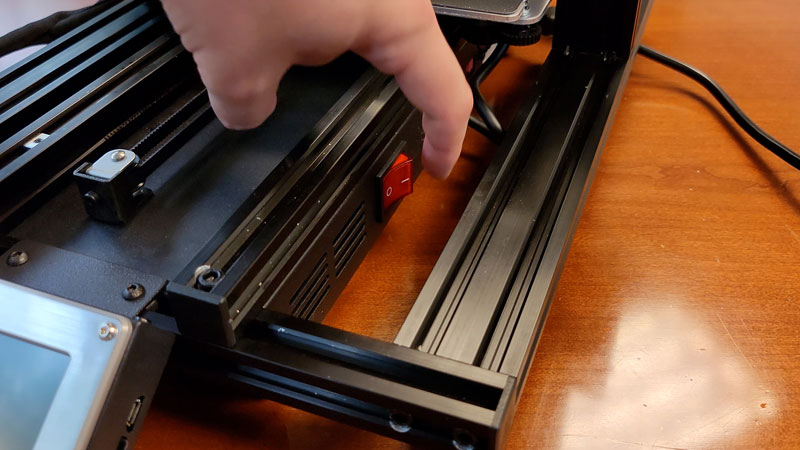
Power lives on a large red switch on the right side of the PSU. You may have to slide the bed out of the way to reach it, and mind a hot bed, but there are not many easier spots for it.
With the printer on, the UI is completely different from the V2, and much simpler. It is a touchscreen, but a resistive one, so you can press it with anything. It is finicky with a fingertip, so I recommend a pen or even the included scraper to navigate.
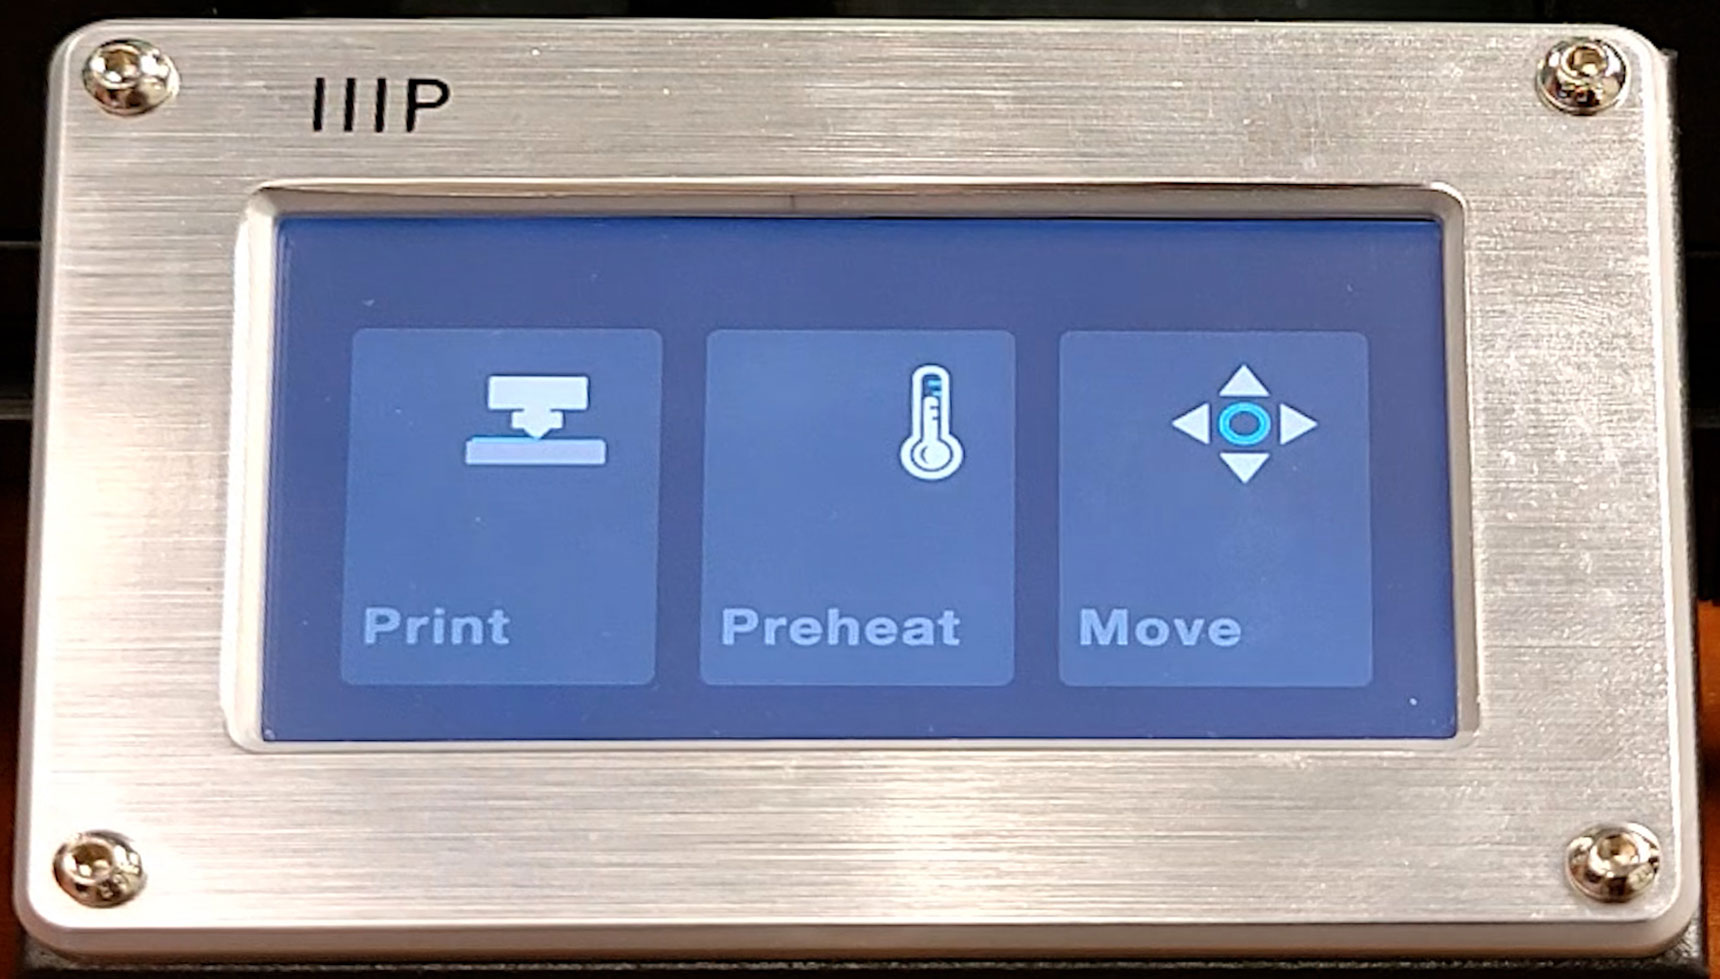
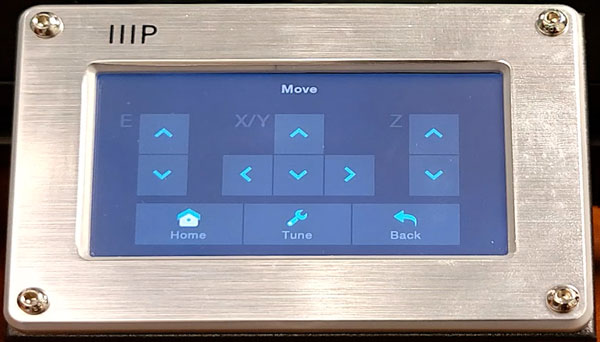
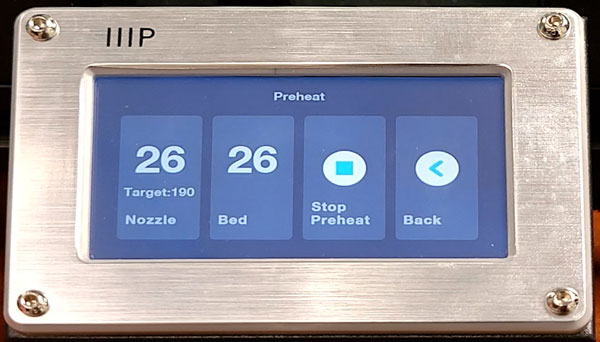
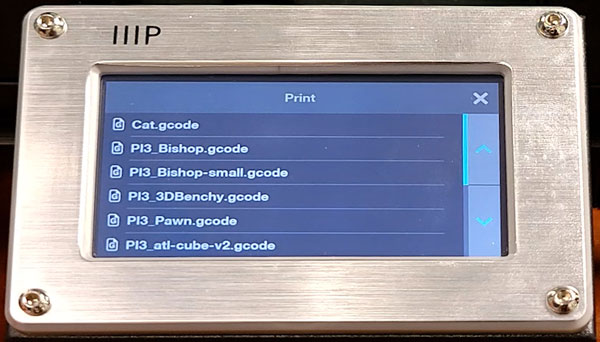
The Move screen is the most interesting. From it you can retract or push filament, move the print head left and right and up and down, and move the bed back and forth, plus a home button that parks the head at the front-left corner. The V2 could do all of this too, just more clunkily with its knob. What the V2 could not do is what sits under the Tune button. The Preheat screen is nicer as well: you pick the exact nozzle or bed temperature you want instead of a material default, though the model data sets the temperatures anyway. The Print screen lists the files on the SD card.
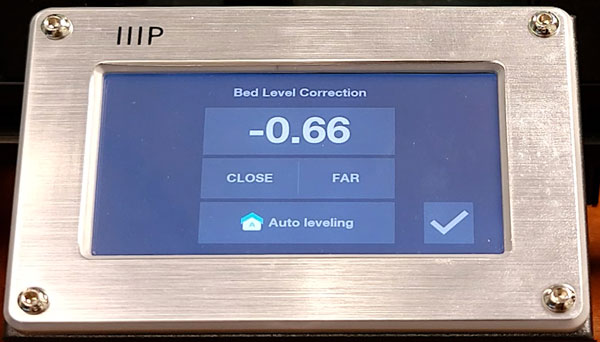
While printing, the screen shows fewer details than the V2 did, dropping things like the print-head coordinates, which I do not really miss. In exchange you get three buttons the V2 lacked. Pause lets you pause and resume, handy for swapping filament colors mid-print. Tune jumps to that nozzle-height screen so you can fix poor bed adhesion or over-squished filament on the fly, instead of canceling the whole print like on the V2. Just remember those adjustments only take effect once you confirm them. Cancel is self explanatory. There is no percentage readout, but a progress bar above the buttons shows how far along you are, and it reports the actual print time at the end.

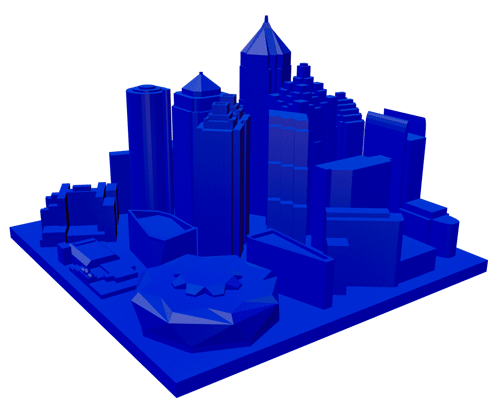
Now the reason you are probably here: how do MP10 prints stack up against the V2? I used two models, the trusty Benchy tugboat and a model I made for a future project, both sliced in Cura 4.6 at draft quality.
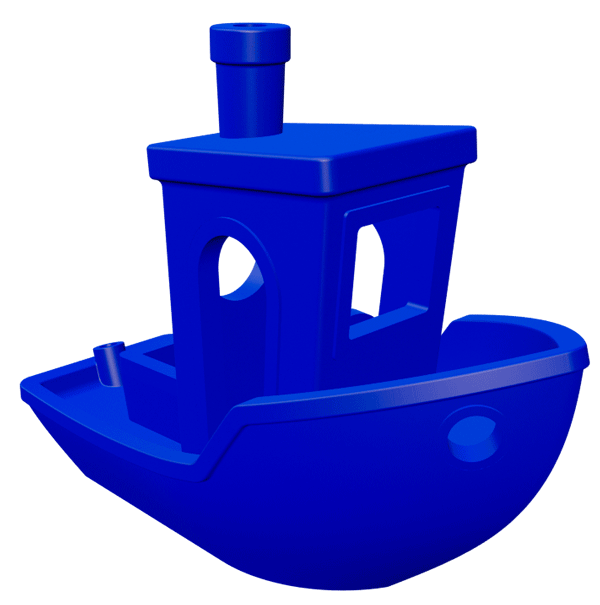
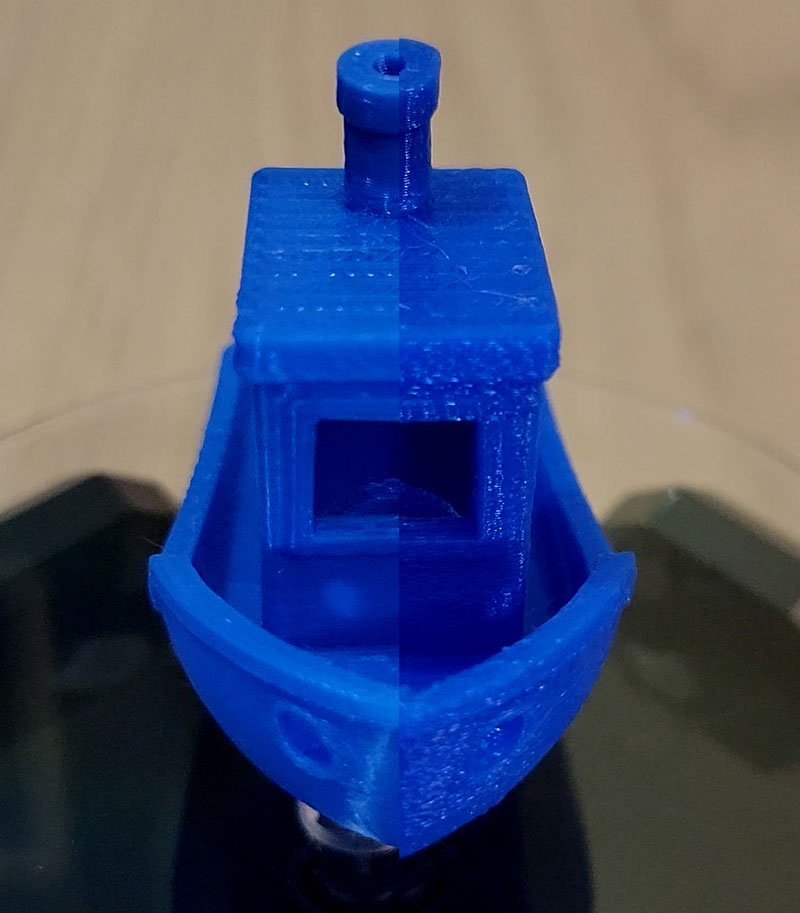
First, the Benchy, and the difference is striking. The hull is much smoother, not perfect but far better than the V2. Details are sharper too: the anchor holes, the window and door frames, and the cabin are all better defined, with almost none of the stringing across gaps that the V2 leaves behind. For an out-of-the-box print from a sub-$300 printer, that is impressive.
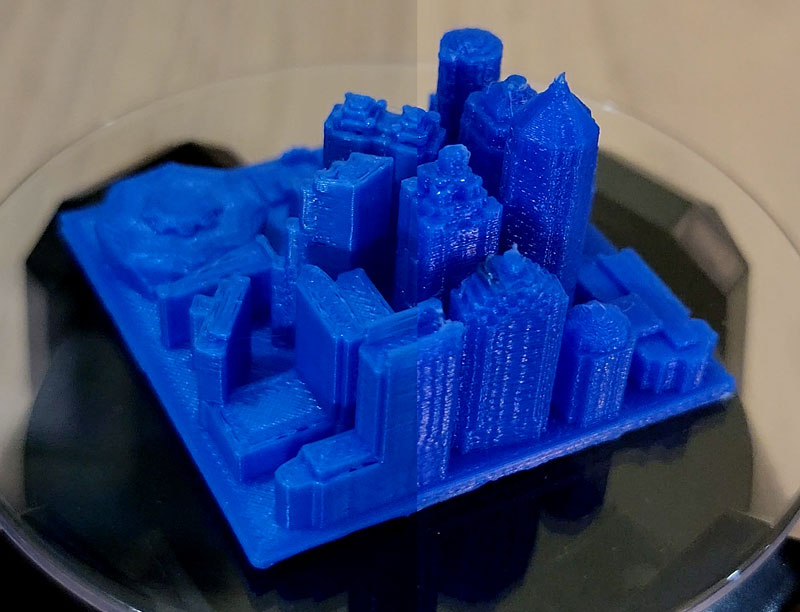
The cityscape tells the same story. All those buildings packed together usually produce a horrific amount of stringing between them, but the MP10 model turned out great next to the V2. The surfaces are much smoother, and it printed noticeably faster thanks to the MP10's higher speed.
Out of the box, the stock MP10 Mini beat my modified V2 on both a Benchy and a detailed cityscape. The prints were smoother, better defined, and had far less stringing, and they printed faster thanks to the higher print speed. It is an impressive result for a sub-$300 printer.
Yes. The Tune button on the touchscreen lets you adjust the nozzle height mid-print, so if the first layer is not adhering or the filament looks over-squished you can correct it on the fly instead of canceling. The adjustment only takes effect once you confirm it. The V2 could not do this at all.
Yes, but it is a resistive touchscreen, not the capacitive kind on a phone, so you can press it with anything. It is finicky with a fingertip, so I recommend using a pen or even the included plastic scraper to navigate the menus.
You feed the filament through the sensor block, into the feed motor on the vertical frame, then down a tube that leads to the nozzle, feeling your way until a small bump tells you it has reached the end. It is different from the V2, and harder to gauge because you cannot see how much filament is left in the tube.
In my testing, yes. The stock MP10 out-printed my modified V2, and its assisted bed leveling plus on-the-fly nozzle-height adjustment made it my new go-to printer. Modding the MP10 would only improve it further, but even stock it was the better machine.
Based on these two models, the stock MP10 is clearly superior to my modified V2. The special features, the assisted bed leveling and adjusting the print head on the fly, make it my new go-to printer. I am still weighing whether to keep improving the V2 or move my main projects entirely to the MP10, and modding the MP10 would only make it better, but that is a story for the future. If you missed the build, start with part 1, and the new Blender-to-Cura workflow shows how I feed models to it now.
Disclosure: This post contains affiliate links. As an Amazon Associate I earn from qualifying purchases, at no extra cost to you. CK Tech Check is 100% ad-free: no banner ads, no ad tracking. Affiliate links like these and my YouTube channel are what keep the site running.