Magnific AI Review: Can It Really Deliver?
As a landscape photographer who also works with AI art, I put Magnific AI through weeks of real upscaling: Midjourney renders, old photos, portraits, and landscapes. Here is what its AI actually adds, the two-pass workflow that gets the best results, and what it costs now that it is part of Freepik.
Editor's note, 2026: Since this review first went up in 2024, Magnific has changed hands. Freepik acquired it in May 2024, and in April 2026 Freepik moved its entire toolset under the Magnific name at magnific.com. The upscaling workflow described here, and the quality of the results, still hold up. What changed most is the pricing: the standalone token plans have been retired in favor of Freepik's credit-based tiers, so the pricing section below reflects where things stand now.
The short version
Magnific AI is the most convincing AI image upscaler I have used. It does not just enlarge a picture, it invents believable detail, especially in the backgrounds where most upscalers fall apart. The trick is a two-pass workflow: run Illusio first, then Sharpy. It is priced for enthusiasts and professionals rather than casual users, and it now lives inside Freepik's Magnific suite. If you work with AI art or want to rescue detail in older photos, it earns its keep.
Verdict: the detail kingWhat is Magnific AI?
As a landscape photographer with a passion for capturing nature, and a habit of experimenting with AI generation, I am always looking for tools that push my work further. That search is also what led me to NVIDIA Canvas, which paints AI landscapes from rough doodles before they ever reach an upscaler. When I found Magnific AI, its promise caught my attention: upscale and enhance images using advanced AI. After using it extensively, here is my full take.
Magnific AI is an image upscaler and enhancer powered by generative AI. Its core job is to turn a low-resolution image into a much higher-resolution one while adding convincing detail and improving overall quality. That makes it genuinely useful for photographers, digital artists, and anyone who needs high-quality visuals. The headline features are:
- Advanced AI technology: generative models tuned for photo-realistic results rather than a plain enlargement.
- Customization and control: options like a Creativity slider that sets how much detail and realism the AI adds.
- User-friendly interface: approachable whether you are a beginner or a professional.
- Versatile applications: portraits, landscapes, illustrations, and AI-generated art all work.
The tool reviewed
Magnific AI
The AI image upscaler and enhancer behind every before and after in this review. Now part of the Freepik / Magnific suite.
Getting started with Magnific AI
The sign-up process is quick. Once I created an account, I was met with a clean, intuitive interface. To get going you upload an image, pick the kind of enhancement you want, and adjust the settings to taste.
The very first image I ran through it produced phenomenal results. I sat staring at the output for a good half hour, and every time I looked at a different part of the frame I noticed more detail. What really floored me was the background, which has always been the weak point of every AI generator I have used.
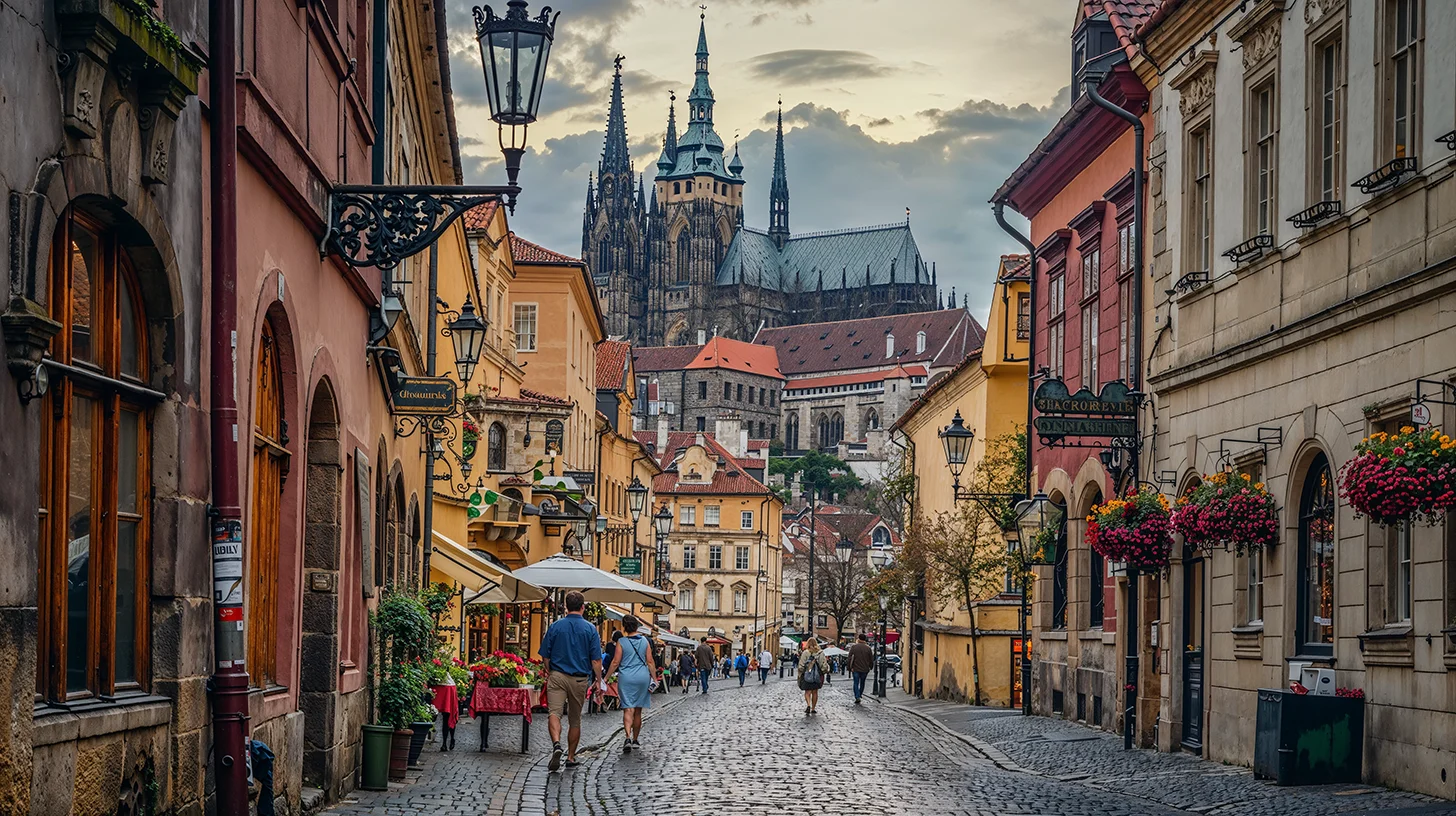
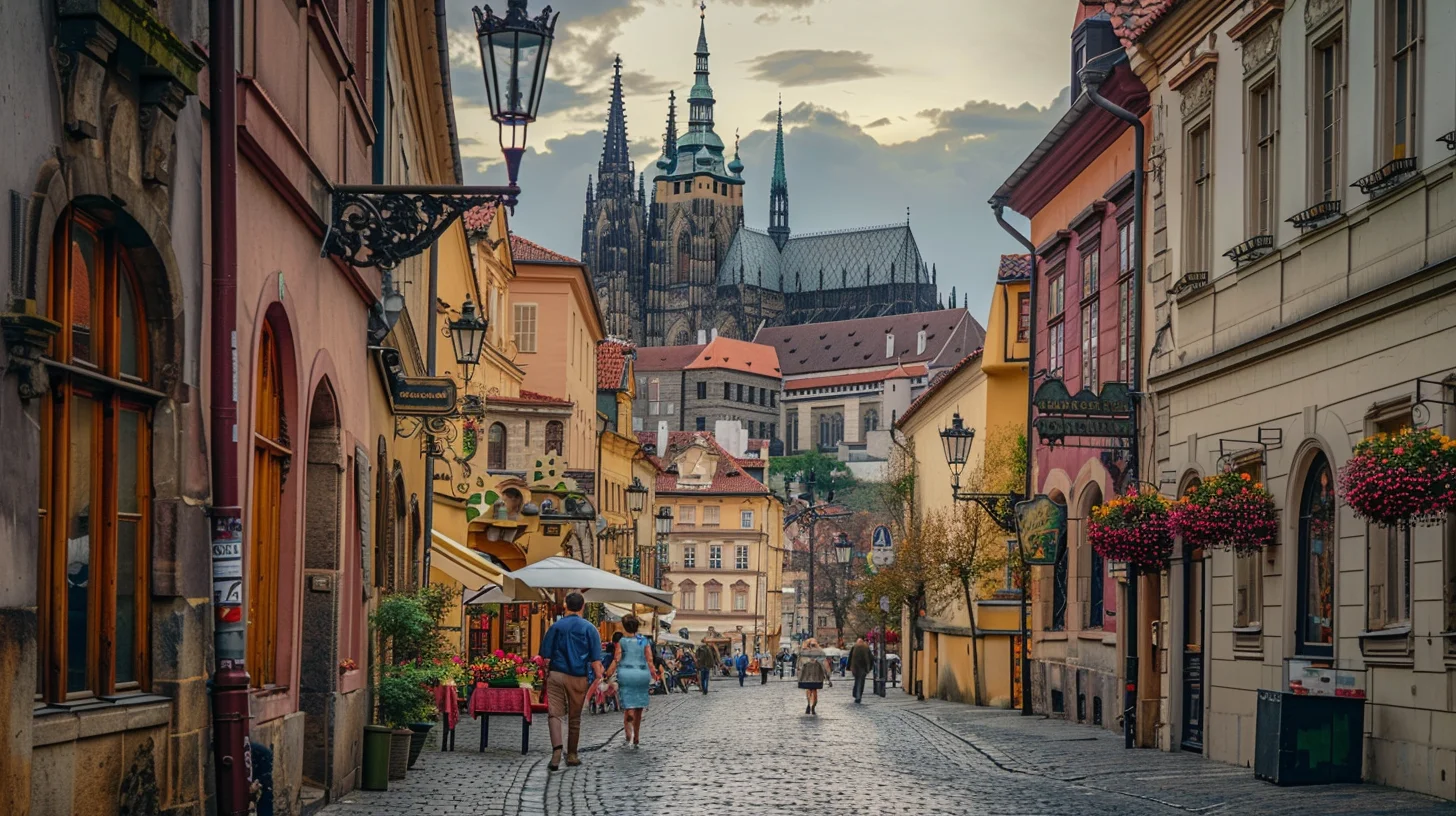
Below is that first image, before and after. I created the original in Midjourney, then ran it through Magnific on default settings. There is a lot to notice, but the baroque leaf pattern on the stonework is a good example: Magnific resolved it almost perfectly.
Magnific also offers in-depth tutorials and an active community. They cover everything from the basics to advanced techniques, so new users can get up to speed fast.
Features and functionality
Magnific packs in a range of features for different needs:
- Upscaling: raises the resolution of an image so it holds up for printing or detailed viewing.
- Detail enhancement: adds intricate detail, pulling back textures and elements that were previously lost.
- Specialized enhancements: tailored options for portraits, landscapes, illustrations, and more.
- Style transfer: applies different artistic styles to your image for a creative twist.
My favorite is the Creativity slider, which controls how much detail and realism the AI adds. It is especially handy with AI-generated content, letting me fine-tune the result toward my own vision.
The Style Transfer tool is the other standout. It applies various artistic styles to an image, which is a fun way to turn an ordinary photo into something more distinctive.
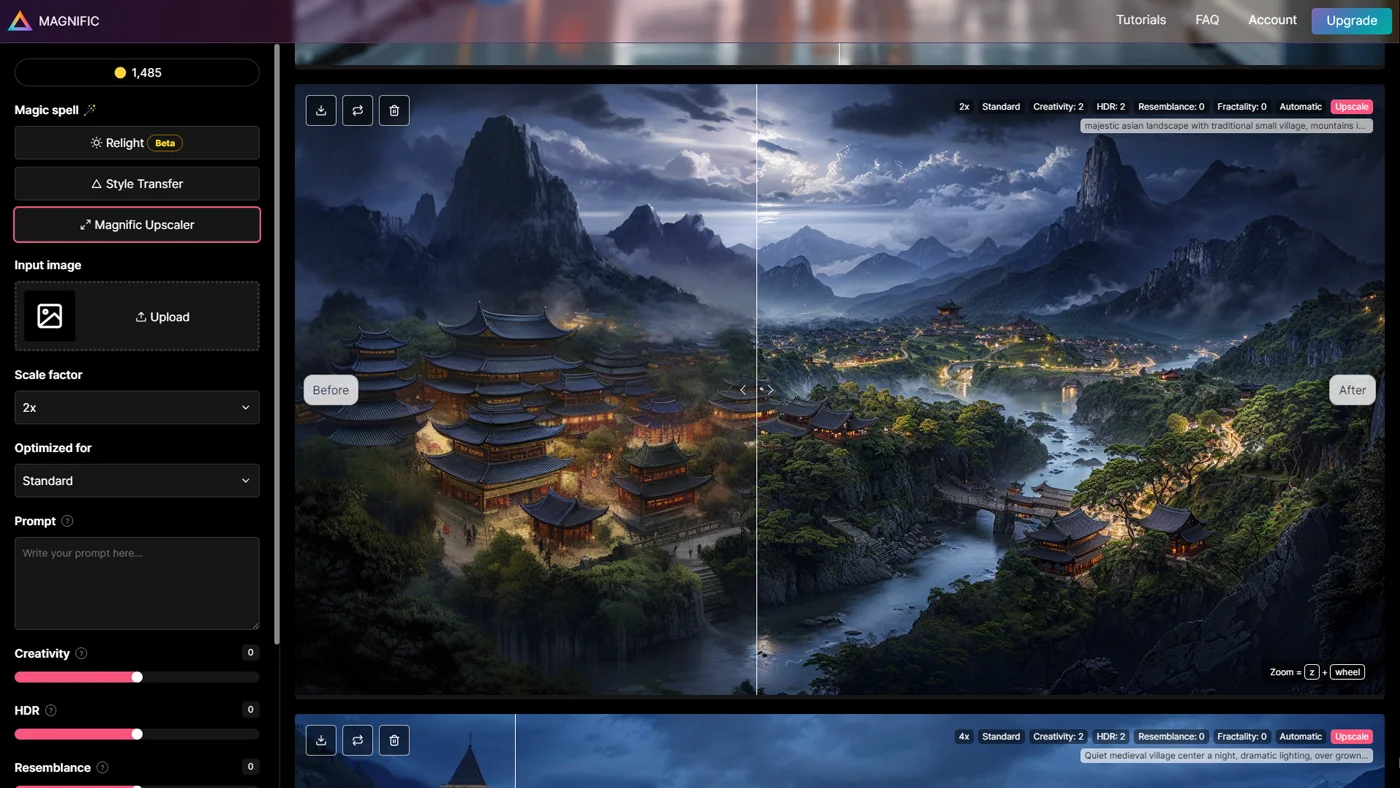
In daily use the platform stays easy to navigate, even if you are new to AI tools, and the community forums and support have been responsive whenever I needed a hand.
Performance and results
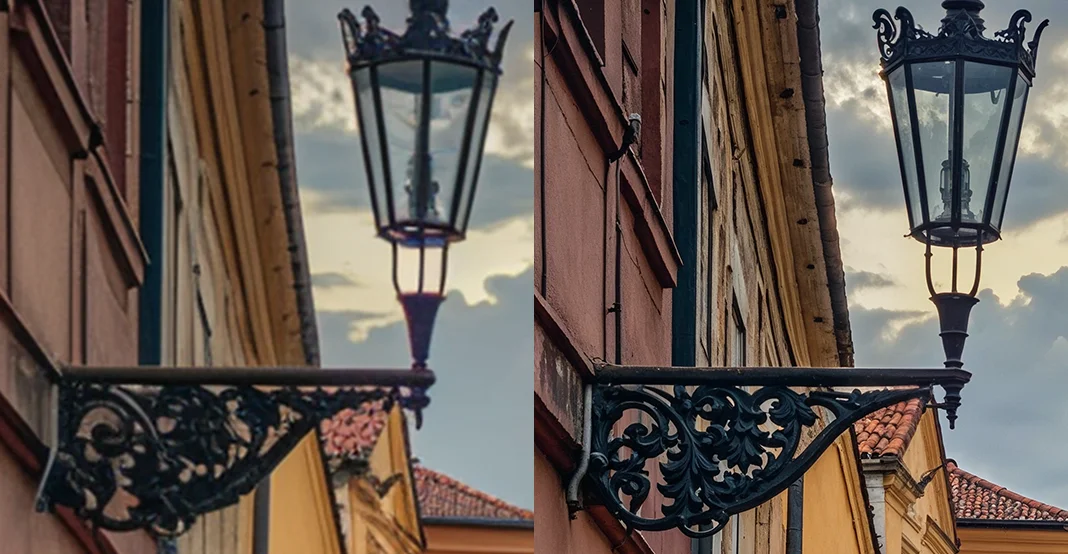
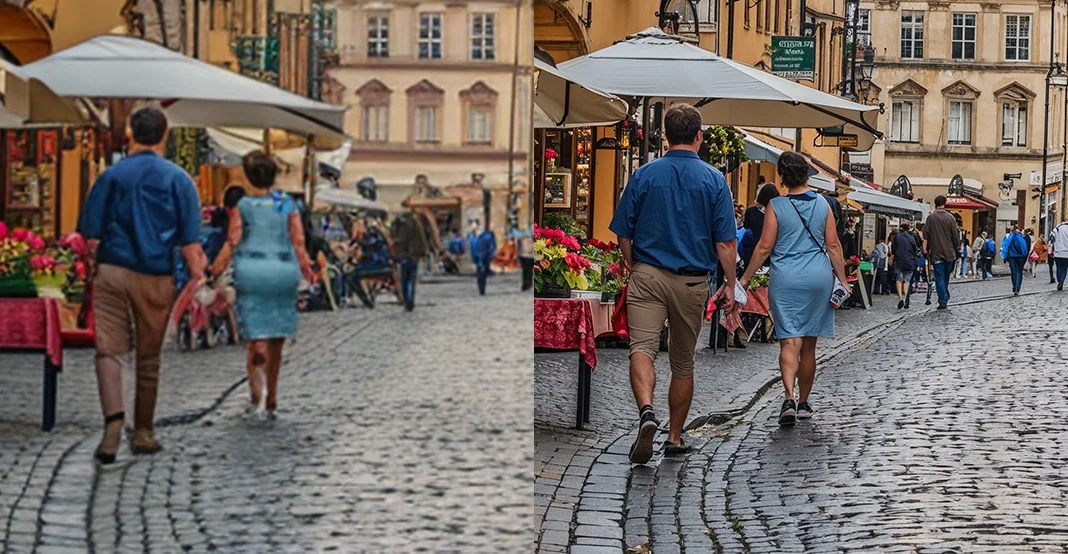
Performance has been impressive. The enhanced images come out sharp, detailed, and genuinely nice to look at. I did hit the occasional artifact, usually when I pushed the Creativity slider high, but those were manageable with a small adjustment.
Depending on the source image, Magnific will sometimes add detail where you did not ask for it. In one case it tried to grow buildings into a tree line. It could have worked, but I did not want them there.
The fix is to add a prompt. It is optional, but I always recommend it so you steer the result. If you still have the original prompt for an AI image, use that.
I tested it on landscapes, portraits, and illustrations, and the quality stayed high across all of them, with realistic detail that lifted the whole image. Processing time depends on how large an upscale you ask for. A 2x pass usually takes about two to four minutes. Go to 4x or larger and you should expect at least a five-minute wait, but the results are worth it.
How Magnific charges you
Magnific bills by how much you generate, and that is tied to the resolution of the final image. A small 2x pass costs little; a big 4x or larger pass costs more.
When I first tested Magnific in 2024, this was a literal token system. On the old $39 per month plan you got 2,500 tokens. A 2x upscale of a typical 1450 × 850 Midjourney image cost 5 tokens, and a 4x cost 20. Pushing an image to roughly 6000 × 3500, about the most you need for non-professional commercial use, also came in around 20 tokens, or about $0.32 per image. That worked out to around 125 such images a month.
Under Freepik those token plans are gone, replaced by an annual credit pool. The underlying logic is the same though: the bigger and higher-resolution your output, the more it draws down your balance. So the cost thinking still applies, just with credits instead of tokens.
Pricing and value for money
Here is where Magnific stands now, straight from magnific.com. Pricing is credit-based, and the rates below assume annual billing:
- Premium: about $14.50/month billed annually (regularly $20). Roughly 240,000 credits a year, around 3,200 images, with access to all AI models.
- Premium+: about $33.75/month billed annually (regularly $45). Roughly 600,000 credits a year, around 8,000 images, plus a commercial license.
- Pro: about $210/month billed annually (regularly $280). Roughly 4,000,000 credits a year, around 53,000 images, aimed at heavy and agency use.
- Business: about $55 per seat/month billed annually, with a shared team credit pool.
There is no permanent free plan on the current pricing page, so check magnific.com for any trial credits before you commit.
At these prices Magnific is not really aimed at the casual user. It fits enthusiastic amateurs and professionals: agencies and photographers who need this level of upscaling and detail for client work. That said, if you have a batch of older images, say vacation photos you want to bring back to life, subscribing for a single month to process them and then cancelling is a perfectly good use of it.
Tips and tricks for using Magnific AI
Over a lot of use I settled on a workflow that squeezes the best quality out of each credit. Here is the two-pass method I rely on:
- Double with Illusio. Start with the Illusio engine to double your resolution. It is excellent at preserving existing detail and texture, which makes it the right first step.
- Refine with Sharpy. Run the result through the Sharpy engine to double again. Sharpy adds sharpness and clarity, and it is especially good on images generated in Midjourney.
- Mind your credits. This two-pass approach reaches the resolution I want without burning through your balance. In the old token terms it was about 20 tokens per image.
One habit that helps: I always start from a 1450 × 850 base image. If my original is larger, I actually scale it down first, which gives Magnific room to add its own detail as it upscales.
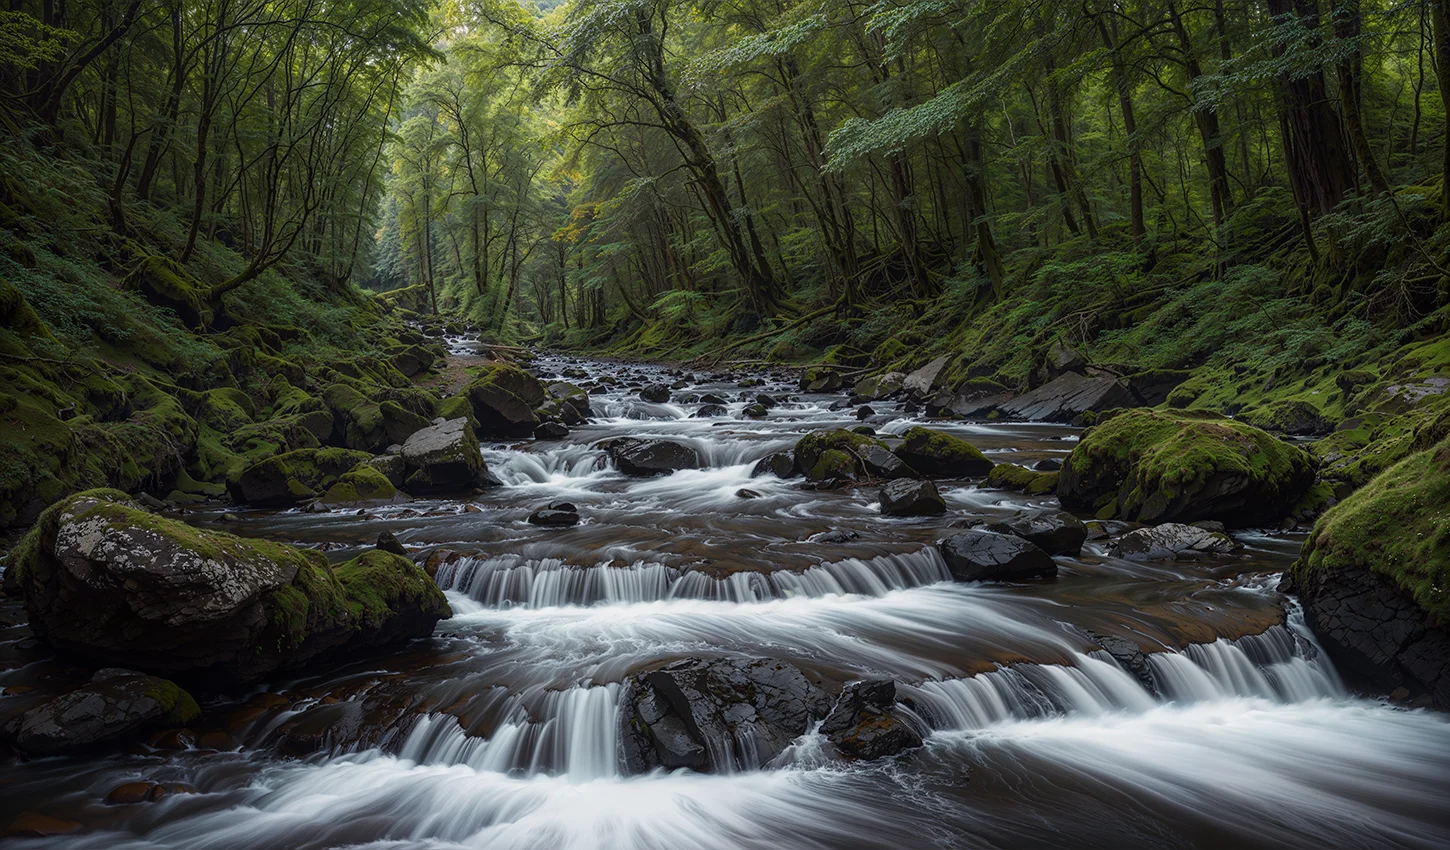
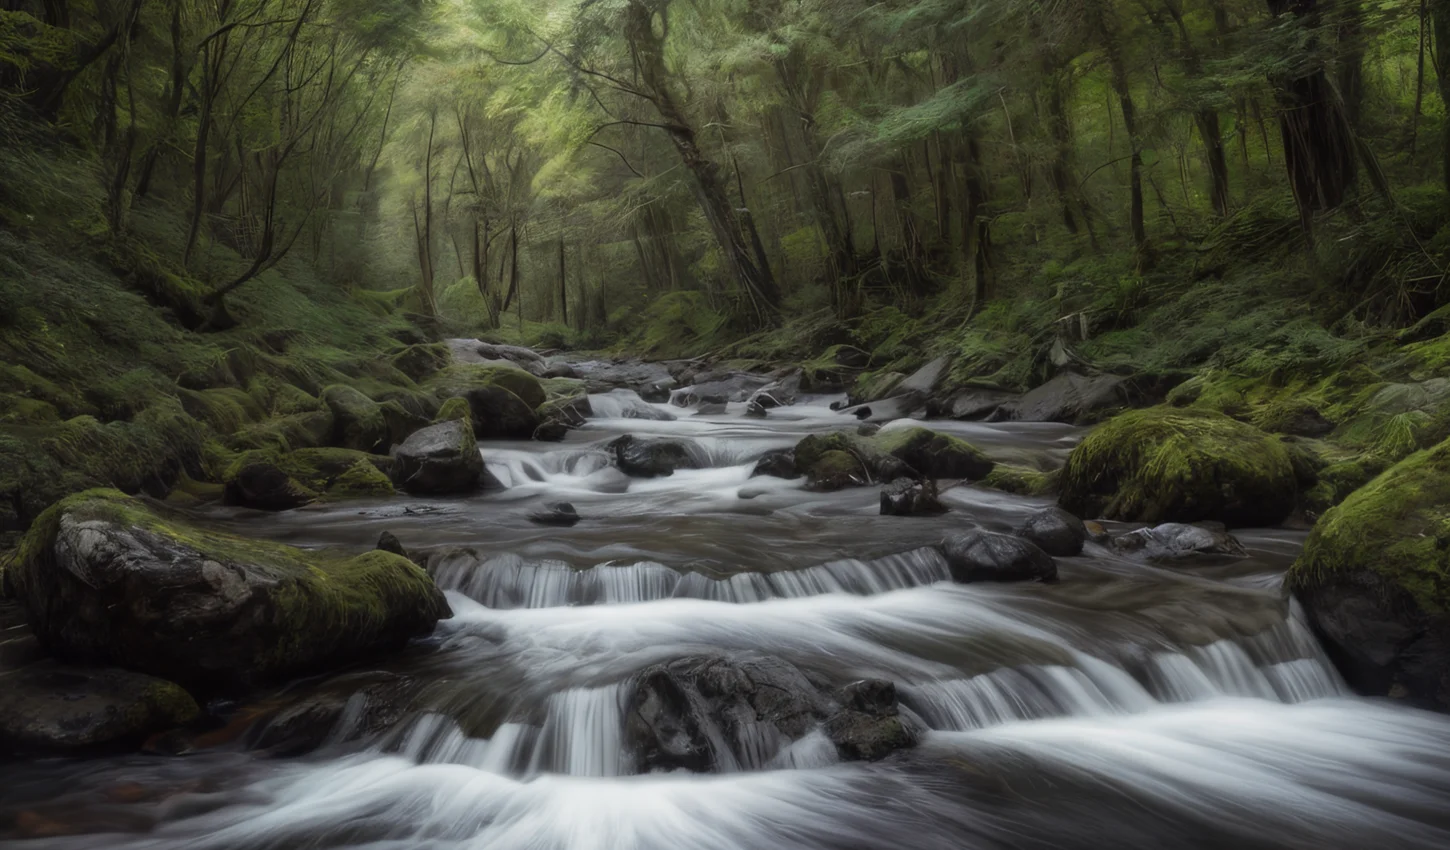
The method works on both AI-generated art and real photographs, which is what makes Magnific so versatile. Below is another example of just how much detail it adds during the upscale.
Pros and cons
Cons watch-outs
- Pricey for the everyday user
- Occasional artifacts if your settings are off
- Top-tier plans get expensive
- No refund policy
Pros what shines
- High-quality, detailed enhancement
- Clean, user-friendly interface
- Works on AI art and real photos
- Responsive customer support
- Flexible credit system
Frequently asked questions
What is Magnific AI and how does it work?
Magnific AI is an AI image upscaler and enhancer. It takes a low-resolution image and generates a higher-resolution version, adding realistic detail as it goes. You control the result with sliders and options, most notably a Creativity slider that sets how much new detail the AI introduces.
Is Magnific AI the same as Freepik now?
They are part of the same company. Freepik acquired Magnific in May 2024, and in April 2026 Freepik rebranded its whole toolset under the Magnific name at magnific.com. The upscaler works the same way it did before. The main change for users is unified, credit-based pricing.
Can Magnific AI upscale both AI-generated and real images?
Yes. Magnific works well on AI-generated art and on real photographs, with optimizations tuned to different image types. In testing it handled landscapes, portraits, and illustrations equally well.
How much does Magnific AI cost?
As of 2026, plans are credit-based and billed annually: Premium is about $14.50 per month, Premium+ about $33.75, and Pro about $210, with a per-seat Business plan for teams. The older standalone token plans of $39, $99, and $299 have been retired. Check magnific.com for current numbers.
What is the best workflow for the sharpest results?
Use two passes. Double the resolution with the Illusio engine first to preserve detail, then double again with the Sharpy engine for sharpness and clarity. This works especially well on Midjourney images and keeps credit use efficient.
How does Magnific compare to other upscalers?
Its main advantage is how convincingly it adds detail, particularly in backgrounds where many upscalers smear or invent mush. Combined with the Creativity slider and support for both AI art and photos, that is what makes it stand out.
Magnific added detail I did not want. How do I stop that?
Add a prompt to steer it, and lower the Creativity slider. Artifacts and unwanted additions, like extra buildings in a tree line, usually come from a high Creativity setting with no prompt guiding the result.
Is Magnific AI worth it?
Magnific AI has become a genuinely valuable part of my landscape photography and AI work. Its ability to upscale and enhance with this much believable detail has raised the quality of what I put out. There are a few rough edges, but the benefits far outweigh them.
I recommend it to photographers, digital artists, and anyone who wants to lift their visuals. Now that it is folded into Freepik's Magnific suite the pricing looks different than it did in 2024, but the core tool is as strong as ever. Try it on a few images and see what it does with your own work.
Disclosure: I pay for my own Magnific subscription; this review was not sponsored or approved by Magnific or Freepik. This post also contains affiliate links, including my Amazon storefront. As an Amazon Associate I earn from qualifying purchases, at no extra cost to you.
Prefer to see it in action?
I dig into AI tools and photography gear in more depth on the channel. Subscribe to catch new reviews and tutorials the moment they are released.