Intro
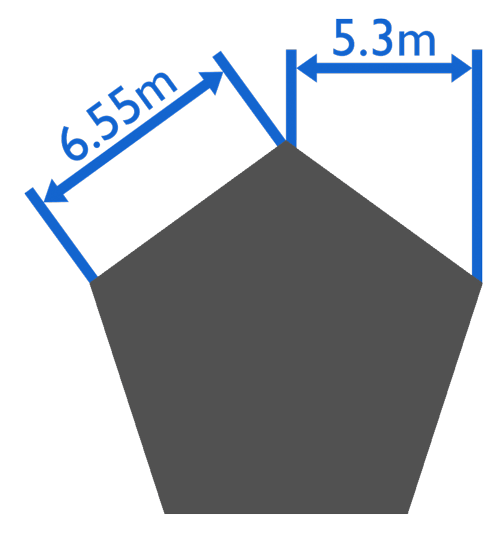
In the last tutorial we covered almost everything to do with measurements and measuring in Blender compared to SketchUp except for one thing. The dimensions tool in SketchUp is pretty unique and has some nice features, for instance once you place one down it updates when you make adjustments, you can add your own readings, and no matter from what angle you’re looking at your model the dimensions always stay oriented relative to you.
Full Guide
Watch the overview video or keep reading the full article below
Table of Contents
Quick Answer
So the outstanding question is, if there’s anything like the dimensions tool in Blender? The short answer is no the long answer is we get pretty close. As of Blender 2.83 there is no equivalent tool to match that from SketchUp. You can always manually draw the extension and dimension lines, the tick marks, and then use the text tool but this can be tedious. It would be nice to have something a little more user friendly. But this is where custom add-ons can come to our aid.
Custom Add-ons
Just like Extensions in SketchUp add-ons are small pieces of code that add some special functionality not found in the stock program. Blender has a huge library of add-ons already included that can be turned on with a single click. What we want though isn’t in the stock library but we can easily install it.
The custom add-on we want is aptly called Dimension. To download it use the following link. Get the Dimensions add-on for Blender on GumRoad. It is a pay what you feel is fair system so please consider donating to help the developer out. After you download and unzip the folder you should have a single dot PY file. PY stands for python, the programing language of Blender. Remember where the file is located as you’ll need to navigate to it in the next few steps.
Install Custom Add-ons
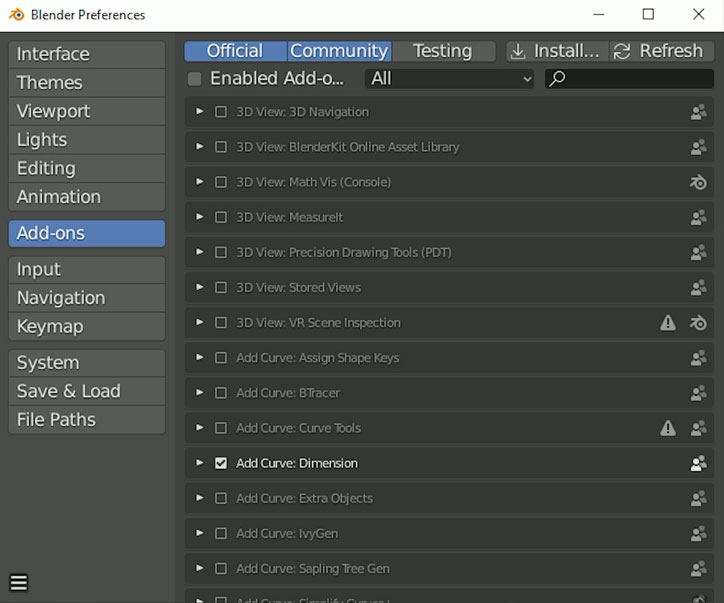
To install any custom add-on in Blender, go to Edit and select Preferences, in the Blender Preferences window click on Add-ons, here you’ll see all the add-ons currently installed but not necessarily active, in the top right click on the Install button. In the next window navigate to the python file you unzipped earlier, select it, and press Install Add-on. It should install pretty much instantly. When it’s done you’ll see it listed among the other add-ons, you can do a quick search for it if it’s not immediately visible. It should already be activated, if not just check it off.
Adding Dimensions
Now that the add-on is active let’s play around with adding some dimensions. First in edit mode, with vertex selection on, select the two vertices you want to measure by holding shift and left mouse clicking the two points. Then you’ll actually have to leave edit mode and go back into object mode by hitting Tab. The two vertices you chose will still be selected in the back ground.
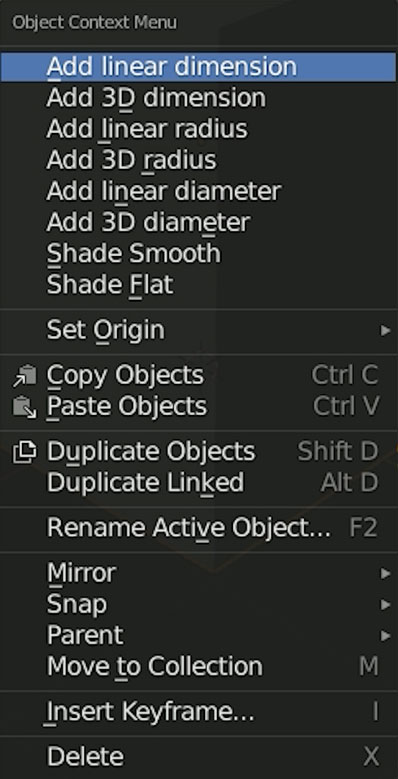
Now right click on the object, under the Object Context Menu select Add linear dimension, the dimensions will now appear at the two vertices. As you probably noticed this tool can also add diameter and angular measurements and if you select only one vertex you can also add a note, much like the Text tool in SketchUp making this add-on very versatile. We’ll focus on the linear dimension option in this tutorial but I would definitely recommend playing around with all the options when you can.
One quick difference I want to point out is that linear dimensions will always be placed parallel to the X axis no matter the orientation of the edge. 3D dimensions on the other hand will always be placed perpendicular to the edge. This gives you a little more latitude on how you present your dimensions.
Dimension Customization Options
Just like with anything you add in Blender you have an options window that’s only active right after you add the new object, if it doesn’t open automatically click on the box in the bottom left corner of the viewport entitled dimensions.
The add-on includes several options in this window to customize your dimensions.
Let’s step through all of these options.
- Presets – The very first option allows you to save your own presets by clicking the plus icon, this saves your customizations for easy implementation in the future.
- Type – Below that that is a drop down where you can change the type and style of dimensions, change it to an angular measurement or even create a note, we’ll stick with the default Linear one.
- End Location – Next you can change the position of the end point, but I honestly wouldn’t mess with this because it will change the actual measurement.
- Lines Options – The Options group focus on the lines themselves and includes Length which adjusts how long the extension lines are. Size is similar to length but acts a little odd so I avoid it. Depth is really the thickness of the lines. It can make some interesting shapes if you go too far with it.
- Center Depth – The Depth from center option aligns the center of the extension lines with the outside of the model or not.
- Rotation allows you to rotate the whole dimension along the z axis of the end point.
- Offset allows you pull the whole dimension away from the object which is considered best practices in architectural drafting.
- Align to camera allows you to align the whole dimension to the current camera, but I would avoid this option as it occasionally throws an non fetal error.
- Coordinate System – The 2D option allows you to align dimensions with a certain view aside from the default top view. This helps if you need to create blueprint from other angles like front, left, right, etc.
- Start Location – Next you can change the position of the start point, again though I wouldn’t mess with this as it will change the actual measurement.
- Units – A feature that goes along with the last tutorial is the ability to choose any unit you want and then also display the unit name, unfortunately unlike the standard Blender measurement system you can’t separate units so 2 feet and 7 inches will appear as 2.59’ because Imperial.
- Text Options group focuses on the text, obviously, and includes Size which changes the size of the text, Depth which is really just the position relative to the dimension line and another cool feature is the ability to round the measurements up to 15 places.
- Custom Fonts – Next you can choose a custom font by clicking the folder icon and browsing to your OS’s font folder, for Windows it’s here by default and for Apple here.
- Arrow Options group is all about the ticks and arrowheads. You can choose from a few different styles for the ticks or arrowheads. Depth only applies to arrowheads and makes them wider or narrower. Length changes well the length of either ticks or arrowheads. Lastly you can give the material I.e. the paint color its own name.
That’s it for the options, just remember that this option window is only available after you first place the dimension, once you click away it will not be available again.
Other Features
A nice feature of the add-on is that once you’ve added and customized a dimension when you add a new one the customization options will be duplicated so that you don’t have to redo all the customizations every time and again you can also save everything as a preset.
Lastly when you’re done if you select the text itself and enter Edit mode you can manually enter whatever values you want just like a note.
Caveats
Now I won’t claim this is a perfect solution. It has quite a few caveats to remember. One thing I will say is that dimensions is best used when you are done with your project as the dimensions do not automatically update when you modify your model like it does in SketchUp.
Here are the caveats I’ve run into.
I’m not sure if this was purposeful or a bug but when using 3D dimensions text only aligns itself toward the negative Y axis. To show what I mean I added dimensions to this nine sided cylinder. If we press the seven key on the number pad to go into the default top down view. You can see as we added dimensions around the cylinder the text will generally faces in the direction of the negative X axis. After you place the dimension you can manually rotate the text itself using techniques we’ve covered in previous tutorials but that can become tedious. This is something to keep in mind when you’re ready to add dimensions.
Secondly the dimensions won’t appear solid unless you are viewing your model in material preview mode or in render preview mode, for now though you should be good just viewing it in material preview mode which is the third viewport shading option here. Render preview requires some knowledge of lighting and materials that we haven’t covered just yet.
Without delving too deep into materials yet, you can change the color of your dimensions by going into the Materials Properties pane in the Properties panel. There you’ll see the name of the color you set for the dimensions, select it than click on Base Color and use the color picker to choose a new color. We’ll go over all the other options here in a future tutorial.
That’s it for the caveats.
Part 4.5 Close
I don’t know if Blender will ever add a fully equivalent feature like SketchUp’s dimensions tool, but in the meantime this is the best option to quickly add dimensions. Again I would encourage you to donate to the developer to hopefully work out some of the issues mentioned and make the tool even more powerful, maybe even get it adopted to the Blender’s add-on library by default.
So again not perfect but the customization options and versatility of the add-on kind of make up for its deficiencies. I’ll provide updates as they come along on both fronts of this tool
I hope this helps you out, if it did please share so others can find this content in the future.

