This is the fun part a lot of you have been waiting for. Forget how SketchUp paints faces: Blender uses physically based materials, and once it clicks you get results SketchUp simply cannot.

Editor's note (July 2026): Written for Blender 2.8. The whole workflow here, add a material, set its base color, view it in Material Preview, and use material slots with Assign, works exactly the same in current Blender (4.x and 5.x). One visible change: the Principled BSDF node was reorganized in Blender 4.0. Its settings are now grouped into collapsible panels and a few were renamed, for example Specular is now "Specular IOR Level," Clearcoat became the "Coat" group, Sheen and Transmission became "Weight" sliders, and Emission split into Emission Color and Strength. The two you will reach for most, Base Color and Roughness (plus Metallic for metals), are right where you expect. New to the series? Start at Part 1; this follows Part 4.5.
Open the Material Properties tab, add a material, and set its Base Color. Nothing changes until you switch the viewport to Material Preview shading, so do that first. The Principled BSDF node is where all the magic lives: Base Color, Metallic, and Roughness get you most of the way. For several colors on one object, add material slots, select faces in edit mode, and hit Assign. Reuse materials across objects from the browse menu.
Add a material, Material Preview, done.Materials are probably the part many of you have been waiting for, and I will be honest, this took me a while to get my head around. The move from SketchUp's simple face-painting to Blender's approach is a real shift in thinking, but it pays off with photorealistic renders that SketchUp cannot touch.
The key idea is PBR, physically based rendering. Instead of just slapping a color or image on a face, you describe how a surface actually interacts with light, which lets you mimic detailed, three-dimensional-looking texture from flat 2D images through a layered node system. Materials break down into three levels: basic color, image textures, and the full node system for PBR effects. This lesson is all about the first one, basic color, which is plenty to start.
Open the Material Properties pane in the Properties panel. A default material is usually already there; click it to rename it. To recolor it, click the white bar next to Base Color and pick a color from the color picker, adjusting brightness or typing an exact color code if you have one.
Do not panic if nothing changes. By default the viewport does not show materials. Switch the viewport shading to Material Preview mode (the third sphere icon, top right) and your color appears. Skip Render Preview for now, it needs lighting we have not covered yet.
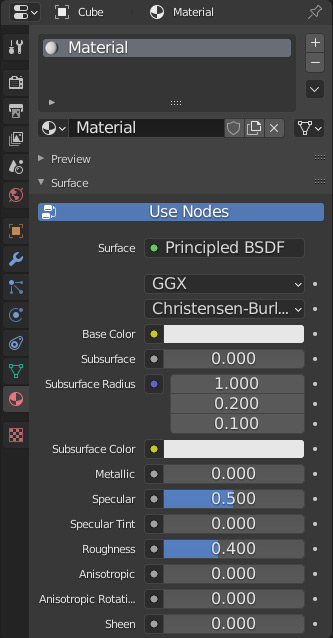
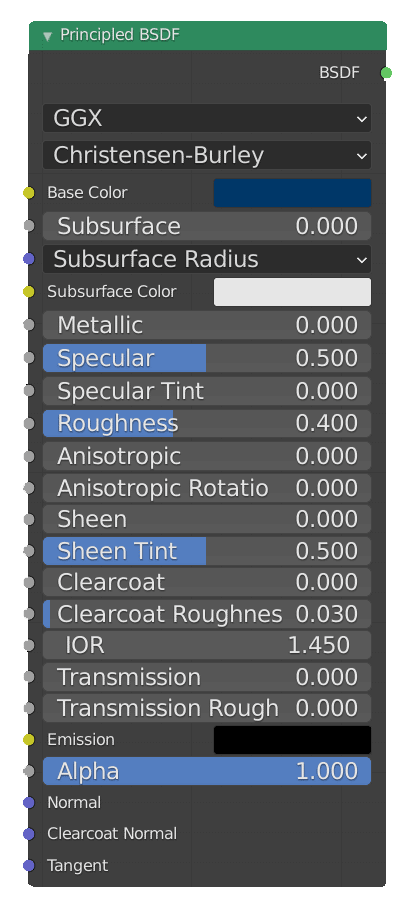
Every material you just touched runs through one node: the Principled BSDF. BSDF stands for Bidirectional Scattering Distribution Function, which is a fancy way of saying "how light interacts with this surface." It bundles almost everything you need to describe a real-world material into a single set of controls. A quick rule for all of them: 0 applies no effect, 1 applies the full effect, and you can drag the slider or type an exact value.
You do not need to learn all of them at once. Three do most of the heavy lifting:
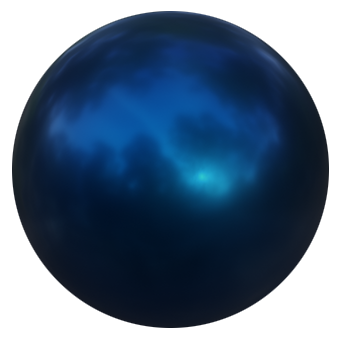
Beyond those, the node has controls for glass (IOR and Transmission), glow (Emission), and cloth or lacquer looks (Sheen and Coat), plus more. Even with just base color, metallic, and roughness, a material like the marble below already looks far more convincing than a flat SketchUp fill.
One object can carry several materials, assigned to different faces. Here is the flow:
Those faces now wear the new material. Repeat for as many materials as you like, and you can go back into any material at any time to change its color or values. It is a clean, non-destructive way to color a model part by part.
Made a material you love? You do not have to rebuild it on the next object. Add a new object, open its Material Properties, and click the browse icon (the small sphere or globe next to the material name). A list of every material you have created appears, and picking one applies it to the whole object.
One thing to know: reused materials are linked. Change the color on one and every object using that material updates too, which is often exactly what you want. When you need an independent copy, click the small number next to the material name, which tells you how many objects share it. That breaks off a separate, editable duplicate so you can tweak it without touching the others.

Open the Material Properties pane, use the default material or add a new one, then click the bar next to Base Color and pick a color. Switch the viewport to Material Preview shading to actually see it, since the default view does not show materials.
The default Solid shading does not display materials. Switch the viewport shading to Material Preview, the third sphere icon in the top-right, and your color and material appear. Render Preview also shows them but needs lighting setup.
It is the default material node that describes how a surface interacts with light. Base Color, Metallic, and Roughness handle most everyday materials, with more controls for glass, glow, and cloth. Each slider runs from 0 for no effect to 1 for full effect.
Add a material slot with the plus button and click New, set its color, then enter edit mode with Tab, switch to face select with 3, choose your faces, and click Assign with the new material highlighted. Repeat for each material.
On the new object, open Material Properties and click the browse icon next to the material name to pick from your existing materials. They stay linked, so editing one updates all. Click the number next to the name to make an independent copy.
Even at the basic-color stage you can already see the potential: a few sliders on the Principled BSDF turn a flat model into something that reads as marble, metal, or matte plastic. Play with Base Color, Metallic, and Roughness until the behavior feels intuitive, and try the environment presets (the dropdown beside the viewport shading icons) to see your materials under different lighting.
Next in the series we go a level deeper and put actual images onto your models: custom images and textures. That is where PBR really comes alive.
Disclosure: This post contains affiliate links. As an Amazon Associate I earn from qualifying purchases, at no extra cost to you. CK Tech Check is 100% ad-free: no banner ads, no ad tracking. Affiliate links like these and my YouTube channel are what keep the site running.