SketchUp's Dimensions tool has no built-in match in Blender. But this is exactly what add-ons are for. Part 4.5 covers installing add-ons and using one to annotate a model with real dimensions.
Editor's note (July 2026): Two things have moved on since this was filmed on Blender 2.83. First, the add-on system was overhauled in Blender 4.2: add-ons are now called Extensions. To install a downloaded add-on file today, open Edit → Preferences → Add-ons, click the small dropdown arrow in the top-right, and choose Install from Disk (or just drag the zip into Blender), instead of the old Install button. Second, the paid "Dimension" add-on used in the video dates to 2020 and may not keep pace with current Blender. If it gives you trouble, Blender's own MeasureIt add-on is free, actively maintained on the official Extensions platform, and does the same job. The concepts below apply to either. New to the series? Start at Part 1; this follows Part 4 (measurements).
Blender has no built-in tool that matches SketchUp's Dimensions, so you add one. Install a dimension add-on through Preferences, then select two vertices, drop to object mode, right-click, and add a linear dimension. A deep options panel lets you style the lines, text, arrows, and units. It is not perfect (dimensions do not auto-update), but it is genuinely useful, especially for finished drawings.
No native tool, but an add-on gets you close.SketchUp's Dimensions tool is genuinely great: measurements update automatically when the model changes, you can add custom values, and the text always faces you no matter how you rotate the model. Blender has nothing built in that matches it. You can fake it by hand with extension lines, tick marks, and text objects, but that is tedious and fragile.
This is where add-ons earn their keep. Add-ons are small code modules that bolt extra features onto stock Blender, exactly like Extensions do for SketchUp. Blender ships with plenty, but a dedicated dimension tool is one you install yourself. In the video I used a pay-what-you-want add-on called Dimension. As noted above, on current Blender the free, maintained MeasureIt covers the same ground, and everything below applies to that kind of add-on.
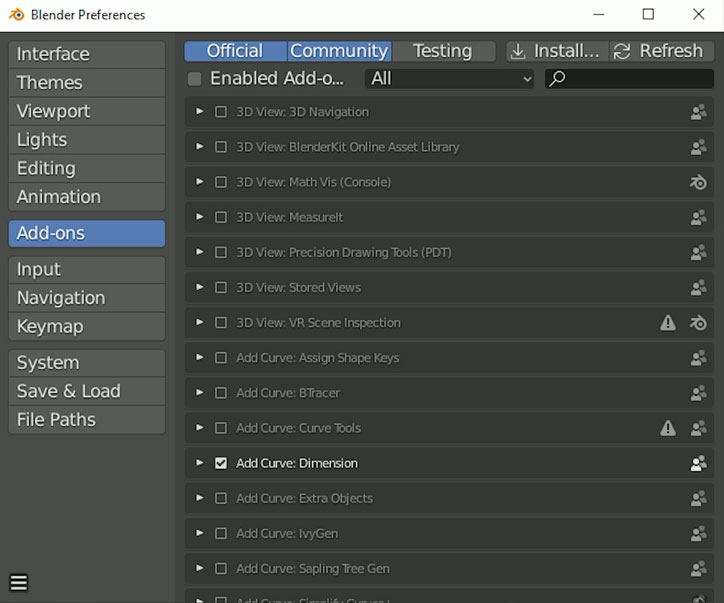
Once you have the add-on file (usually a single .py file or a zip), installing it is quick. On current Blender:
The add-on installs instantly and shows up in the list, usually already enabled. If it is not, tick its checkbox to turn it on.
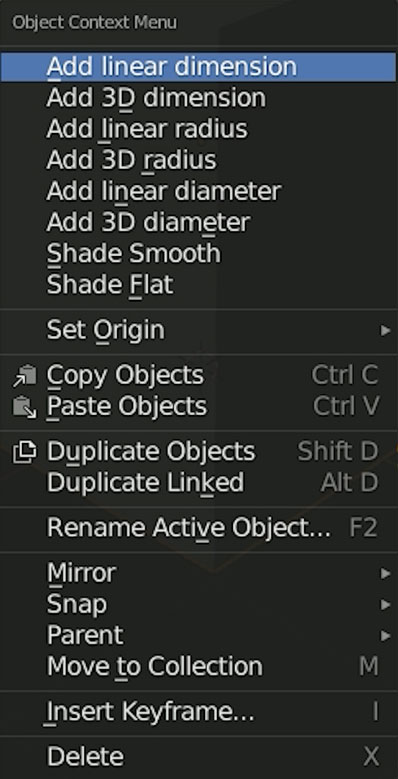
With the add-on enabled, the workflow is a quick mode dance:
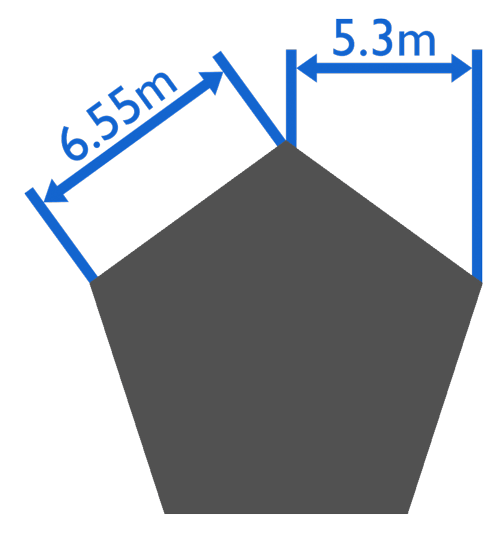
The dimension appears between your two vertices. The add-on can also add diameter dimensions, angular dimensions, and notes (from a single selected vertex). One important distinction: linear dimensions always sit parallel to the X axis regardless of the edge's orientation, while 3D dimensions always sit perpendicular to the edge. That matters, because a linear dimension on an angled edge reports the wrong length. The pentagon in the image below shows the difference.
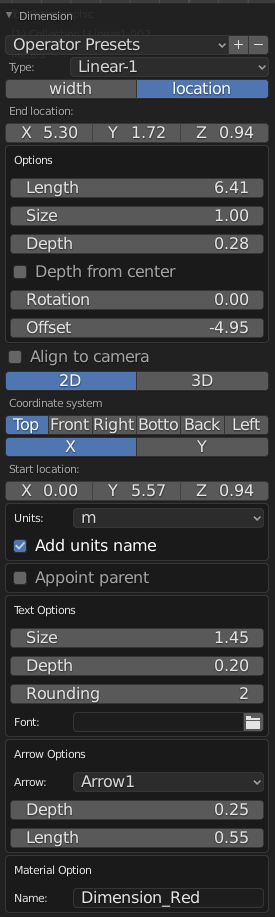
Right after you place a dimension, an options panel appears in the bottom-left of the viewport. If it closes, click the "dimensions" box in that corner to bring it back. There are a lot of knobs here, and these are the ones worth knowing:
One to skip: Align to camera. It occasionally throws an error, so I leave it off. Handily, once you style one dimension, the next one you add inherits those settings automatically, so you are not re-configuring every time.
This is not SketchUp's Dimensions, and a few limits are worth planning around:

Not built in. Blender has no native tool that matches SketchUp's Dimensions, so you add one with an add-on. The free MeasureIt add-on, now on Blender's official Extensions platform, is the mainstream option today.
Open Edit then Preferences, click the Add-ons tab, then use Install from Disk (the dropdown arrow in the top-right) and pick the add-on file, or drag the zip into Blender. On Blender 2.8 through 4.1 it was a plain Install button. The add-on then appears in the list, usually already enabled.
With a dimension add-on enabled, select two vertices in edit mode with Shift+click, press Tab to object mode, right-click the object, and choose Add linear dimension from the context menu. The dimension appears between the two vertices.
A linear dimension always sits parallel to the X axis regardless of the edge, while a 3D dimension sits perpendicular to the edge. On an angled edge, a linear dimension reports the wrong length, so use a 3D dimension for the true measurement.
Dimensions only render solid in Material Preview or Render Preview shading. Switch the viewport to Material Preview and they appear. Also remember they do not auto-update, so add them to finished work rather than as you model.
A dimension add-on does not fully replace SketchUp's Dimensions, mostly because it will not update itself when the model changes. But the sheer depth of styling, presets, coordinate systems for blueprints, custom fonts, and arrow control, more than makes up for it on finished drawings. And now you know how to install any add-on, which opens up a huge world of Blender extensions.
Next in the series we finally add some color: basic materials and painting, and meeting the one node you will use more than any other.
Disclosure: This post contains affiliate links. As an Amazon Associate I earn from qualifying purchases, at no extra cost to you. CK Tech Check is 100% ad-free: no banner ads, no ad tracking. Affiliate links like these and my YouTube channel are what keep the site running.