SketchUp snaps constantly and invisibly. Blender's snapping is more powerful but you turn it on deliberately. Part two covers edit mode, selecting geometry, and Blender's full snapping system.

Editor's note (July 2026): Written for Blender 2.8, and everything here still applies in current Blender (4.x and 5.x). Tab still toggles edit mode, 1 / 2 / 3 still pick vertex, edge, and face selection, and the snapping magnet plus Shift+Tab work exactly as shown. New to the series? Start with Part 1 (navigation and the basics) first.
Press Tab to drop into edit mode, where you reshape geometry instead of whole objects. Switch what you grab with 1 for vertices, 2 for edges, 3 for faces. Snapping is off by default: click the magnet icon or press Shift+Tab to enable it, then pick what to snap to. Far more control than SketchUp, once you flip it on.
Tab, then 1/2/3, then the magnet.SketchUp's snapping, its inference engine, runs the whole time and mostly stays out of your way. Blender's is more capable but works differently: you switch it on when you want it and tell it exactly what to snap to. Before that makes sense, though, you need two things from Part 1's world: how to get into edit mode, and how to select the piece of geometry you actually want to move. This lesson covers both, then snapping itself. If you have not been through Part 1 yet, do that first, because this builds directly on it.
Everything starts in Object Mode, where you move, rotate, and scale whole objects. To change the actual geometry, the vertices, edges, and faces, you go into Edit Mode. A helpful way to think about it if you are coming from SketchUp: every object you add in Blender behaves like a component that is automatically grouped. Object mode handles the group, edit mode opens it up.
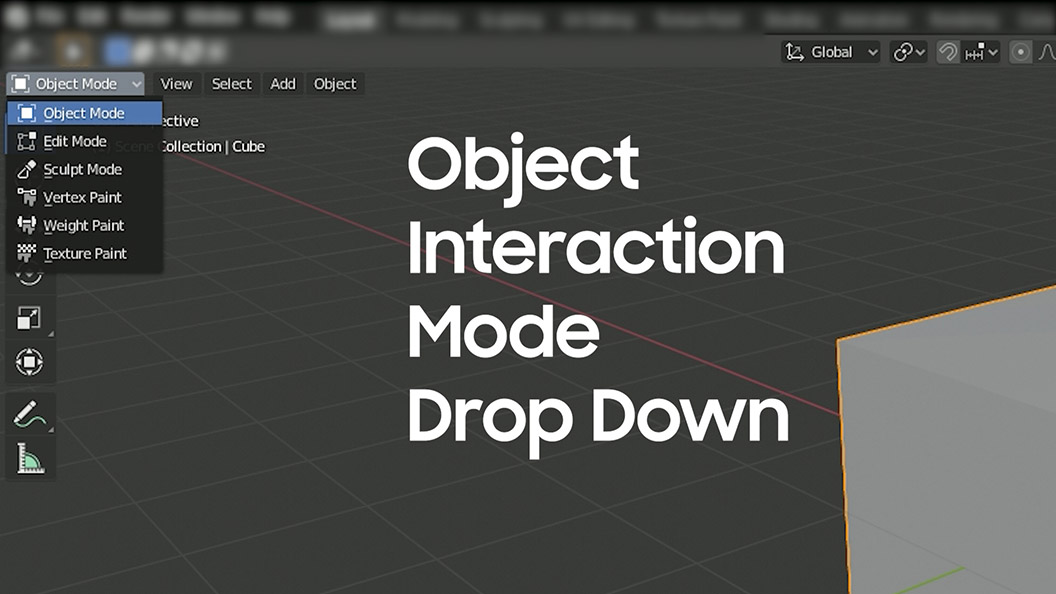
The switch is one key: press Tab to toggle between the two. It is a straight toggle, so Tab again takes you back out. If you prefer menus, select the object first, then use the mode dropdown in the top-left corner, labelled object interaction mode, and pick Edit Mode. The Outliner on the right lists every object in the scene so you can keep things organized.
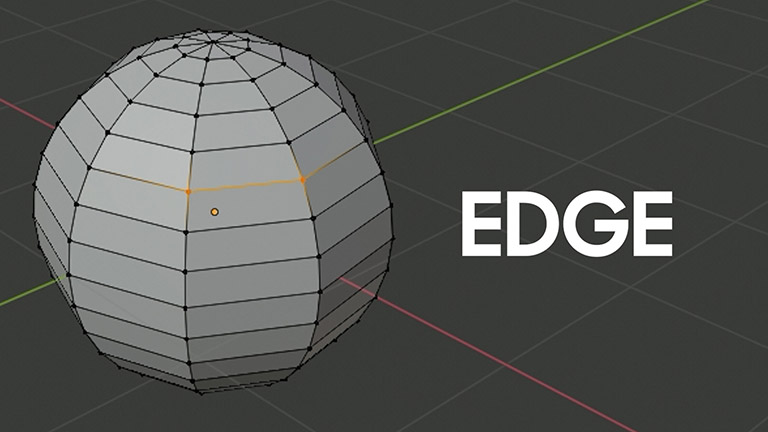
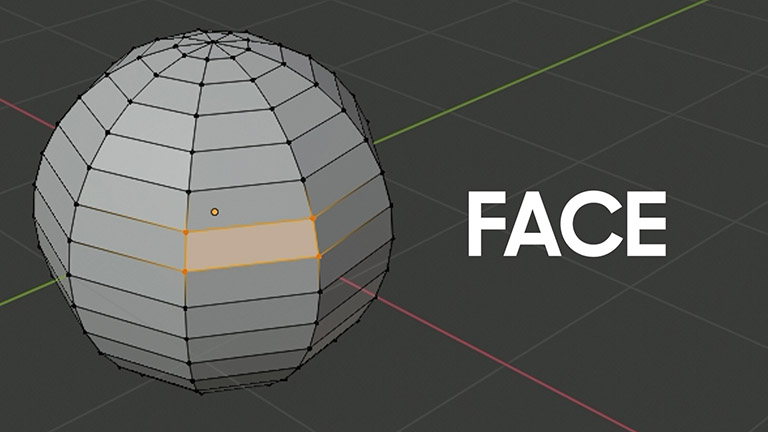
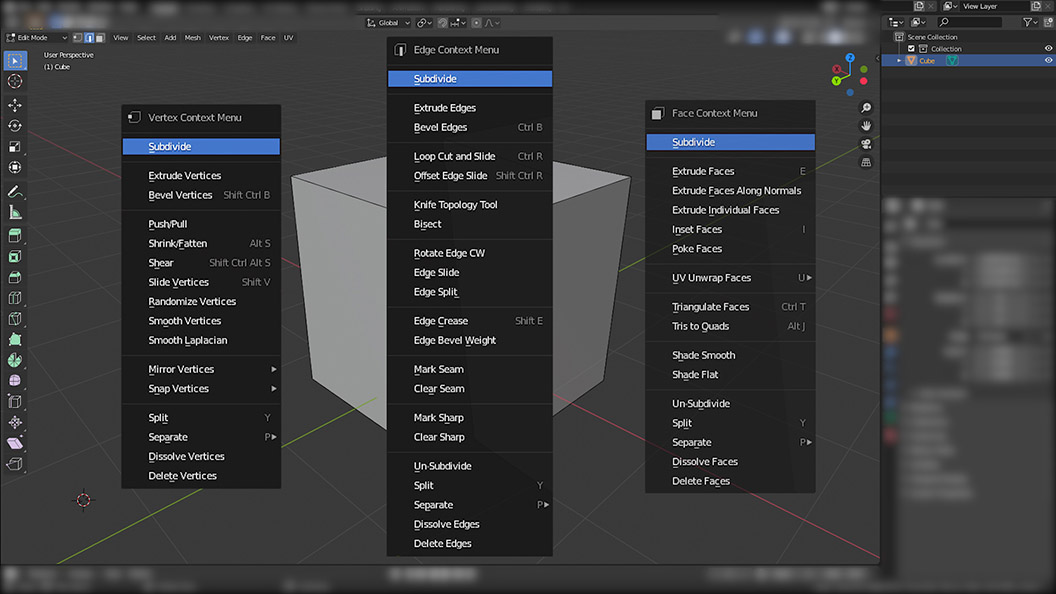
Blender geometry is built from the same three parts SketchUp uses: vertices (the endpoints), edges (the lines between them), and faces (the surfaces). In edit mode you choose which of the three you are selecting, and there is a number key for each:
You can also click the three little icons in the top-left of the header, or use the selection context menu, but the number keys are far faster once they stick.


Now the reason we are here. Blender's snapping does not run all the time like SketchUp's, so first you turn it on: click the magnet icon in the top-center of the header, or press Shift+Tab to toggle it. With it on, a small dropdown next to the magnet controls everything about how it behaves.
While you are dragging, a yellow circle marks the snap target so you can see exactly where it will land. And snapping stacks with everything from Part 1: press an axis key like Z mid-move to snap along only that axis, which is perfect for sliding an edge to a target while staying dead level. If you prefer snapping off most of the time, leave the magnet off and hold Ctrl to snap only for the current move.

Select the object and press Tab. It toggles between Object Mode, where you move whole objects, and Edit Mode, where you reshape the geometry. You can also use the mode dropdown in the top-left corner.
In edit mode, press 1 for vertex selection, 2 for edge selection, and 3 for face selection. The same three modes are available as icons in the top-left of the header.
Click the magnet icon in the top-center of the header, or press Shift + Tab to toggle it. Unlike SketchUp, Blender snapping is off by default, so you enable it deliberately and choose what to snap to.
Yes. The snapping dropdown lets you target vertices, edges, faces, edge centers, perpendicular points, increments, or the volume center. Hold Shift while clicking to enable more than one target at once.
Start the move, then press the axis key, for example Z, while snapping is on. The element snaps to your target but only along that axis, so you can slide an edge to a point while keeping it level.
Snapping is one of those features that clicks with a bit of play. Toggle it on, try each snap-to target, mix in an axis constraint, and switch between closest and center snapping until the behavior feels predictable. It is genuinely more flexible than SketchUp's inference once you are comfortable steering it.
That is Part 2. Next up in the series is the one every SketchUp user asks about: where did Push/Pull go, and how you get the same result in Blender.
Disclosure: This post contains affiliate links. As an Amazon Associate I earn from qualifying purchases, at no extra cost to you. CK Tech Check is 100% ad-free: no banner ads, no ad tracking. Affiliate links like these and my YouTube channel are what keep the site running.