Blender looks like an artist's tool, but it is fully capable of millimeter-accurate work. Part four covers showing edge lengths, setting your units, typing exact sizes, and the Measure tool.
Editor's note (July 2026): Written for Blender 2.8, and every measurement feature here still works the same in current Blender (4.x and 5.x). The Edge Length overlay, the Scene unit settings, Save Startup File, and the Measure tool are all unchanged. New to the series? Start with Part 1, and this lesson builds on Part 3.
Turn on the Edge Length overlay in edit mode to see any edge's size. Set your unit system under Scene Properties (metric, imperial, and a base length so a bolt reads in millimeters, not meters). Type exact values during a move or extrude, just like SketchUp. And use the Measure tool for tape-measure distances, angles, and thickness. Save it all as your startup file so it is there every time.
Blender does precision. You just switch it on.When I work on 3D-print projects, where a millimeter matters, I basically always keep edge lengths on screen. To switch them on, drop into Edit Mode, open the Overlays menu in the top-right corner of the viewport, and near the bottom you will find a group of checkboxes for measurement display. Tick Edge Length.
Now selecting any edge shows its length. Select a whole face and it shows the length of every edge around it, and you can add more with Shift+click. The numbers update live as you reshape geometry, so you always know the real size of what you are building.

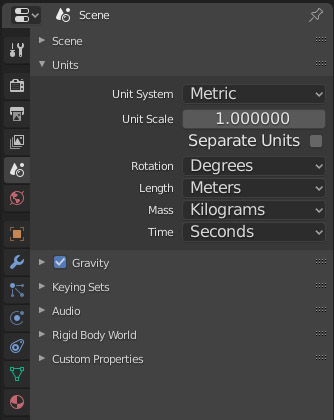
Open the Scene Properties tab in the Properties panel (bottom-right by default) and look under Units. There is more here than a simple metric-or-imperial switch, and it is worth setting up once:
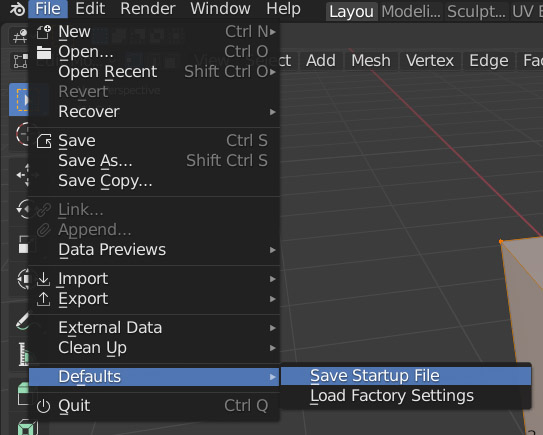
Setting units on every new project gets old fast, so bake them in. Go to File, then under Defaults choose Save Startup File, and confirm. From now on every new project opens with your units, your unit scale, and any other tweaks (like clip start) already set. It is the single best five-second habit for precision work.
This is the one that feels most like SketchUp. During any transform, a grab, rotate, or extrude, just start typing a number. As you type, the value appears in the top-left corner above the toolbar, and Blender interprets it against your unit system and base length. So mid-extrude you can type 25 and, with millimeters as your base unit, pull exactly 25mm. Press Enter or left-click to commit. Combined with axis constraints from Part 1, that is precise modeling with almost no menus.
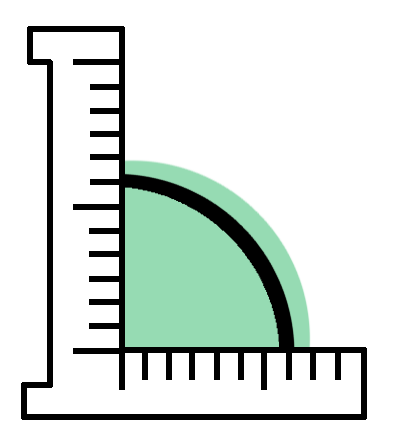
For checking distances without changing anything, Blender has a Measure tool in the left toolbar, its own tape measure. Click and drag from one point to another to read the distance, and hold Ctrl to snap the ends to vertices or edges for an exact reading.
You can leave as many measurements on the model as you like, but they only show while the Measure tool itself is active, so they never clutter your normal working view.
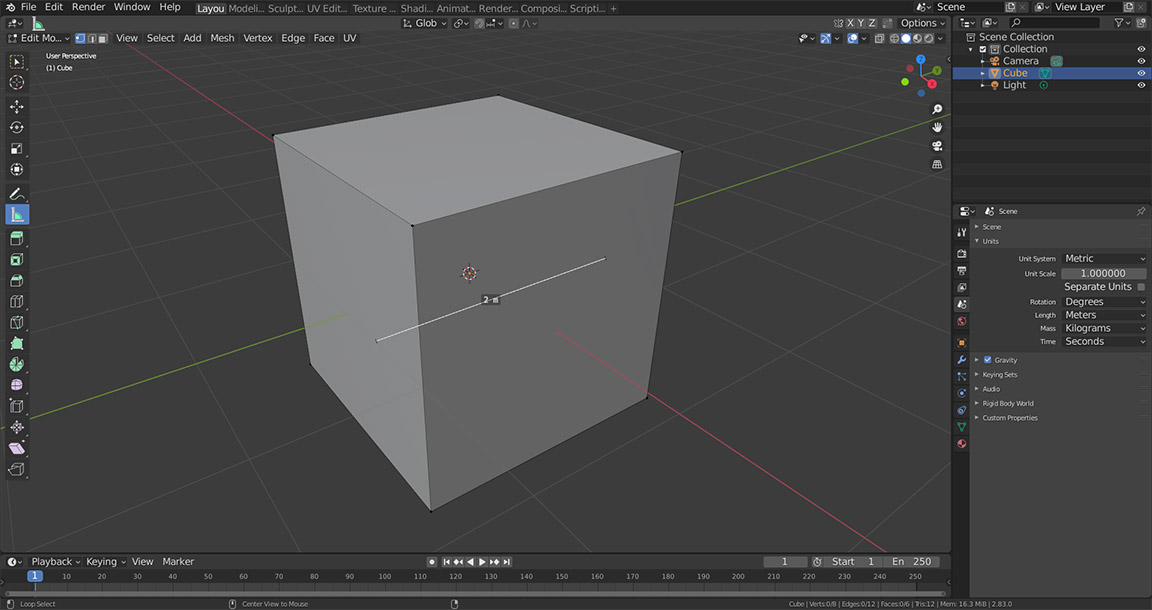
In edit mode, open the Overlays menu in the top-right of the viewport and tick Edge Length. Then any edge you select shows its length, and a selected face shows the length of all its edges. The numbers update live as you edit.
Open Scene Properties, find the Units section, and set the Unit System to Metric and the Length to Millimeters. Setting a sensible base length keeps small parts readable, so a bolt shows as 2.3mm instead of 0.0023m.
Yes. During any move, rotate, or extrude, just start typing a number and it appears in the top-left corner. Blender reads it against your units, so you can extrude exactly 25mm, then press Enter to commit.
Use the Measure tool in the left toolbar. Click and drag from one point to another to read the distance, holding Ctrl to snap to vertices or edges. Click a line's midpoint to measure an angle, or Shift plus right-click to measure thickness.
Set up your units and options, then go to File, Defaults, Save Startup File and confirm. Every new project will open with those settings already applied, so you never reconfigure units again.
Between the overlay, proper units, typed input, and the Measure tool, Blender handles precise work as well as anything, once you know where the settings live. Set them once, save your startup file, and it is precision from then on.
I know a lot of you are itching for one of SketchUp's best tools: Dimensions, the kind that annotate a drawing. Blender has no built-in match, but we can get close with a custom add-on. That, plus how to install add-ons in the first place, is Part 4.5.
Disclosure: This post contains affiliate links. As an Amazon Associate I earn from qualifying purchases, at no extra cost to you. CK Tech Check is 100% ad-free: no banner ads, no ad tracking. Affiliate links like these and my YouTube channel are what keep the site running.