Intro
Hey everyone Patrik CK here with a new series aimed at helping those of you looking to make the switch from SketchUp to Blender but who may be worried that learning a whole new program from scratch may be just too daunting. I mean just looking at the interface of Blender is enough to scare off some peeps.
I understand, after 15 plus years of working in SketchUp there was definitely a learning curve for me to overcome trying to get used to a new environment. At first, I kept expecting things to be or act the same as they did in SketchUp but in time I learned my way around and have come to appreciate just how powerful Blender is. I have no ill will against SketchUp, it got me started in the world of 3D CAD and it’s been a loyal companion for that time but recent changes to both programs have led me to realize that it was time to move on and upgrade.

Full Guide
Watch the overview video or keep reading the full article below
Table of Contents
Why Make the Move
In case you’re still not sure why you should make the move to Blender, here are the reasons why I did.
- First off Blender is 100% free, there is no Pro version or any limitations of its capabilities just because it’s free.
- Blender simply has more advanced features out of the box, from advanced lighting to realistic PBR or physics-based rendered materials, smooth topology, sculpting, integrated physics simulators like gravity, cloth, and wind just to name a few.
- Blender can handle far more geometry at one time than SketchUp, I’m talking about into the millions on an even a basic computer.
- For me the animation system is simply the next level, you can keyframe animate almost every element, value, or setting.
- Support for exporting into many different file formats is included, STL among them, which is key for 3D printing projects.
- There is a massive community that’s constantly growing where you can learn new tricks, download assets, materials, add-ons, etc.
- There’s so much more to talk about, but to put it simply, it’s freaking amazing, even if you don’t plan on using all the advanced features it’s nice to know it’s there if you ever want to experiment.
I will make some assumptions on your level of knowledge when it comes to CAD terminology, such as what orbiting/panning/zooming relates to and what the 3D axes are, things like that.
Getting Started
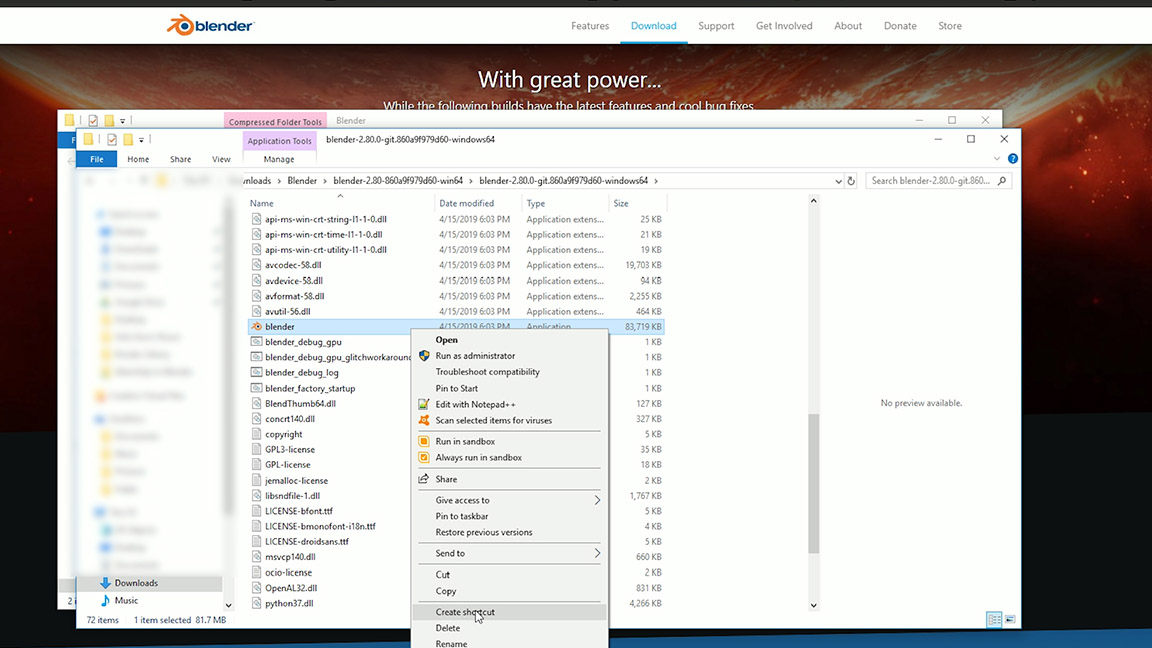
Let’s get started. I’m using Blender 2.8 which, at the time of this script, is still technically in Beta but it may as well be a finished product in my eyes not to mention Blender 2.78 will be a huge step backward especially if you’ve never used Blender before. Link to download Blender 2.8 will be below. Again at this time when you download the program files, you will have to manually extract the assets, navigate to the root file, and open the program by double-clicking the Blender icon here. Go ahead and create a shortcut for easy access in the future. Once 2.8 goes live there’ll be an executable that does everything for you.
Blog Update - Installing Blender
With the official release of Blender 2.8+ it's never been easier to get started. If you have a Steam account you can install Blender directly to you library for free. Steam will keep it up to date automatically.
Workspace / 3D space navigation
Like in SketchUp short cuts are the most efficient way to get work done but there are buttons and menus to accomplish each function as well. I’ll try to cover each way as much as possible but I would advise learning the shortcuts in the long run.
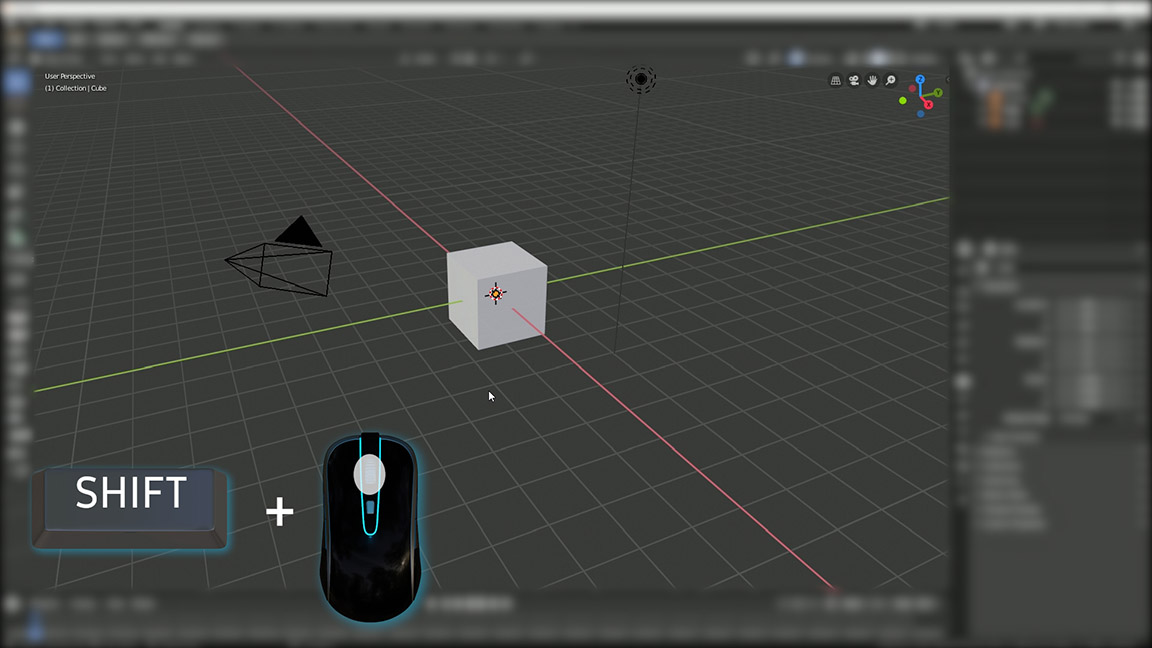
Let’s start out with the interface. Obviously Blender has a lot more going on at first glance than SketchUp but for now lets just focus on the 3D workspace you’ll see some familiar things, like the main 3D axis’s that goes on to infinity, minus the a visual Z-axis. A starting cube that may as well be the same as the figure at the start of every SketchUp project in that it’s the first thing to get deleted. There is also a grid floor and a 3D cursor that we’ll talk about more soon. You also get a camera object and a default light source. We’ll ignore these last two for now.
A few quick navigation points, panning is similar in both programs. The most common way to pan is to hold down the left or right Shift key and the middle mouse button at the same time then moving your mouse. If you don’t have a middle mouse button you can grab this hand icon in the top right corner and while holding down left mouse button pan all you want, what’s nice here is that no matter how far you move your mouse you’ll keep panning, there’s no limit when you reach the edge of the screen like in SketchUp.
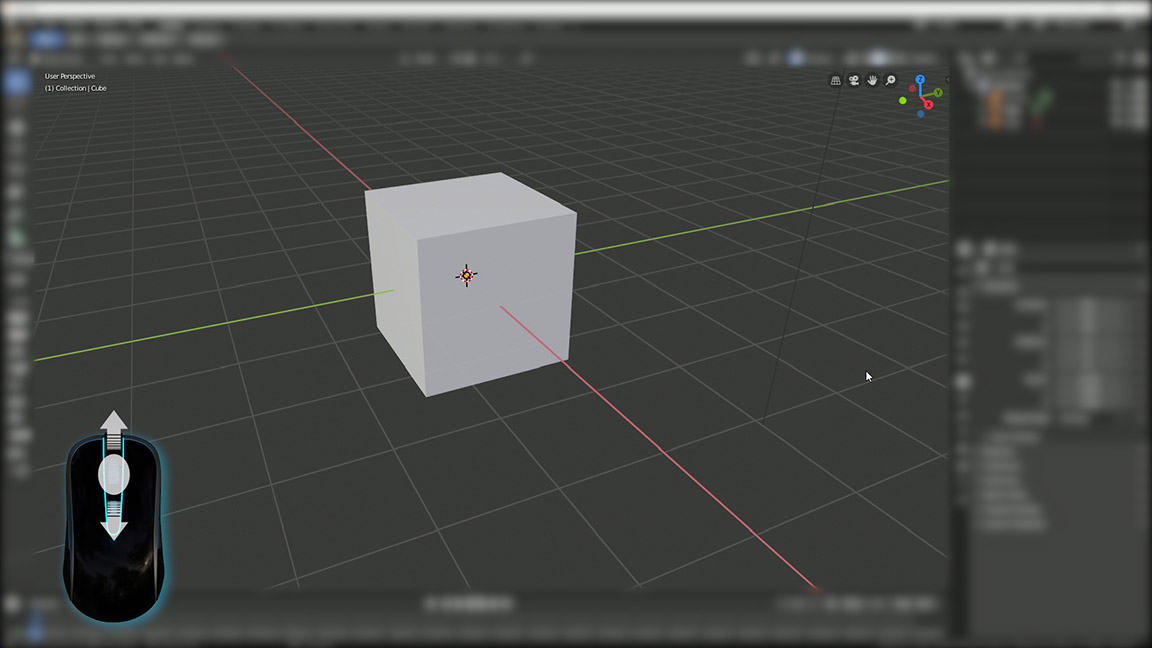
Now the basic zooming in and out function does behave a little differently between the programs. Unlike in SketchUp, Blender does not zoom to wherever the mouse cursor is (this can be changed but not in this video), it only zooms to the center of the current view. Like in SketchUp zooming is achieved by scrolling up and down with the middle mouse wheel. Again without a middle mouse wheel, you can grab the magnifying glass in the top right corner.
To orbit around a single point simply hold down the middle mouse button. This is just like it is in SketchUp, if you don’t have a middle mouse button, navigate to this 3D axis in the top right corner and hold down the left mouse button to orbit infinitely. Again the note of a difference here is that the point you orbit is fixed with the view. You don’t orbit around the mouse cursor like in SketchUp.
Quick tip, to zoom to and center a specific object or objects, select that object first or to select multiple objects hold SHIFT while clicking each object with the left mouse button, when you do the active objects will have an orange outline by default, then press the period key on your number pad. This will zoom the view to the extents of the object or objects and set the point of orbit at the center mass. This is really helpful when you need to move from one object to another especially if they are different sizes. Click in empty space to deselect everything or hit the A key twice.
Moving Objects
Moving objects in Blender is similar to SketchUp except for the axis snapping feature which does take one more step to do. To move objects first select one or hold Shift to select multiple. There are two ways to accomplish a move. The first is done by selecting the Move button in the left toolbar when you do a 3D axis will appear at the center of the object. You can either hold the left mouse button on the ends of the arrows to move along the selected axis or hold down anywhere else to move freely. You must hold down the left mouse button until you position the object where you want, while you are moving you can click the right mouse button to reset the object back to its original position.
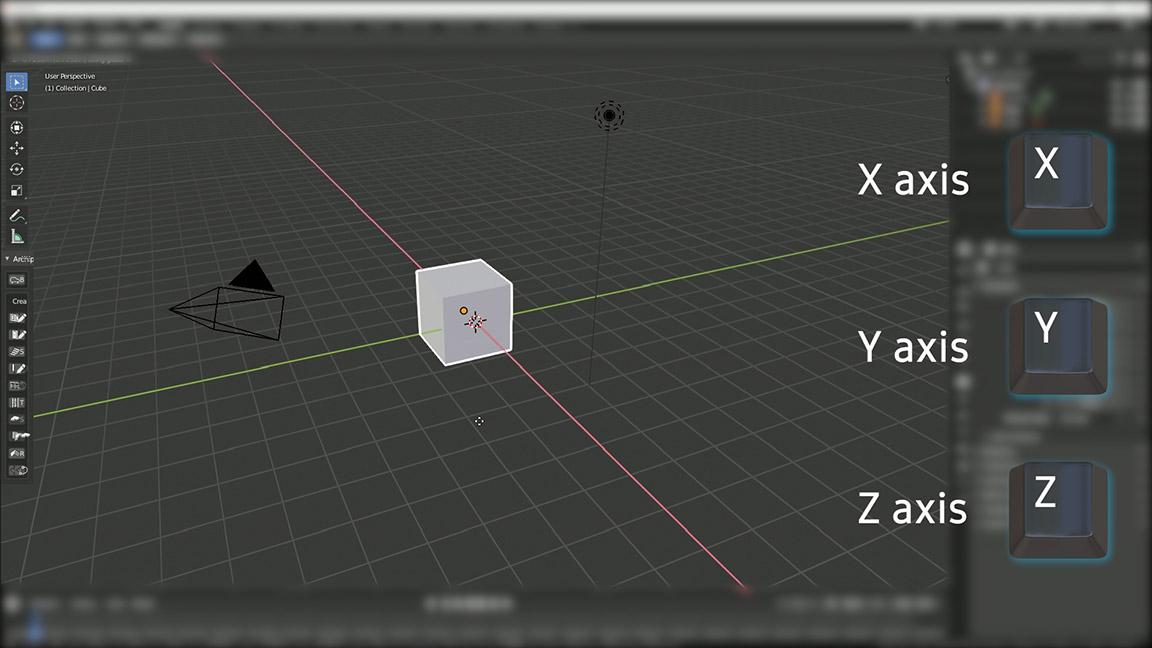
The shortcut to Move is G, the only difference is that the 3D axis will not appear on the object instead the object outline will change to a pale blue. You will have to choose which axis to move along by hitting the corresponding keyboard shortcut, X for the X axis, Y for the Y axis, and Z for the Z axis. If you don’t choose to snap to an axis you will move freely. When using these shortcuts you don’t have to hold down the key just left mouse click when you are in position or right mouse click to reset the object back to its original position.
Whichever method you choose when you are not snapped along an axis the movement of the object is parallel to the plane of the viewport which can be a little disorientating if you don’t realize it’s happening. To give a better demonstration of this we can move into one of the preset views, just like in SketchUp, there are the standard Top, Bottom, Front, Back, Right, and Left views which can be accessed using the View menu then the Viewport submenu or by using the number pad. Where Top is 7, Bottom is CTRL + 7, Front is 1, Back is CTRL + 1, Right is 3, and Left is CTRL + 3.
If you free move an object in one of these views you’ll see that it only moves in conjunction with the view. It’s easy to see this in action here but when you are looking at a scene from an iso angle it can be a little difficult to anticipate the final position of the object in the end. This is where global snapping comes into play, more on that later.
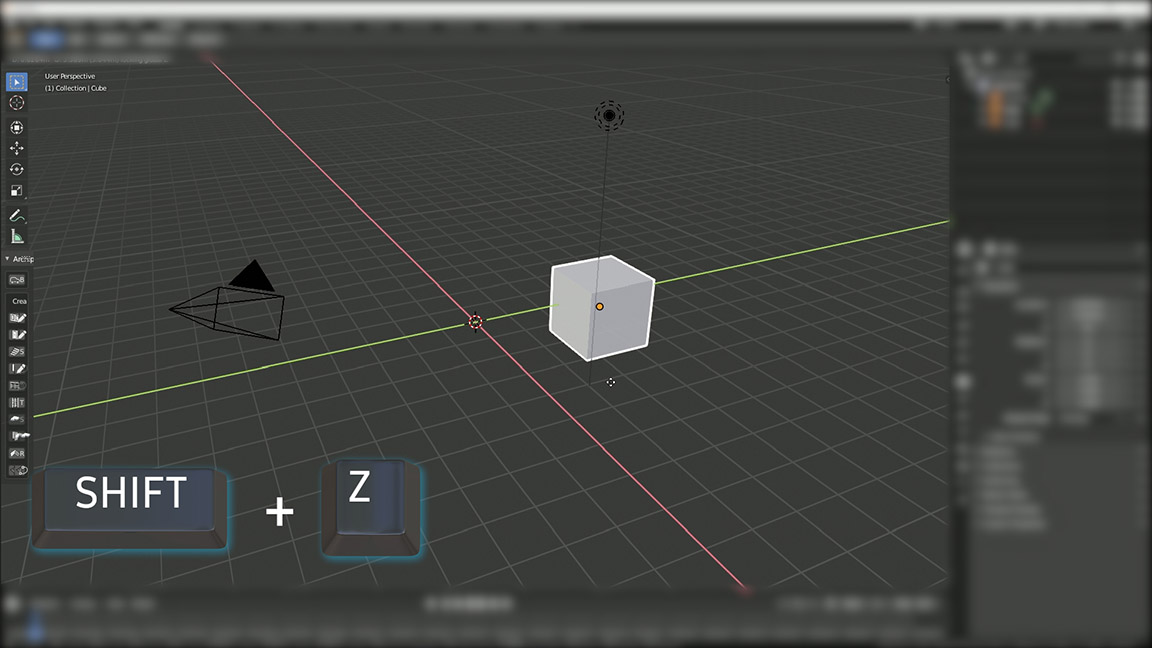
One cool feature of the move function is the ability to move along two axes at the same time. To do this select an object or objects then select move by hitting G then hold SHIFT and press the key for the axis you don’t want to move long. For example if you want to move along the X and Y axis but not the Z axis press G, hold SHIFT + Z. The axes you will move along will be highlighted. Use the same process for any combination of movement.
Just in case you forget what these options are you can always refer to the options row at the bottom of the window here. Options for almost any features will be shown in this location.
Adding primitives
To start off most any project you first add a primitive object and build off of it. Let’s first delete the opening cube, select it then either press the DEL key, or X than ENTER, or under the Object Menu select Delete. To Undo an action hit CTRL + Z or under the Edit menu hit Undo.
A big difference between SketchUp and Blender is that in Blender the ‘3D Cursor’, this little guy here dictates where objects you add are placed. Yes this does seem limited compared to the, ‘add where ever the mouse is’ style in SketchUp but there is a reason for this kind of system that will become more apparent as we delve a little deeper. In the meantime just know that whatever element you add will appear wherever the cursor is located. We’ll talk about moving the cursor around later.
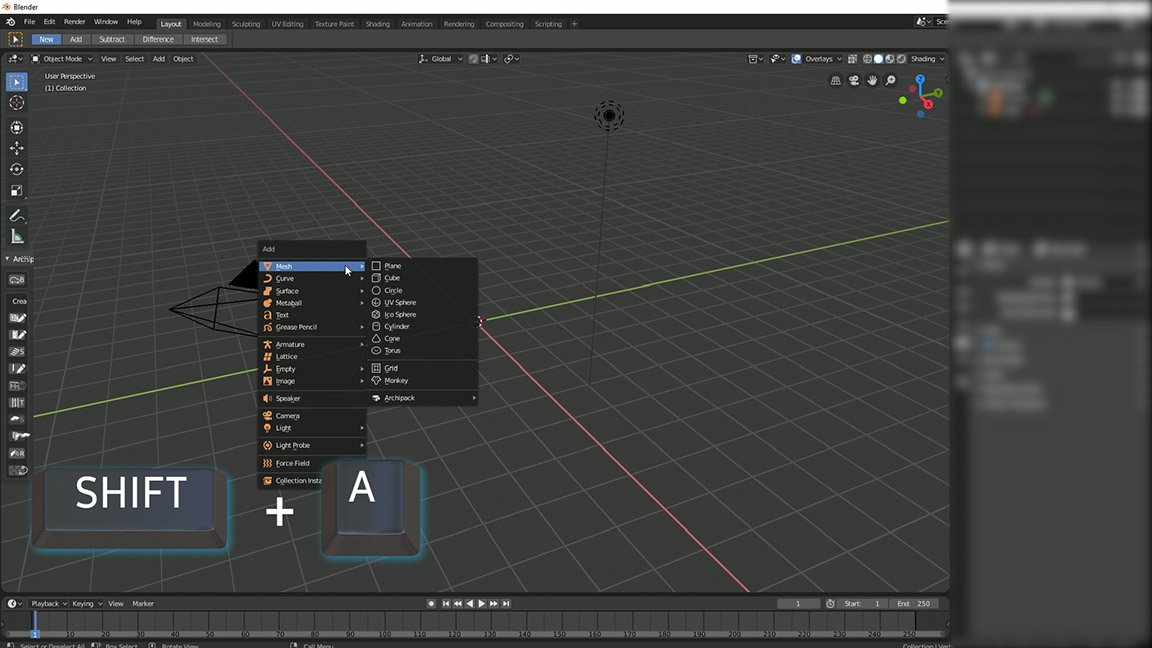
In Blender you have tons of primitives to choose from. By clicking ‘Add’ in the left corner of the viewport you can see all the options available to put into your scene. For now though we are just going to focus on the options under the ‘Mesh’ submenu. Unlike in SketchUp you can choose between several 2D and 3D elements to start off with.
The shortcut to bring up the ‘Add’ menu is Shift + A.
To place a primitive into the scene bring up the Add menu, navigate to the item and simply select it, in this case, we will go with a UV Sphere. It will instantly appear at the 3D cursor, at the same a time an Add UV Sphere window will appear in the bottom left. This window has several different options that relate to the object you added. In this case, you can change the number of Segments, Rings, and the Radius which is specific to UV Spheres, you can also adjust the Location and Rotation which is common for most objects.
Inputs like these can be changed in three different ways, either click in them and type a value, click the left or right arrows to increase and decrease respectively, or hover over the input and hold down the left mouse button to ‘slide’ the value quickly decreasing to the left and increasing to the right.

A cool note here, you can do math in most inputs of this type in Blender. If I type 2 + 2 and hit enter it will output 4. This is very helpful in many cases. For instance, if you know the diameter of the object but are too lazy to do the math in your head for the radius just type in the diameter and divide it by two, 7 / 2 = 3.5 and done.
An important thing to remember, this window is only present right after you add the object if you deselect it the window will not be accessible again.
Part 1 Close
This is it for Part 1, I know that these functions are really basic but like I said at the beginning practicing the mundane stuff will help alleviate some of the frustration as you move into learning the more advanced features of Blender. So I would spend some time practicing how to navigate the workspace, adding primitives, changing their options, zooming between objects, selecting one and multiple objects, moving them around the 3D space, and finally deleting objects. This will all become second nature quickly.