
How to Connect the VITURE Luma Pro to a Desktop PC
Laptops get USB-C Alt Mode and just work. Desktops are a science project. Here is the exact cable-and-coupler chain that feeds a clean signal into the Luma Pro, plus an honest troubleshooting log for the AMD systems that still fight it.
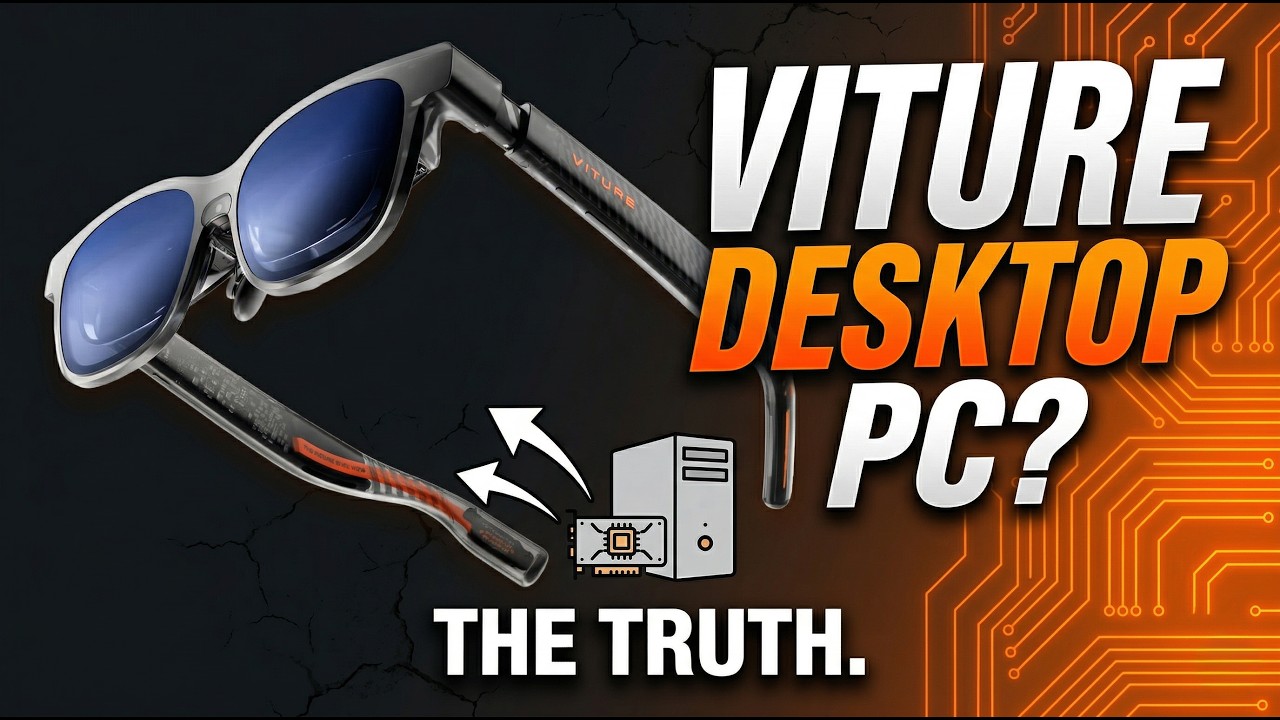
Plays via YouTube. Google may set cookies when the player loads. Privacy policy
The short version
On a desktop the Luma Pro needs two inexpensive parts working together: a DisplayPort-to-USB-C cable to pull a real video signal off your GPU, and a 40Gbps female-to-female USB-C coupler to bridge that cable to VITURE's proprietary magnetic cable. On Intel systems the setup is close to flawless. On AMD systems, SpaceWalker's virtual screens currently refuse to launch, and this guide documents exactly how far the troubleshooting goes.
Verdict: two parts, both requiredWhy plug-and-play fails on a desktop
Connecting the VITURE Luma Pro to a desktop is, honestly, a bit of a science project. On a laptop with USB-C Alt Mode these glasses are a dream. Move to a desktop and you hit a wall: most consumer GPUs and motherboards do not output a DisplayPort signal over their USB-C ports, if they even have one.
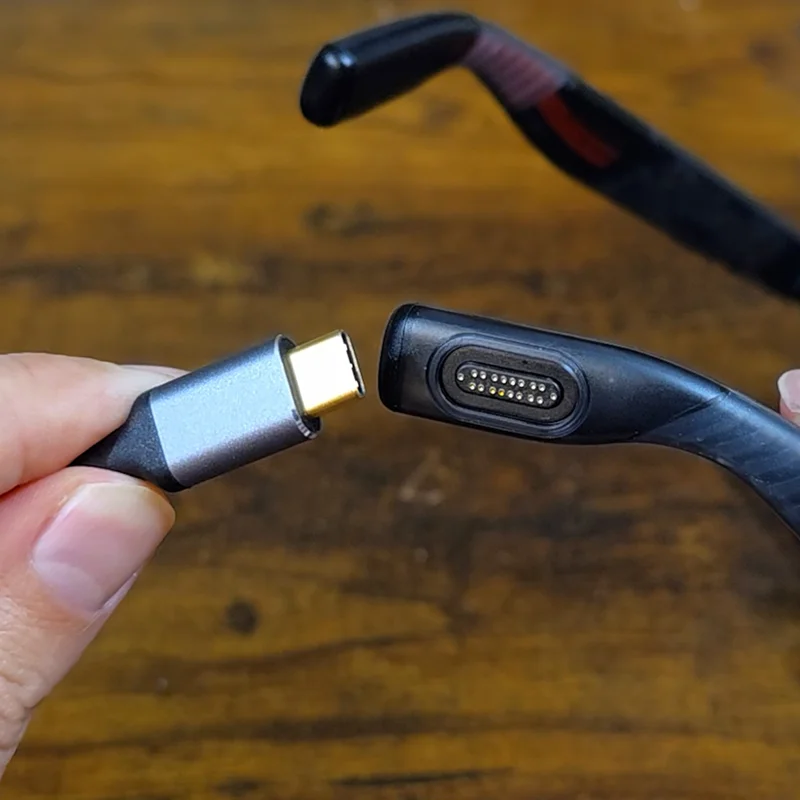
With my old Xreal glasses, a single easy-to-find adapter cable did the trick. The Luma Pro is far more finicky about signal integrity. VITURE also uses a proprietary magnetic power-and-video cable, so you cannot simply swap the cable out. You have to feed a high-quality, high-bandwidth signal into that specific proprietary link.
Disclosure: This post contains affiliate links. As an Amazon Associate I earn from qualifying purchases, at no extra cost to you.
The two-part connection kit
Neither part works alone. The cable creates a proper signal off your GPU; the coupler delivers that signal into the glasses. Budget for both, because this is the combination that actually gets you a picture.
The signal source
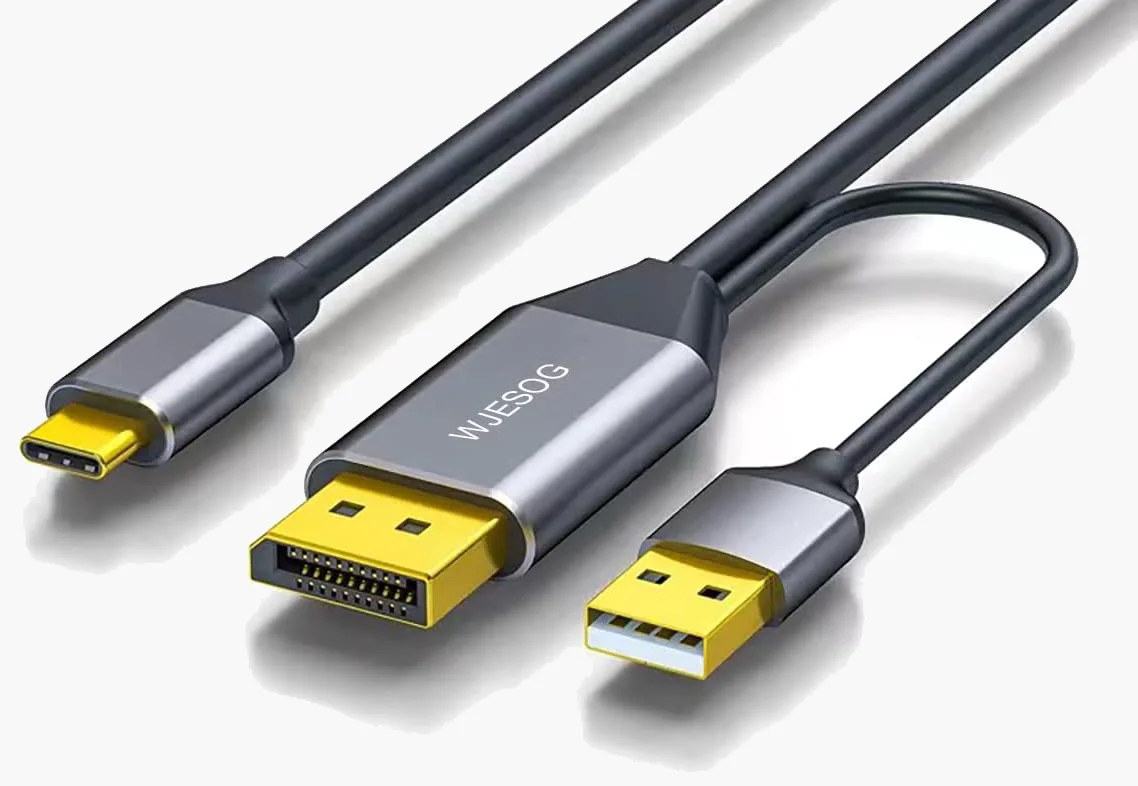
WJESOG DisplayPort to USB-C Cable
Pulls a true video signal off your GPU's DisplayPort, draws power, and creates a data link from a USB 3.0 port. This is the same cable that worked with my old Xreals.
The critical bridge
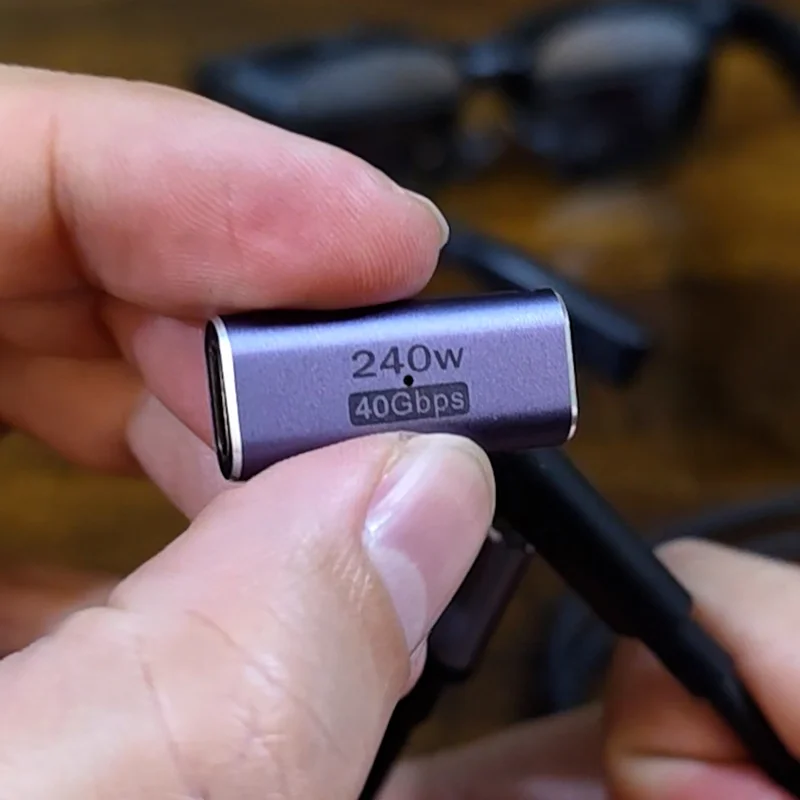
AuviPal 240W USB-C Coupler
A female-to-female coupler joins the cable's male USB-C to VITURE's male cable. Get one rated for Thunderbolt 4, so it passes video, data, and power together instead of dropping the data.
Think of it as one kit: the cable makes the signal, the coupler carries it the last inch.
The Frankenstein rig that actually works
To bridge the gap between the GPU's DisplayPort and the Luma Pro's USB-C requirement, I had to architect a specific chain of components. The heart of the solution is that WJESOG cable, which pulls the video signal from your GPU's DisplayPort, draws power, and creates a data link from a USB 3.0 port.
Because the WJESOG cable ends in a male USB-C and the VITURE cable is also male, you need a USB-C female-to-female coupler. This is the critical middle-man where most people run into trouble. Through my testing, you want one that at least claims the Thunderbolt 3 or 4 40-gig spec, so it can handle the combined bandwidth of video, data, and power. There are dozens of these couplers out there. I took a stab in the dark with one from AuviPal that had fairly decent reviews and a lower return rate. I use the word claims very loosely here.
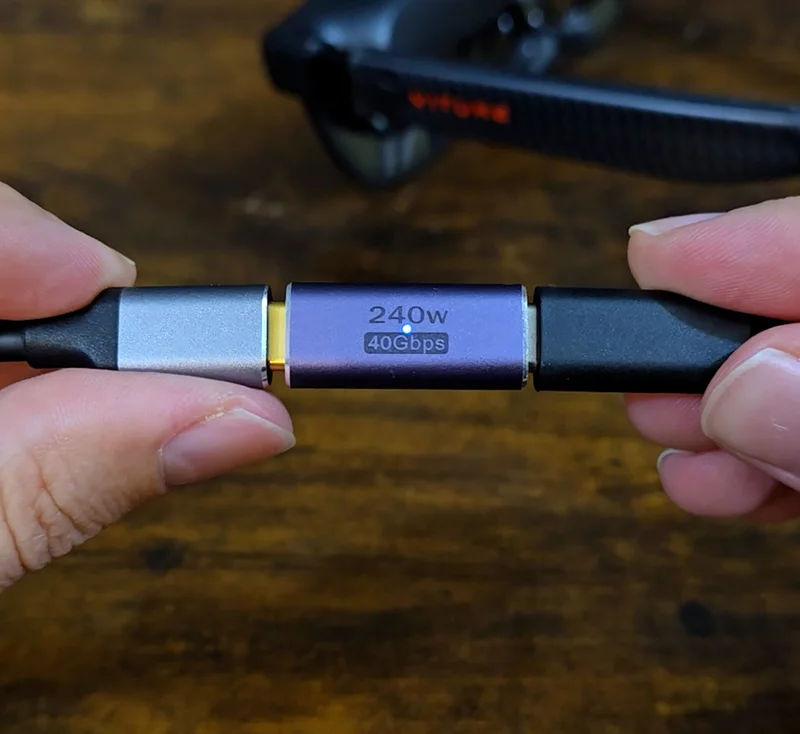
These couplers are often directional, even though both ends are USB-C. I lost a good chunk of time chasing a dead signal only to realize I just had to flip the coupler. Watch the LED: if it is not lit, flip the connector over. Mark the correct side of the coupler and cable so you do not have to guess every time you plug in.
I did find a single DisplayPort and USB-A to female USB-C version, but I already know it will not work before buying it, which is unfortunate.
The AMD mystery
This is where the project got complicated. I tested this hardware chain across four different systems I had access to. On the Intel builds, launching the SpaceWalker app was basically flawless: the glasses powered up, I launched SpaceWalker, and got into the virtual screens with no problem. Even my seven-year-old PC with a GTX 1070 ran swimmingly at 60Hz.
On my AMD machine and a friend's, the button to launch the virtual screen simply does not show up, even when using the exact same RTX 3080 GPU that one of the Intel machines had. I always got a display on the glasses, but never the virtual screens generated by SpaceWalker. The connection was also very unstable, disconnecting and reconnecting seemingly at random.
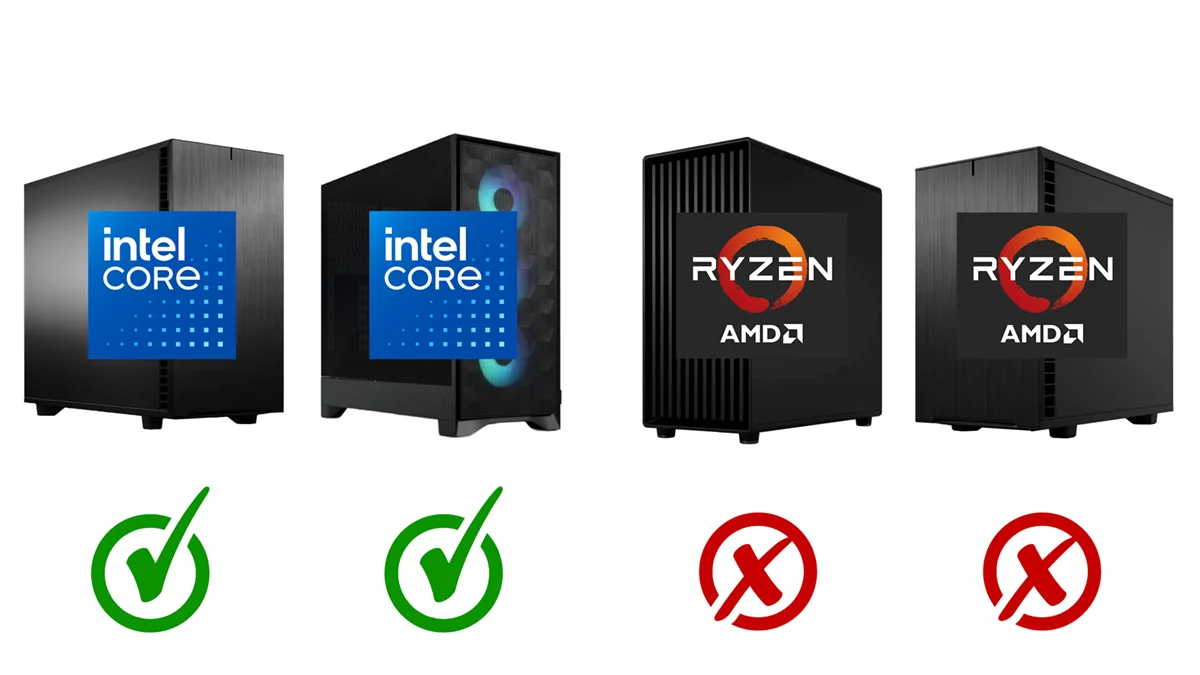
That sent me down a deep troubleshooting rabbit hole:
- Power distribution. I unplugged every other USB device to give the glasses the maximum available current.
- Power management. I disabled various Windows power settings so the USB ports would not go to sleep.
- The BIOS. I updated it, since newer versions often improve power distribution, a known issue for my specific AMD chipset. The update was successful but did not fix the connection.
- Ruled out the iGPU. My Ryzen 5900X has no integrated graphics, so it is not quietly talking to the wrong graphics interface.
- A host of other steps to no avail.
Interestingly, on the AMD systems SpaceWalker thinks it is running. The menu is accessible and I can even select and adjust the zoom settings, but of course nothing actually happens on the glasses. My best guess is a handshake issue specific to how certain AMD boards handle this data transfer. We have a video feed, but not the head-tracking data needed to produce the virtual screens.
A community hardware database
I wanted to build a database of which PC specs actually work, so we can all stop guessing. Readers have been submitting their results through a short Google form, and the table below is every submission so far. By pooling our data, we can start to see where the issue begins and ends.
Reader-submitted results
Thirteen reports, collected between 6 April and 2 August 2026. Five got SpaceWalker's virtual screens running, eight did not. Click any column heading to sort.
| Worked | Intel i7-12700KF | NVIDIA RTX 3070 Ti | ASUS Prime Z690-D4 | 596.02 | 3811 | Win 11 | Luma Ultra |
| Worked | Intel i9-10900K | NVIDIA RTX 5070 | MSI MPG Z490 Gaming Carbon | 596.49 | AMI 1.80 | Win 11 (Insider) | VITURE Beast |
| Worked | AMD Ryzen 5 7500F | NVIDIA RTX 5070 Ti | MSI B650 | 32.0.15.9186 | 1.O2 | Win 11 | Not given |
| Worked | AMD Ryzen 7 5700X | PowerColor RX 9070 XT | MSI MAG B550 Tomahawk | Adrenalin 26.5.1 | 7C91vAJ | Win 11 | Luma (Cyberpunk LE) |
| Worked † | AMD Ryzen 7 7800X | NVIDIA RTX 5070 Ti | ASUS Pro B650M-A | 591 | 1.L0 | Win 10 | Luma Ultra |
| Failed | AMD Ryzen 9 5900X | NVIDIA RTX 3080 Ti | Not given | Not given | Not given | Win 11 | Not given |
| Failed | AMD Ryzen 7 9800X3D | Aorus RTX 5070 Ti | X870E Aorus Pro Ice | 595.79 | FA | Win 11 | Not given |
| Failed | AMD Ryzen 9 9900X3D | AMD RX 9070 XT | B850 | Adrenalin 26.3.1 | F11a | Win 11 | Not given |
| Failed | AMD Ryzen 9 9900X | NVIDIA RTX 4070 | Gigabyte X870 Torus Elite | “Latest” | “Latest” | Win 11 | VITURE Pro XR |
| Failed | AMD Ryzen 9 7950X3D | Gigabyte RTX 4080 Super | NZXT N9 X870E | 610.88 | 4.10 | Win 11 | VITURE Beast |
| Failed | Ryzen 9 3090XT * | NVIDIA RTX 3090 | MSI MAG X570 Tomahawk | 610.62 | “Latest” | Win 11 | VITURE Pro XR |
| Failed | AMD Ryzen 7 5700X3D | AMD RX 6700 XT | Gigabyte B450M-DS3H | Adrenalin 25.10.43.19 | f67 | Win 11 | Luma Pro |
| Failed ‡ | AMD Ryzen 7 5800H | NVIDIA RTX 3070 (mobile) | Laptop, not specified | 610.62 | Not given | Win 11 | Luma Pro |
Entries are reproduced as submitted, with only spelling and capitalisation tidied. † This reader selected “successful connection and launch” but their comment says “I get output but no tracking,” which is the failure signature. Treat it as unresolved. ‡ A laptop, not a desktop, so it is outside what this guide covers. Included for completeness. * No such CPU exists; left as submitted rather than guessing at the intended model.
What the submissions actually show
The headline is not the one I expected when I published this guide. My own testing pointed at a clean Intel-versus-AMD split, and the reader data does not support that. Three AMD systems got SpaceWalker running. The split that does hold up in this sample is by chipset:
- Both Intel reports worked. Z490 and Z690, no drama. Small sample, but consistent with my own results.
- Every AMD success was on a B550 or B650 board. Three for three.
- Every AMD 800-series board failed. X870, X870E twice, and B850, zero for four. The X570 and B450 submissions failed too, so the newest AMD platforms are not the only ones affected.
There is one large caveat that cuts across all of this, and it matters more than the CPU brand: most people are not using the same cable chain. Several respondents connected through an HDMI-to-USB-C adapter rather than the DisplayPort-to-USB-C cable and 40Gbps coupler described above. Those adapters generally carry video and power but not the USB data link, which is exactly the handshake SpaceWalker needs. The one reader who explicitly reported using both parts of the kit above, the WJESOG cable and the AuviPal coupler, got it working.
So some of these failures are probably adapter failures rather than platform failures. If your report is in the failed column and you were using an HDMI adapter, it is worth retrying with the two-part chain before concluding your board cannot do it.
The failure descriptions themselves are remarkably consistent, and they match what I saw on my own Ryzen machine: the glasses are recognised as a normal monitor and video arrives fine, but SpaceWalker either never detects them or drops the connection the moment you try to launch a virtual screen layout. Nobody reported a system where video failed outright. It is always the data and tracking half that breaks.
It is a bit disappointing that VITURE's website and marketing do not address these desktop-specific hurdles at all, leaving users to figure out the science project on their own. For a product this refined on mobile, the lack of official documentation or a verified-hardware list for desktops feels like a missed opportunity to support their most technical power users.
If you are attempting this desktop connection, please add your result. No personal information is needed, and the more boards we cover the sooner the pattern above becomes something you can actually rely on. You can also just leave a comment with the same details.
One more hardware note: these couplers are not only for desktop Frankenstein rigs. If your laptop lives in a vertical stand or docked across the desk, the included VITURE cable can be a touch too short. Pair a quality USB-C to USB-C cable with the coupler and you have a high-speed extension cord for your glasses. The catch is that finding a cable that truly meets its advertised specs is a gamble. Linus Tech Tips recently launched their TrueSpec cables, and I have been using the 50cm, 40-gig, 240-watt version for exactly this. It has been rock solid here and everywhere else I use it.
SpaceWalker: the payoff
Once the physical connection is sorted, the software is where the Luma Pro really shines. If you are coming from the Xreal ecosystem, you probably remember the frustration with the Nebula app: it felt abandoned almost immediately after launch, leaving users with a forever-beta experience. VITURE is the opposite. They push updates constantly. Even in the last few months we have seen consistent firmware patches and stability improvements. Knowing the developers are actually listening and iterating makes a huge difference when you rely on this daily, the desktop issues above aside.
The Nebula app did have some nice touches, like tightening or widening the curve of a multi-monitor setup, that I wish SpaceWalker would copy.
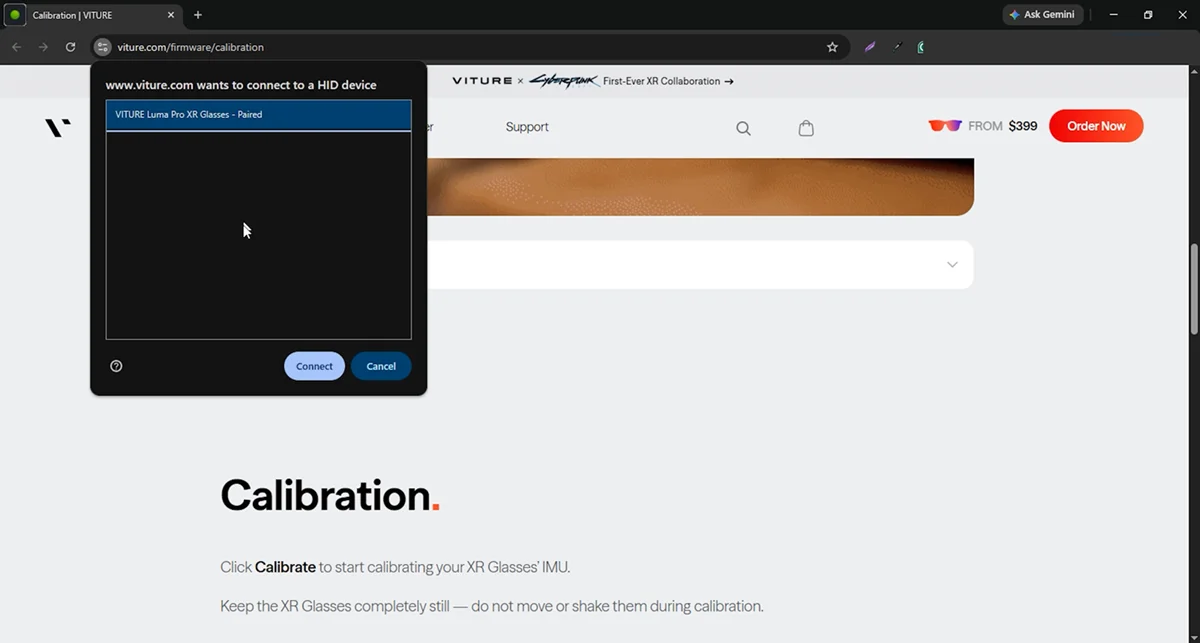
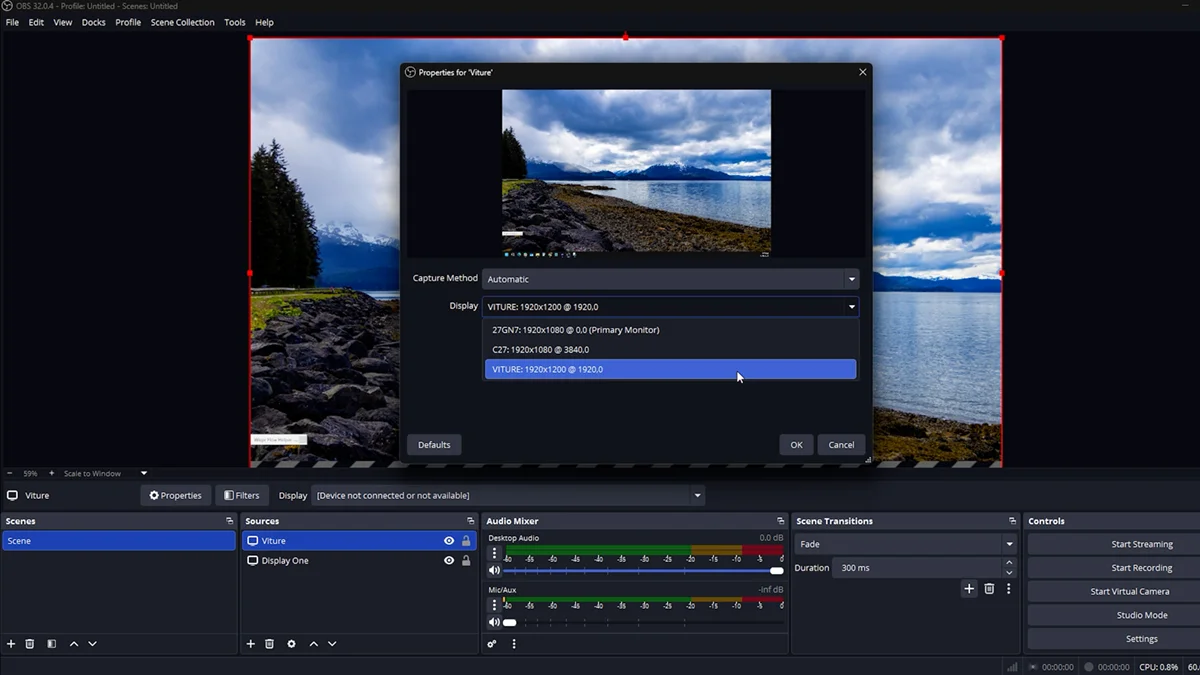
After installing SpaceWalker, run the calibration first to prevent screen drift, though I have run the virtual screens without it before too. What is odd is that VITURE sends you out of the app to a web-browser-based tool for this. Dealing with browser HID permissions and hardware-access hurdles is clunky for something that should just be built into the app.
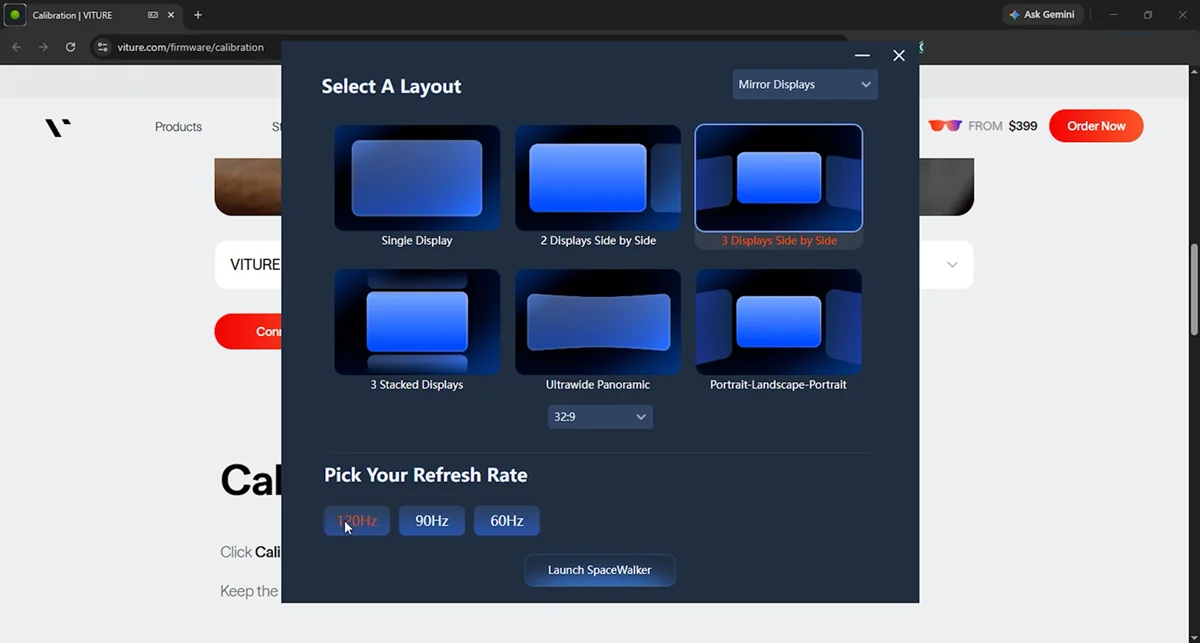
Next, choose your screen layout. Try the different options: my favorite is the traditional three-monitor side-by-side. If you are running a recent 70-series GPU or higher, you should be able to push the refresh rate to 120Hz, especially for productivity work like mine. Play with the settings until you are happy, then hit launch and enjoy your new virtual screens.
This is how I use it when I am turning a video I already produced into a blog post: I do not have to tab between programs all the time, I just look over to whatever app I need.
Pro tip: SpaceWalker has keyboard shortcuts for almost every function, from centering the display to adjusting zoom. I mapped mine to an Elgato Stream Deck MK.2, so I have physical buttons to toggle the XR environment. It makes the whole experience feel seamless. I actually use three.
The coupler is the critical middle-man where most people run into trouble.
Frequently asked questions
Why does my PC see the glasses as a monitor but the Launch SpaceWalker button never appears?
This is the most common hurdle. It usually means the data handshake is failing even though the video signal is getting through. Use a USB-C female-to-female coupler rated for 40Gbps (Thunderbolt 4). Lower-spec couplers often pass only power and video and drop the data signal that SpaceWalker needs to communicate with the glasses' tracking sensors.
My virtual screen is drifting to one side. How do I fix it?
Drift is usually caused by either missing calibration or a hardware performance bottleneck. First, use the web-based calibration tool linked in SpaceWalker to reset the internal gyroscopes. If it still drifts, check your CPU usage. If your processor is pinned at 100%, SpaceWalker cannot process tracking data fast enough, so the image slides. Try lowering the refresh rate to 60Hz to see if it stabilizes.
Does the VITURE Luma Pro work with AMD FreeSync or NVIDIA G-Sync?
Currently, no. Disable G-Sync or FreeSync in your GPU control panel for the VITURE display. These variable refresh-rate technologies can interfere with SpaceWalker's virtual-screen stitching, leading to flickering or app crashes.
Can I use a longer cable to move around my office?
Yes, but quality is everything. If you extend the range using a coupler, use a verified Thunderbolt 4 cable or a TrueSpec cable from LTT. If the total cable length exceeds about 2 meters (6.6 ft), you may experience signal dropouts unless you use an active high-bandwidth cable.
Is it worth the hassle?
I am genuinely happy with how this turned out. Once the cable and coupler are dialed in, the Luma Pro on a desktop is a legitimately great multi-monitor workflow. It is just unfortunate that we have to jump through these hoops to even see which machines can support it.
If you are on Intel, you can most likely replicate this today with the two parts above. If you are on AMD, go in with open eyes, and please add your result to the community sheet so we can map out where the wall really is. Do not hesitate to leave a comment or fill out the form. Hopefully we can get a clearer picture of what is happening.