
FitcamX Dash Cam Review: The Stealthiest Install
FitcamX replaces your car's factory sensor shroud with one that hides a 4K camera inside, so nothing hangs off the glass and no wires get routed. Here is the full OEM-style install on a 2023 Toyota Corolla, plus honest day and night footage put to the test.
Plays via YouTube. Google may set cookies when the player loads. Privacy policy
The short version
FitcamX is the cleanest, most stealth dash cam install I have ever done. It swaps your factory sensor shroud for one with a 4K camera built in, so there are no wires to route and nothing hanging off the windshield. Once it is in, it genuinely looks like a factory part. The catch is the video. Despite the 4K label, the footage leans hard on digital sharpening and falls apart with motion, distance, and low light. If a completely stock look is your top priority, it delivers. If you need reliable license-plate detail, especially at night, temper your expectations.
Verdict: it comes down to your prioritiesA decade of dash cams, one lingering annoyance
The FitcamX dash cam is the most convincing stealth camera I have tested. It hides a 4K sensor inside a replacement factory shroud, so it records with no visible wires at all. I have been running dash cams for well over a decade and would not drive without one, but there has always been one thing I could never get used to: the cables. Routing wire through the headliner, down the A-pillar, giving up a power port, and leaving the camera hanging off the windshield like a sore thumb.
There is also the quiet worry that someone spots it through the glass and decides they want one of their own. FitcamX sets out to solve both problems at once, and after installing and testing one, I came away impressed by the design and a good deal more mixed on the footage.
Disclosure: This post contains affiliate links. As an Amazon Associate I earn from qualifying purchases, at no extra cost to you.
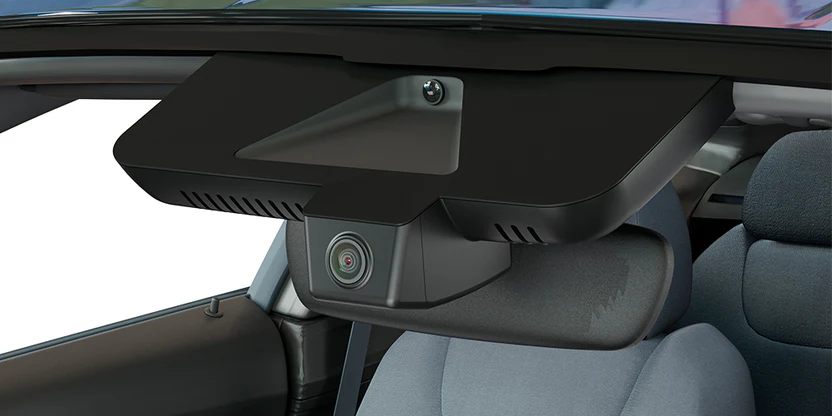
The camera tested
FitcamX 4K Dash Cam
An OEM-style camera built into a replacement sensor shroud, powered off the car's own sensor system: the exact unit behind every install shot and every frame of footage below.
An OEM-style camera that hides in plain sight
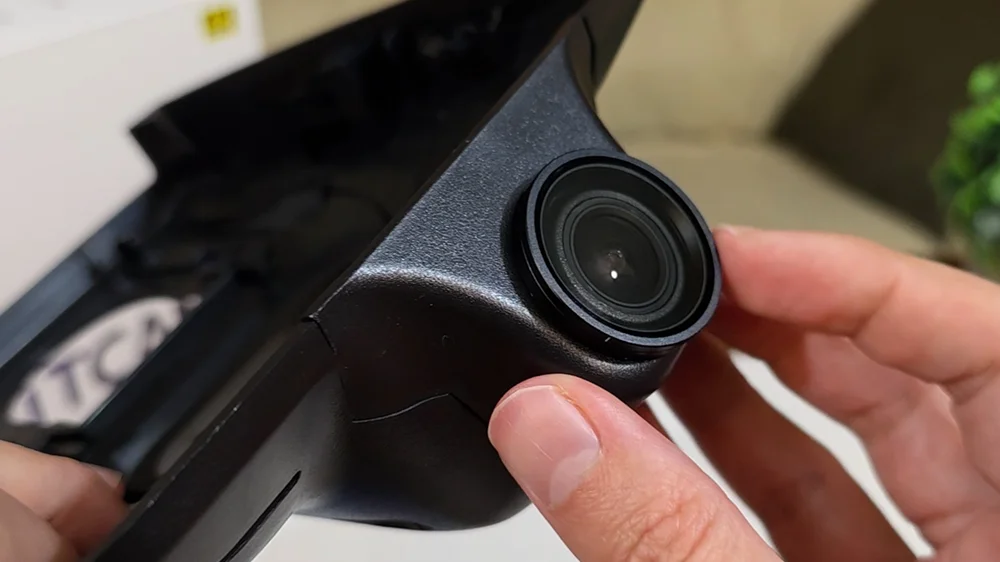
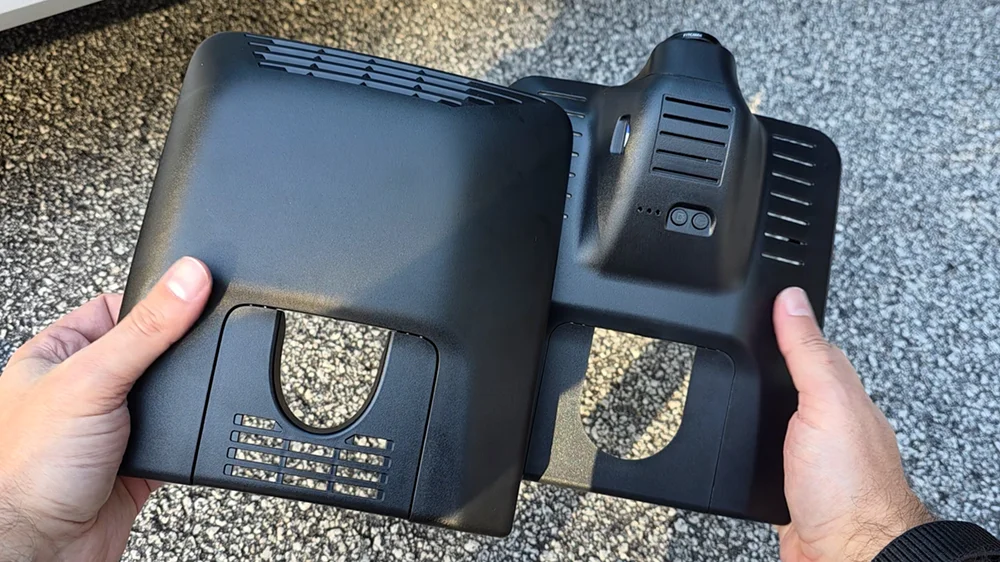
FitcamX takes a different approach from every dash cam I have used. Instead of sticking a camera onto the windshield, it replaces the factory sensor housing behind the rear-view mirror with a custom shroud that integrates the camera directly into it. The result is a setup that looks completely stock.
FitcamX is not the only camera taking this approach. I later fitted the Mangoal, a very similar OEM-style camera, to the same Corolla and put it through a teardown, a thermal check and a full resolution comparison.
On paper the pitch is strong: 4K recording combined with that OEM look and a clean install. Even better, the camera draws power from the vehicle's existing sensor system, the same one that feeds features like adaptive cruise control and lane assist, so there are no cables to route anywhere else in the car. It is a genuinely clever solution to one of the biggest annoyances with traditional dash cams.
What comes in the box
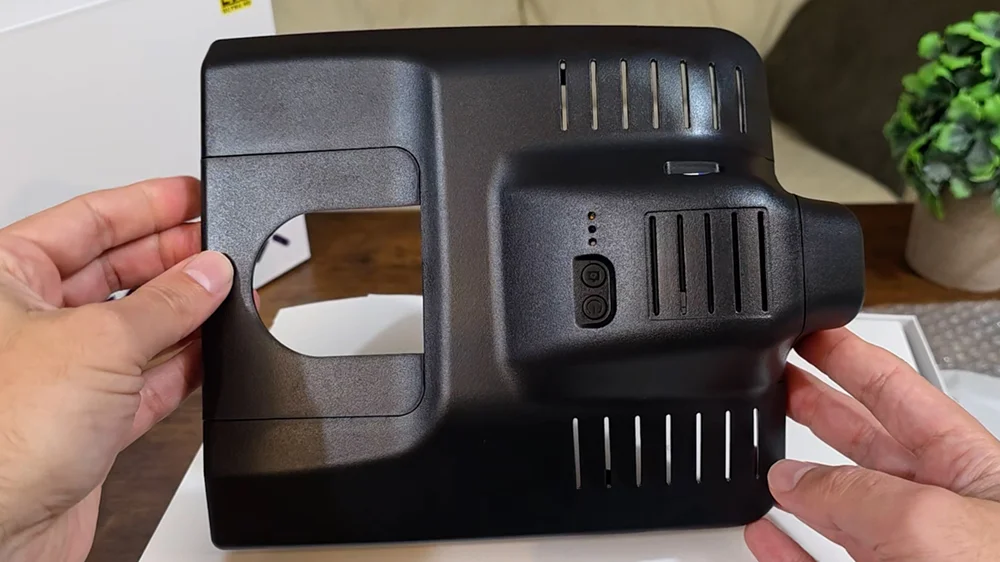
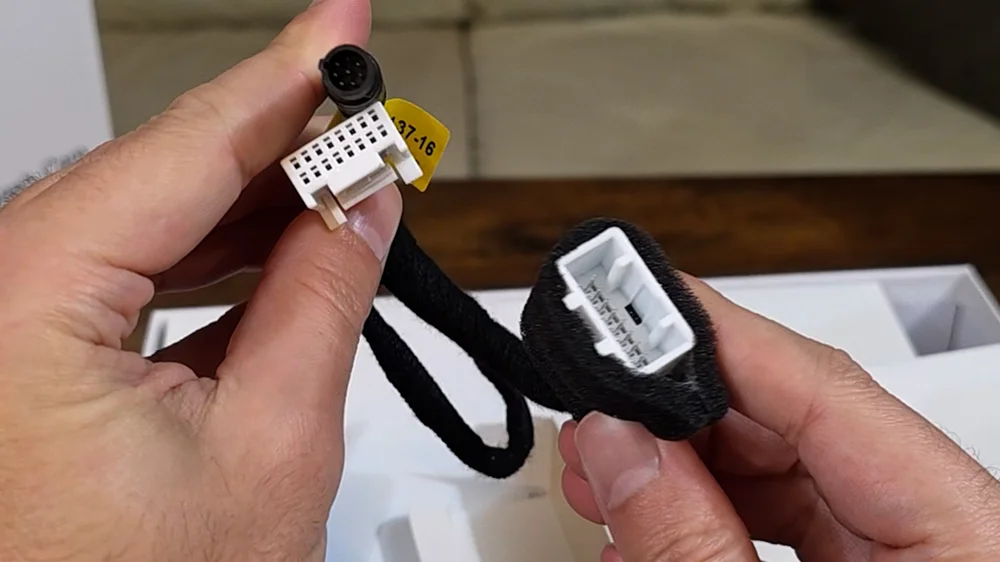
Starting with the unboxing, right on top is the user manual, an old-school folding-map style, along with a contact card. The accessories box holds an SD card reader with both USB-A and USB-C connectors, a nice touch, plus a trim removal tool and the proprietary power adapter and splitter that ties into the vehicle's sensor power. That splitter ends in an unusual barrel-style connector for the camera itself.
The main unit is a fairly beefy piece. The camera and housing are fully integrated, and a FitcamX-branded 64GB SD card comes already installed. On the underside are the power and snapshot buttons alongside the indicator LEDs. The interface is deliberately minimal, which only adds to the stealthiness.
Overall the unit feels solid. The plastic is thick and well molded, and the finish matches the factory shroud. From a build-quality standpoint, this feels very OEM.
The optional CPL filter
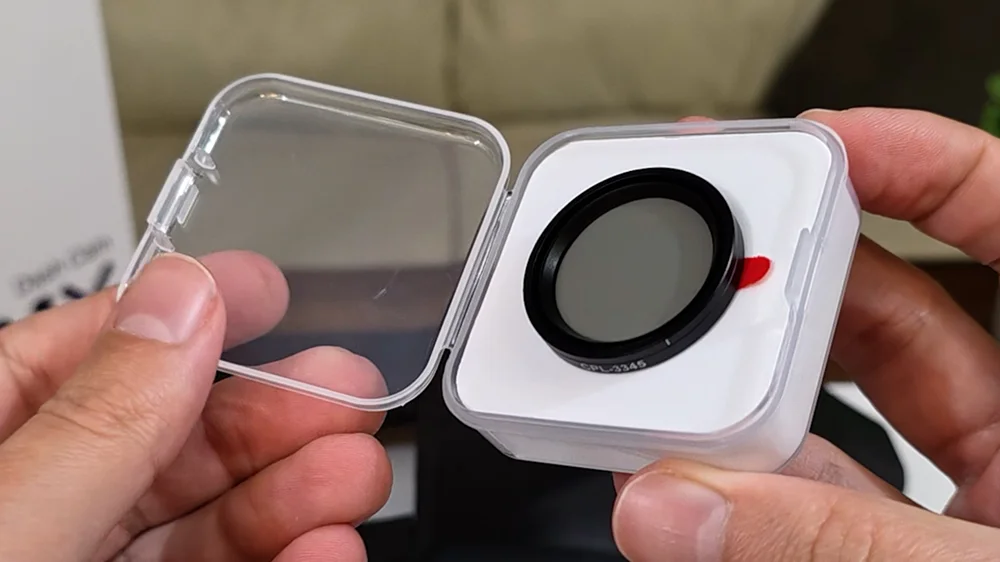
I also picked up the optional CPL filter, which is sold separately. I do wish it came in the box. What I like about this one is the rotating bezel, so you can fine-tune it after installation. The downside is that it mounts with 3M double-sided tape, so once it is on, it is not coming off easily.
Installing it is straightforward. Peel the protective film off the adhesive, line the filter up over the lens, and press it into place. The filter is slightly larger than the lens, so alignment is on you. As you rotate the bezel you can watch the reflections drop away. As we have seen time and again, a CPL filter makes a huge difference cutting windshield reflections, even if it costs you a little nighttime visibility.
Installing it in a Toyota Corolla
I installed this in my 2023 Toyota Corolla Hatchback. These cameras are purpose-built for specific makes, models, and even trim levels, so choosing the correct version matters. The install itself is very different from a traditional dash cam, and the first rule is simple: make sure the car is turned off before you start.
Because each FitcamX shroud is molded for one sensor cluster, order by your exact make, model, year, and trim, and compare your factory housing to the photos on the product page before you buy. Even small trim differences can matter.
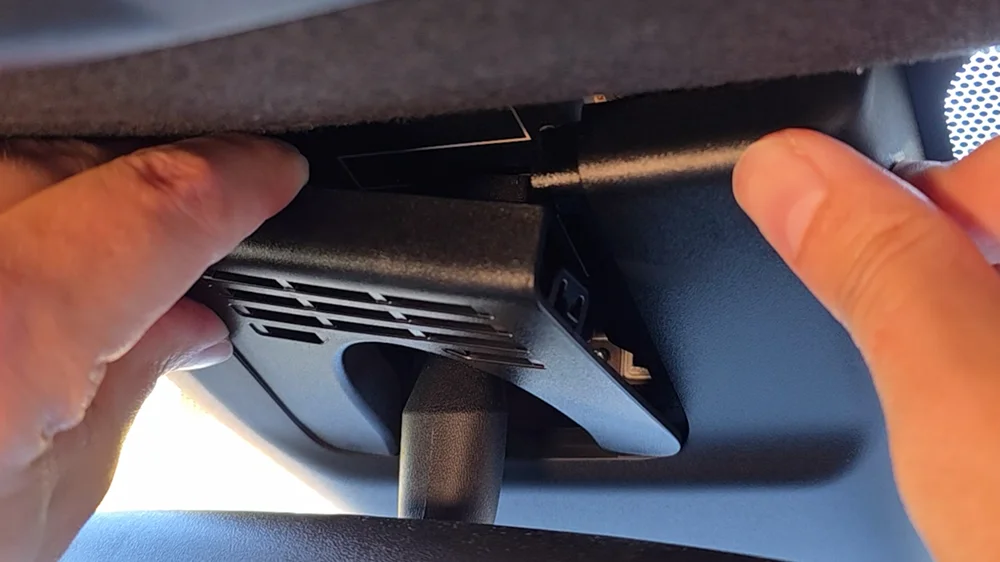
- Remove the small rear cover. With the ignition off, take off the small rear panel on the factory sensor shroud. I found it easier to pop it with my fingers than with the included trim tool.
- Remove the main shroud. Slide it downward, parallel with the windshield. It does not glide off, it kind of pops, so be ready for that.
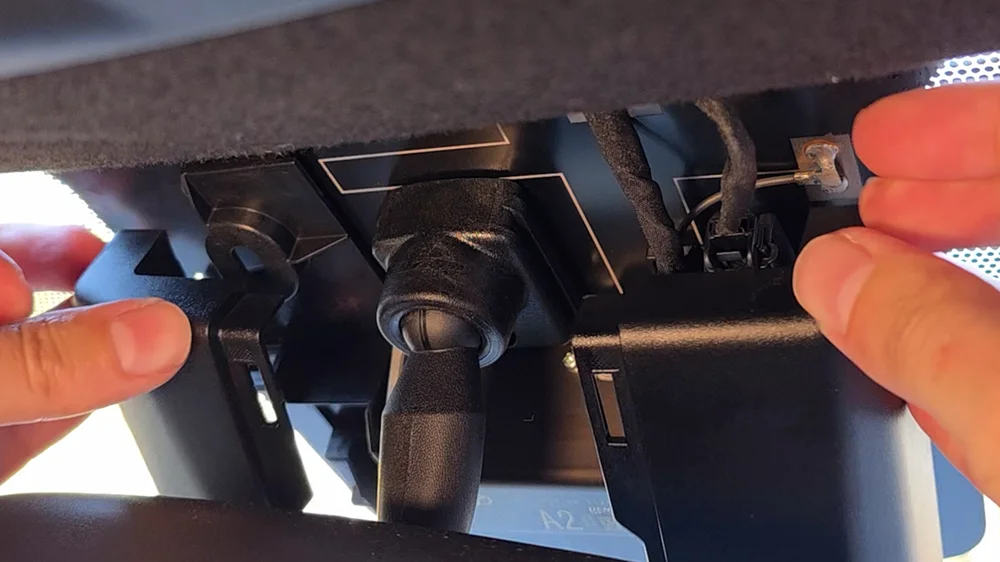
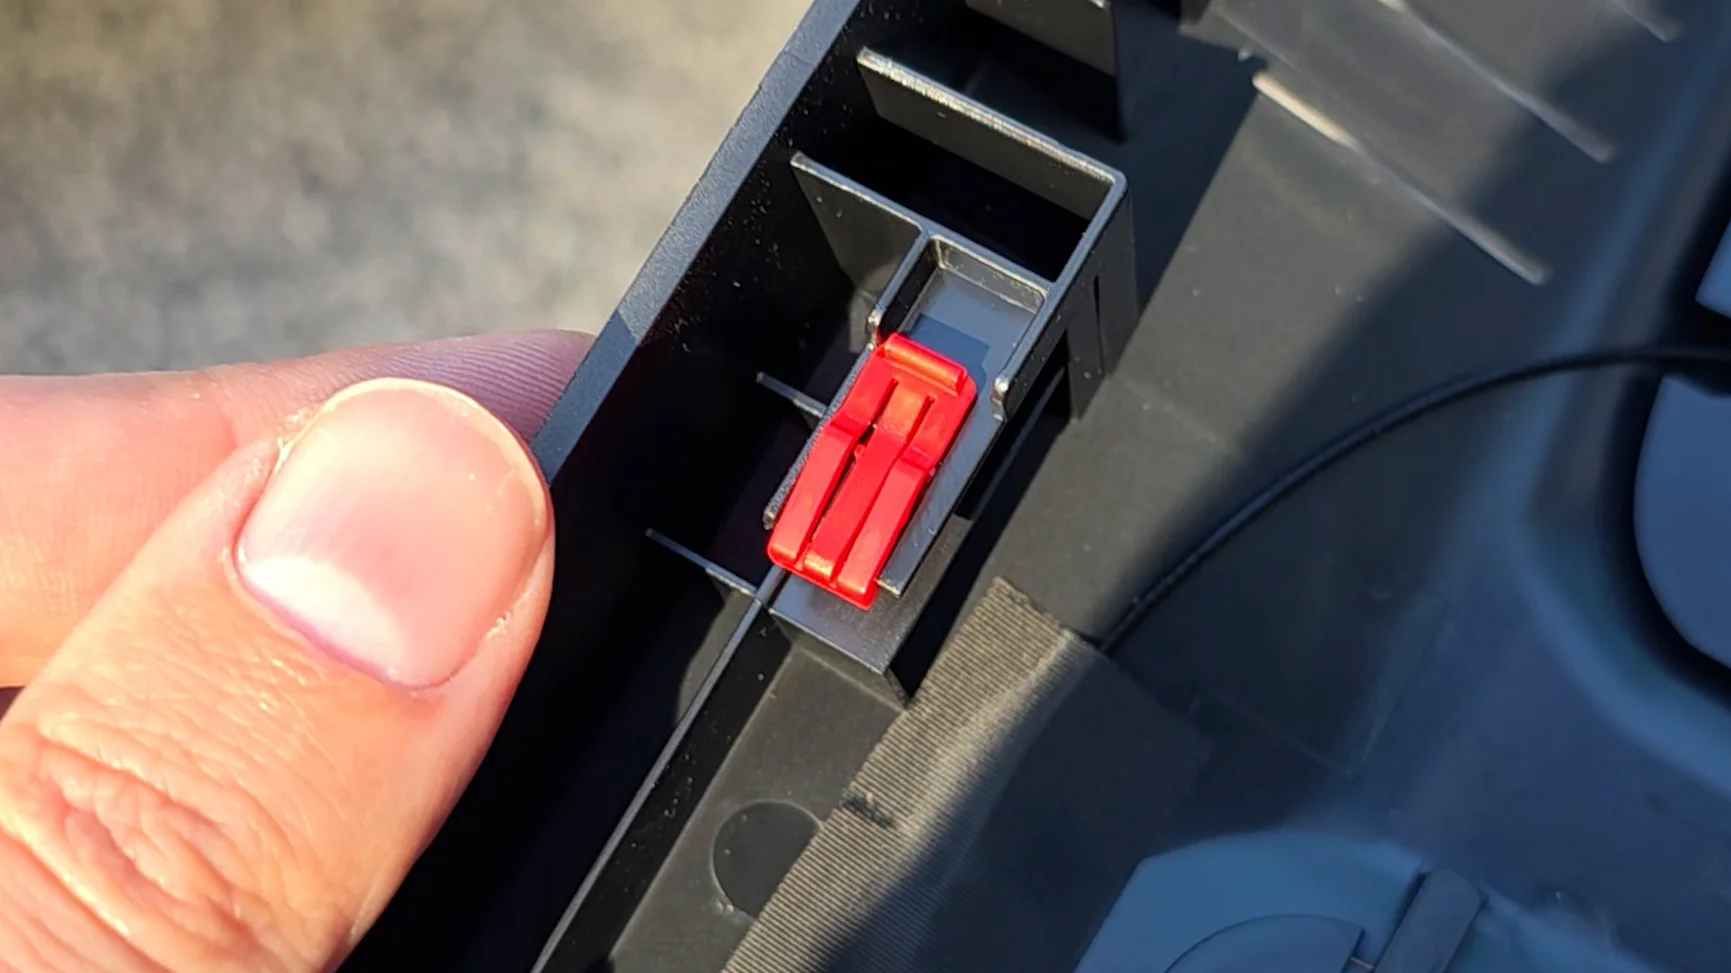
- Transfer the two fasteners. The only parts to carry over are two fasteners, mine were red, yours may differ. Gently pull them from both sides so you do not break them, then slide them onto the FitcamX shroud.
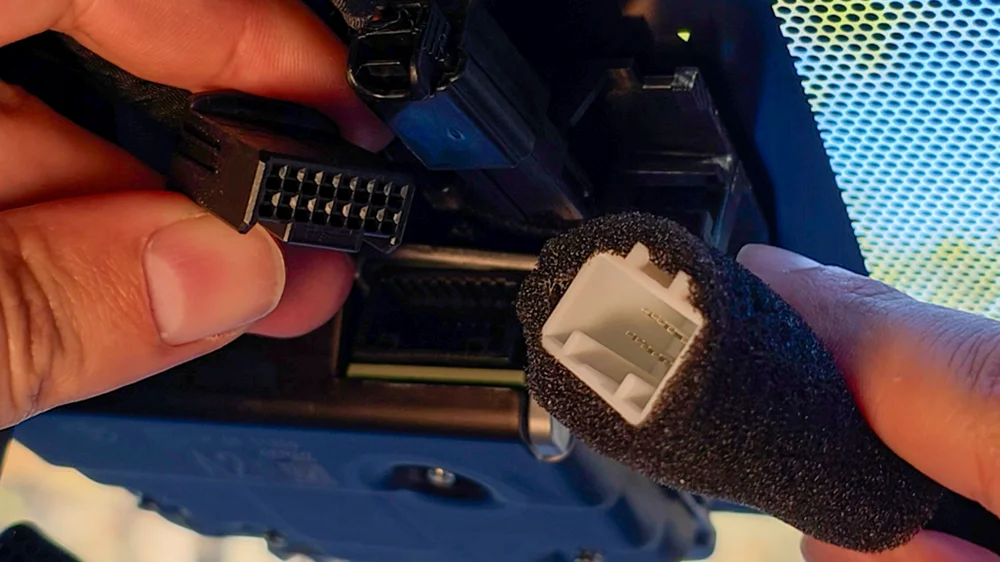
- Connect the power adapter. Back inside the car, unplug the factory power connector and attach the FitcamX power adapter and splitter.
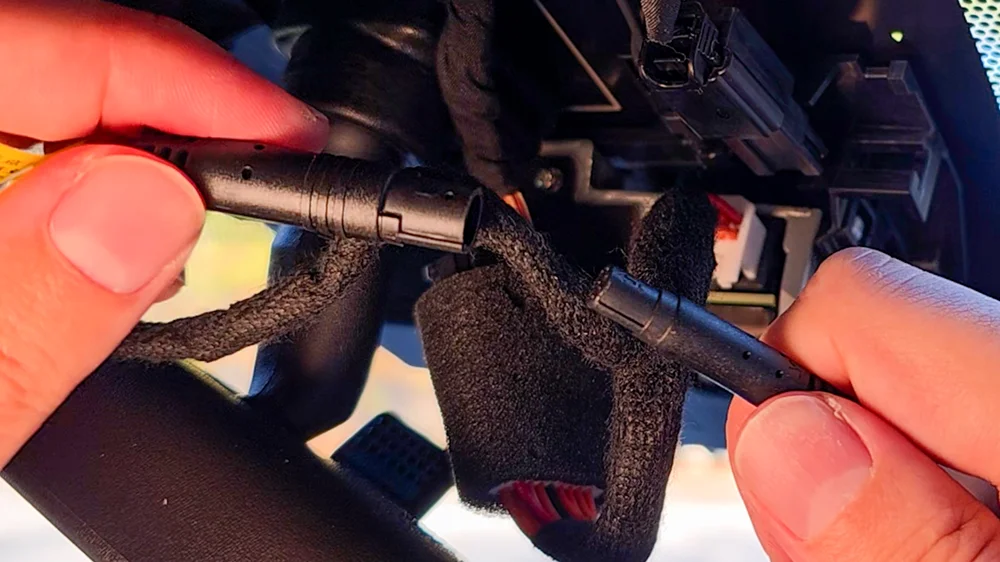
- Connect the barrel plug. Connect the barrel plug to the camera and slide the new shroud into place. Managing the loose cables in a tight space while lining up the shroud takes all your dexterity, but once it is positioned it pops right in.
- Install the new rear panel. Snap the small rear panel back on, and you are done.
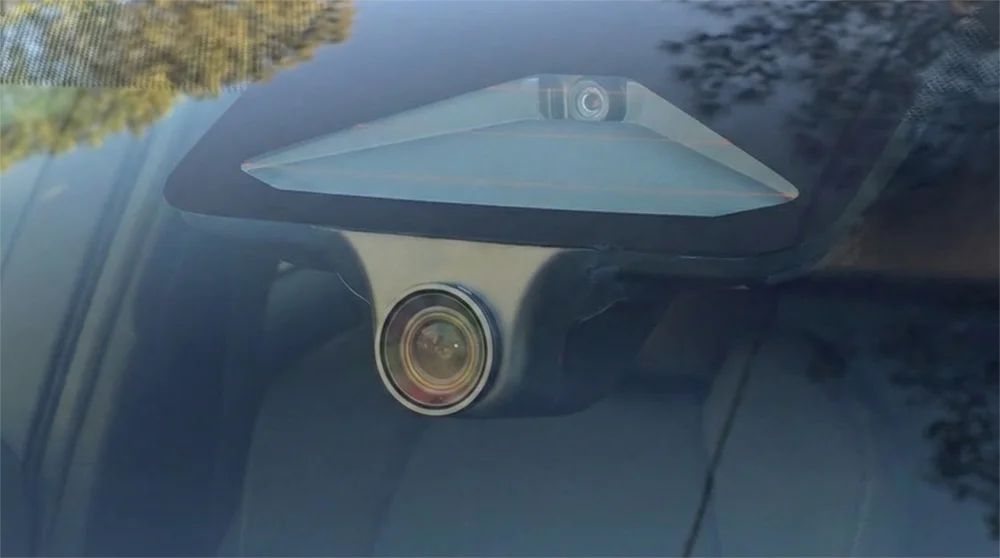
That is it. No routing cables, no tucking wire into the headliner, no pulling the glove box, nothing. The whole process takes about five minutes. Once installed it genuinely looks stock. If you did not know it was aftermarket, you would assume it was part of the factory sensor cluster.
No cables, no clutter, about five minutes of work. Once it is in, it looks completely stock.
First power-on and the FitcamX app
Turn the car on and the camera powers up automatically. The indicator LEDs are not very visible from the driver's seat, but three flashing blue and red lights confirm it is recording.
Next you connect to the camera through the FitcamX app, available on the App Store and Play Store. The first time you launch it, you join the camera's own Wi-Fi network using the default password 12345678. Keep in mind that while your phone is connected to the camera, it will not have cellular data.
The app itself is basic. There are not many settings, and honestly there is not much you need to change. Recording length tops out at three minutes per clip, which I assume keeps file sizes manageable at 4K. You can watch the live feed, which is when I dialed in the CPL filter, browse recorded clips, preview them, and download whatever you need.
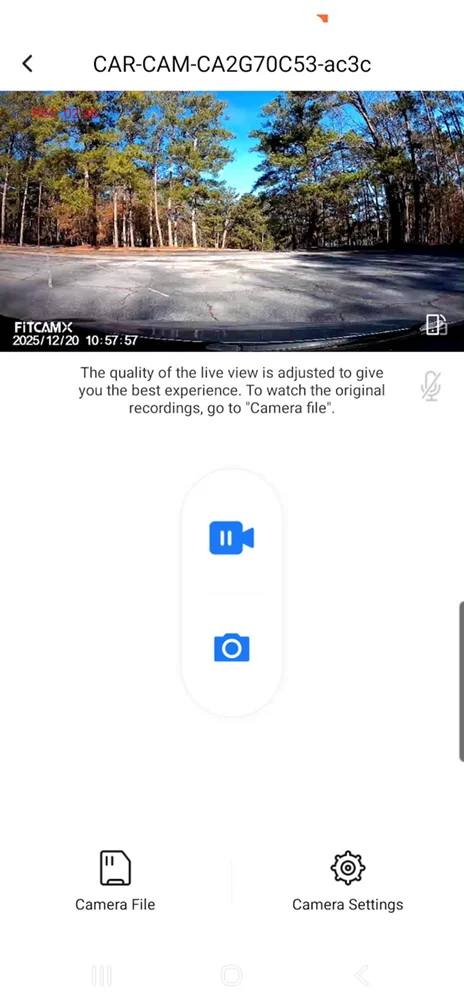
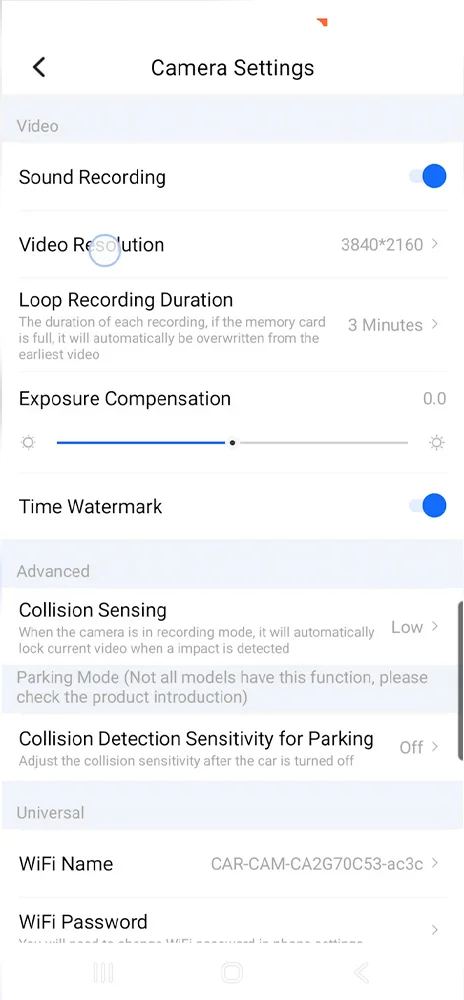
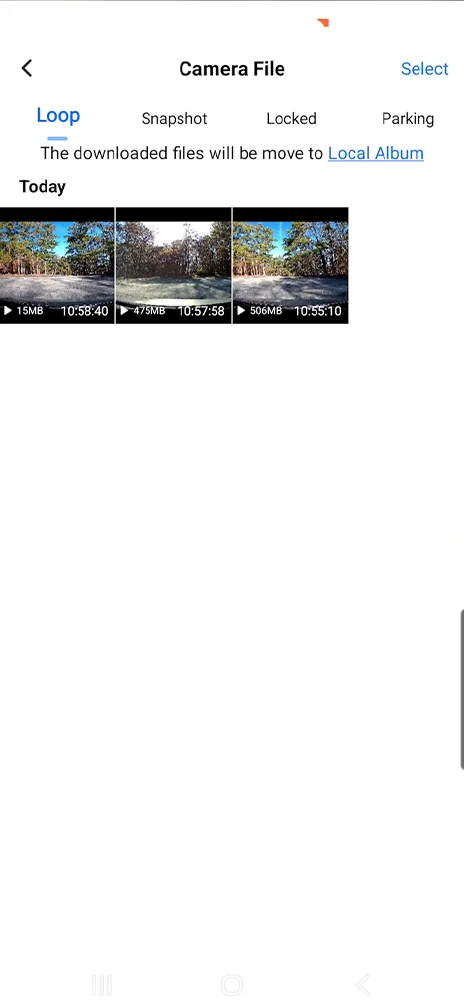
One thing worth flagging: the camera's Wi-Fi stays on all the time. From a security standpoint I am a little on the fence about that. Realistically it would be difficult for someone to connect while you are driving, but not impossible.
How much footage fits on the card
The included 64GB SD card, which I have since put through the full bench, holds a little over five hours of footage at 4K. If you want a longer history before it loops back over old clips, upgrade to a larger card, ideally a high-endurance or Pro-grade microSD. I lab-test these on CKBench, and the SanDisk High Endurance came out of it at 5 out of 5. The card picker takes what this camera actually writes and shows every card against it. Bundled cards can be better than their reputation too: the 128GB card packed inside a Botslab dash cam held every speed class printed on it. I stick with cards like the SanDisk High Endurance and the Samsung PRO Plus for anything that records all day (I lab-tested the SanDisk's real speeds and thermals in my High Endurance 128GB review, and the PRO Plus 512GB on the same bench). To size a card to your own driving, my dash cam storage calculator does the math for you.
Is the FitcamX really 4K? Where the claim breaks down
This is where it gets complicated, because on paper FitcamX advertises 4K recording, and that was a big part of why I wanted to try it. Before I get into the problem areas, I want to be fair: in good daylight the footage can look pretty decent. A clip driving through the Atlanta area is a good example. The sky looks nice, the colors are pleasant, and at a glance it looks perfectly serviceable. If that were all you ever saw, you might think the video quality is just fine.
The issues show up the moment you look closer, or the light and motion get less forgiving. Starting in good daylight on a small road, the first thing that jumps out is how aggressively the footage is processed. Look at the foliage, the tree lines, the power lines: heavy edge sharpening everywhere, with haloing around branches, poles, and wires. Instead of natural texture you get a crunchy, over-processed look. It gives the impression of sharpness, but zoom in and it is not actually resolving real detail.
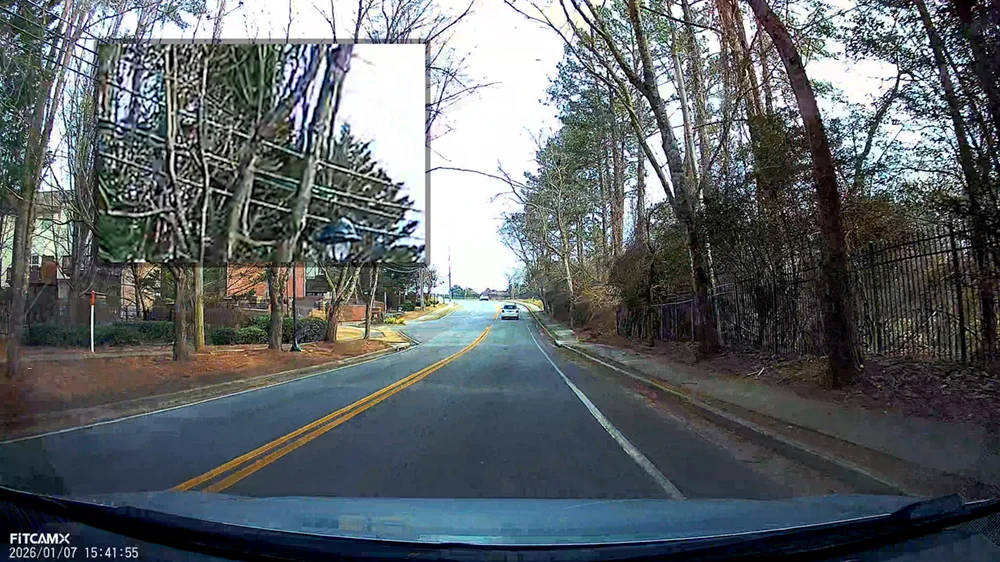
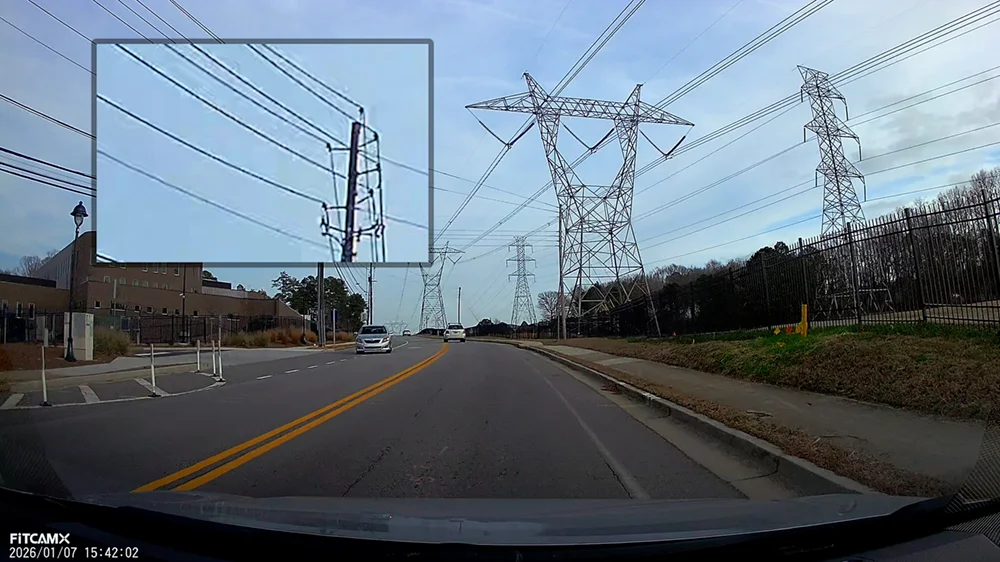
It gives the impression of sharpness, but zoom in and it is not resolving real detail.
Then there is license-plate readability, which is a big one for a dash cam. Stopped at a light, the red Corvette right in front is clear. The white RAV4 a little farther out you can just make out, but not with confidence. The Mercedes farther over is completely unreadable. At highway speeds it is the same story: a truck is legible for a moment, but the van next to it is not readable at all. Sitting under an overpass, the car directly ahead is okay, but anything off-angle or farther away quickly falls apart. Even crawling through slow traffic, the Audi on the left is mostly readable while the van ahead and the truck beside it lose detail fast.

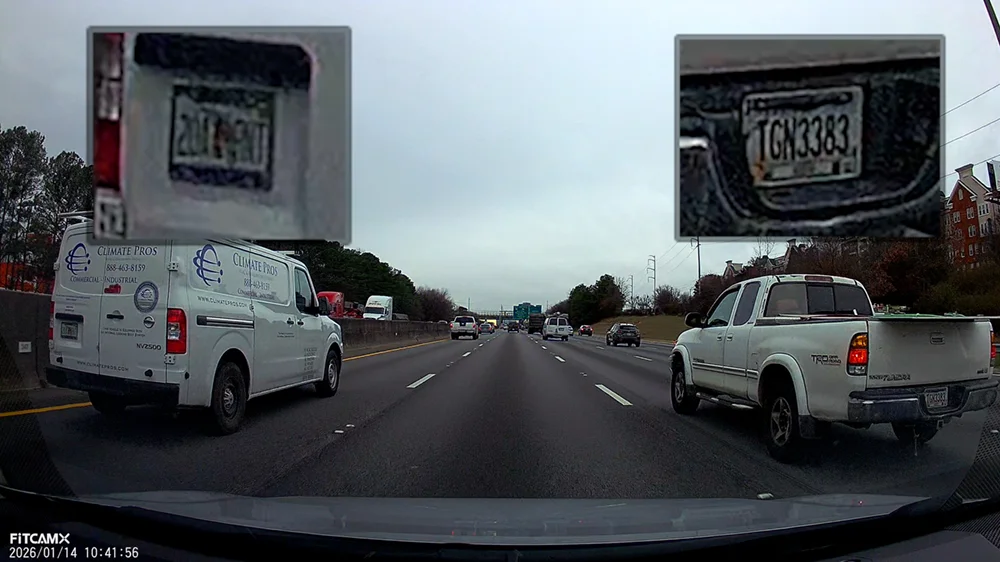

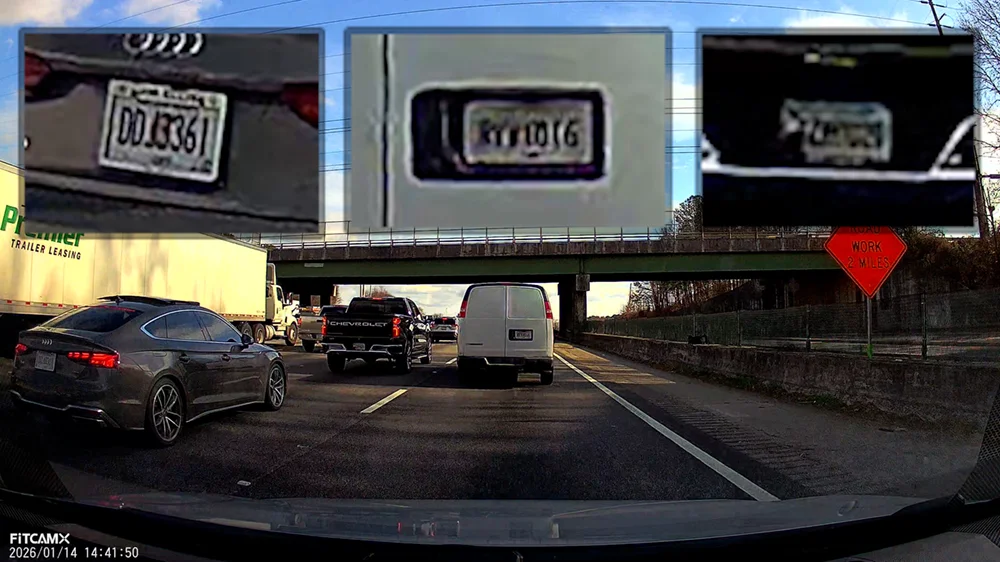
This is where it becomes clear that resolution alone is not the problem. It is how the image is being processed. That turns out to be true of every dash cam: even on the cameras that share Sony's IMX678, the processing and the encoder decide more than the sensor does.
Night footage is where it struggles most
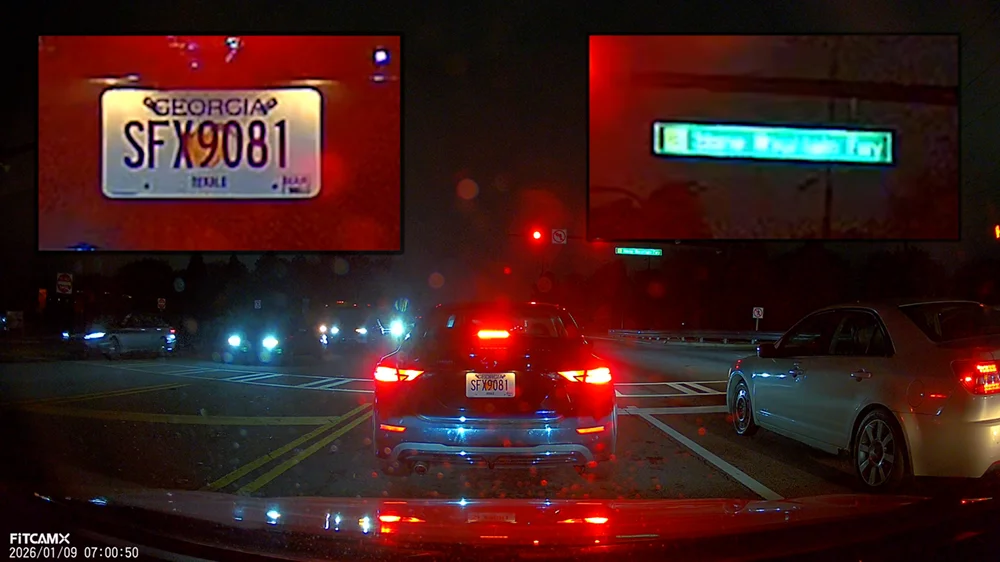
If the daytime footage already looks like this, night is where a dash cam either proves itself or it does not. Stopped at a traffic light, I can read the plate of the car directly in front of me, but the lighted street signs are blown out and unreadable. Pulling onto the on-ramp with a car about ten feet ahead, its plate is already blurry, with no clean detail to work with.
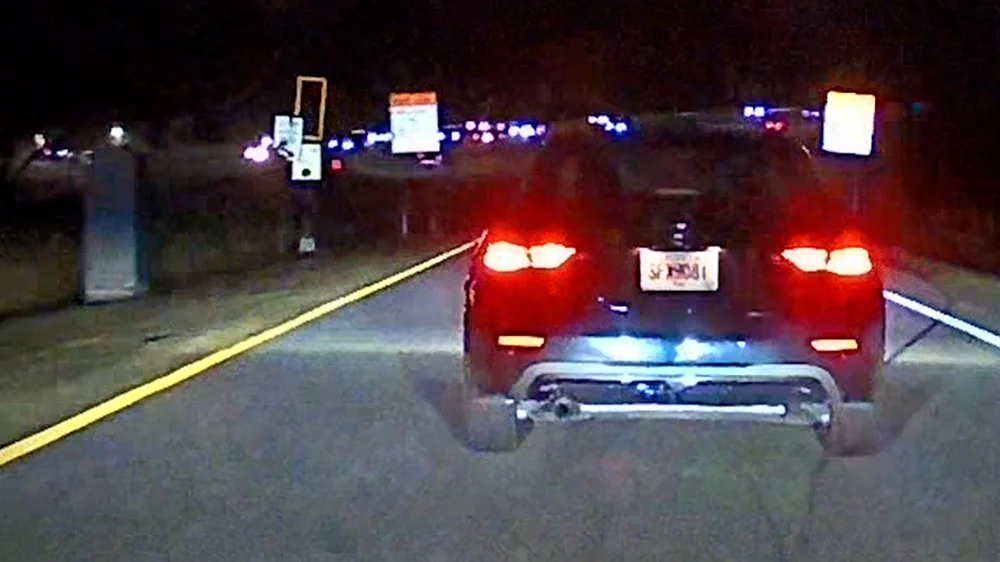
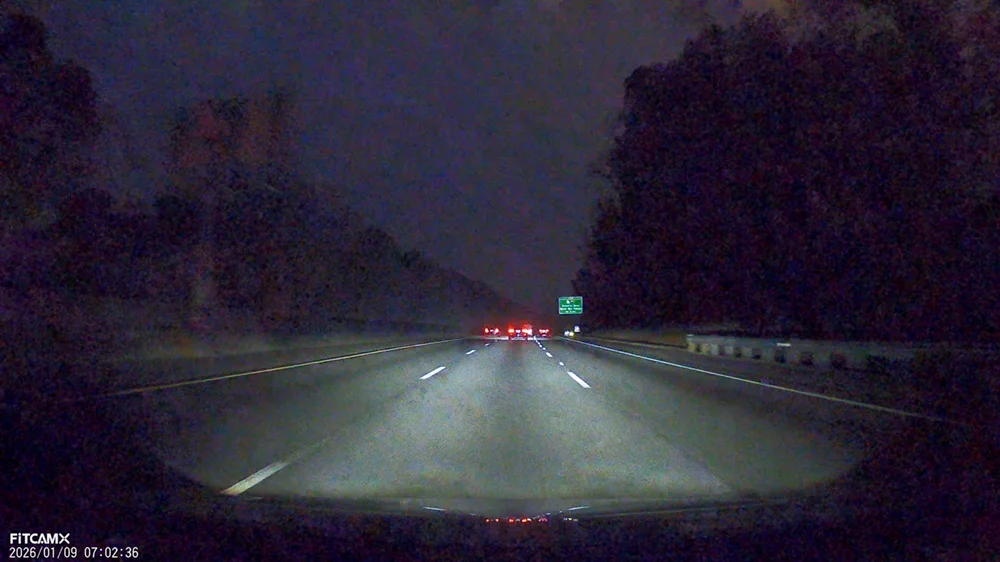
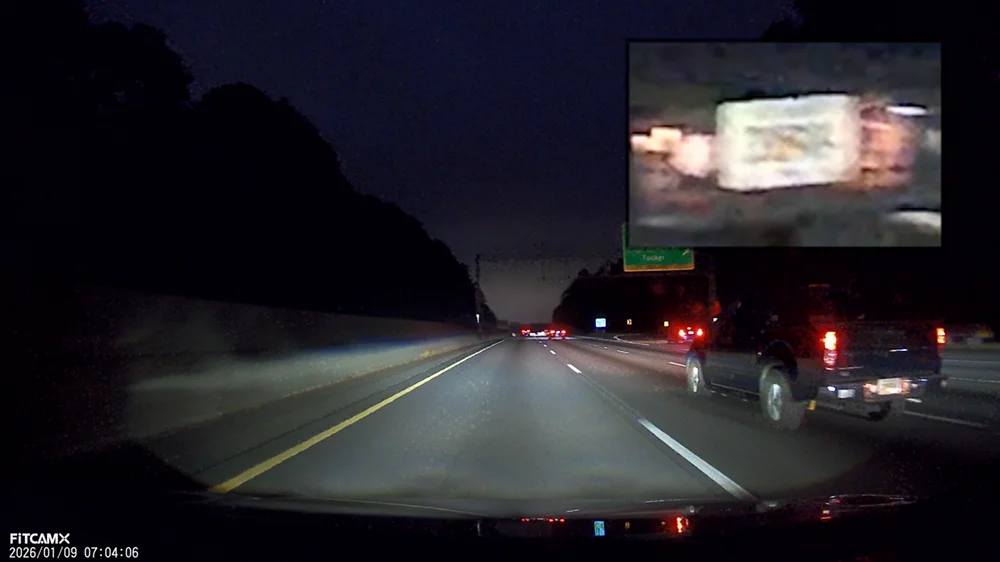
Once you are up to highway speed at night, things really fall apart. The image fills with noise and fine detail is wiped away. Trying to read the plate on the truck ahead, I cannot make out anything at all.
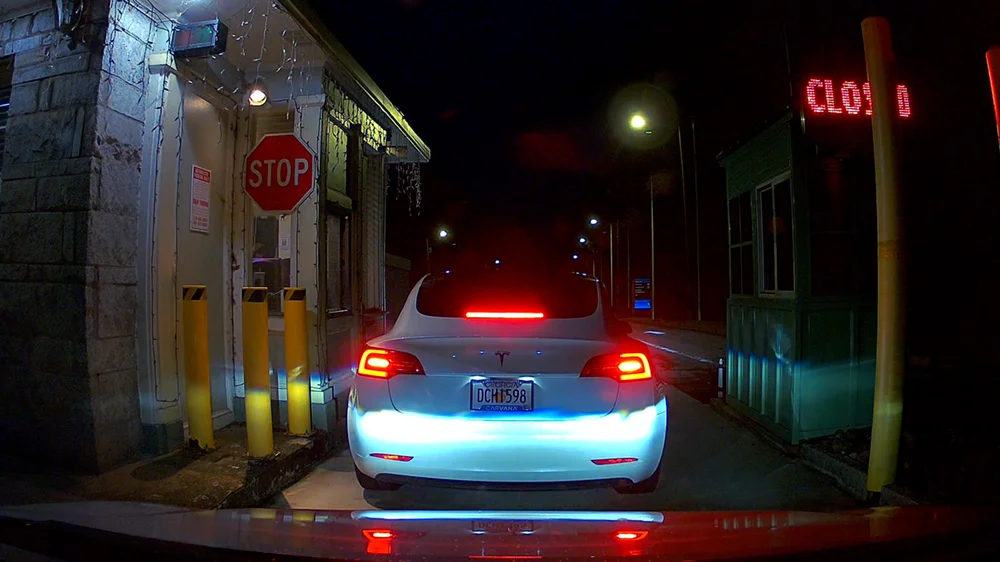
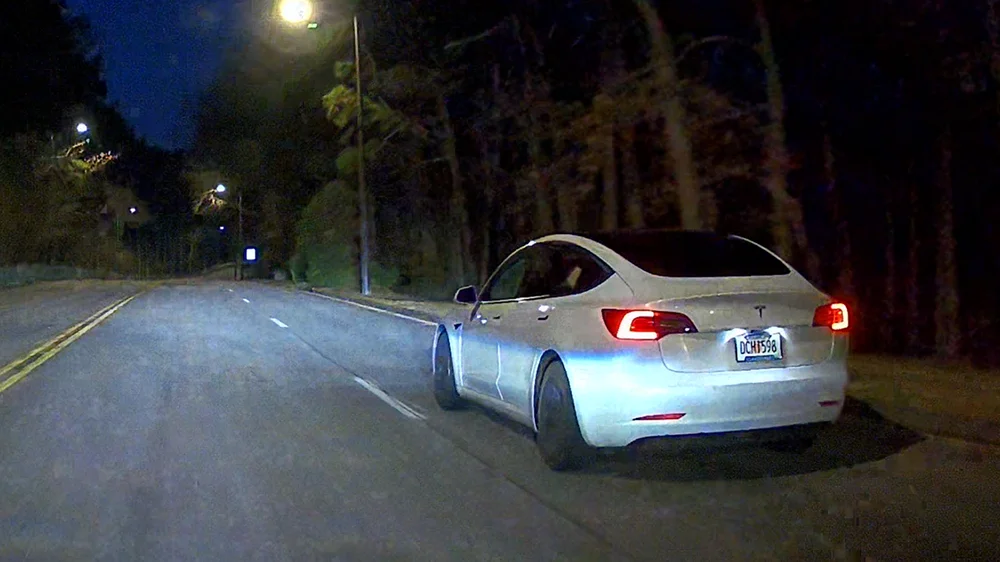
When conditions are ideal, stopped, close, and well lit, the camera does better. The Tesla's plate here is mostly readable. But you still see haloing around the overhead light, and the moment you start moving again, even slowly, motion blur and light bloom come right back. Depending on the lighting you might get lucky and read a plate while creeping alongside it.
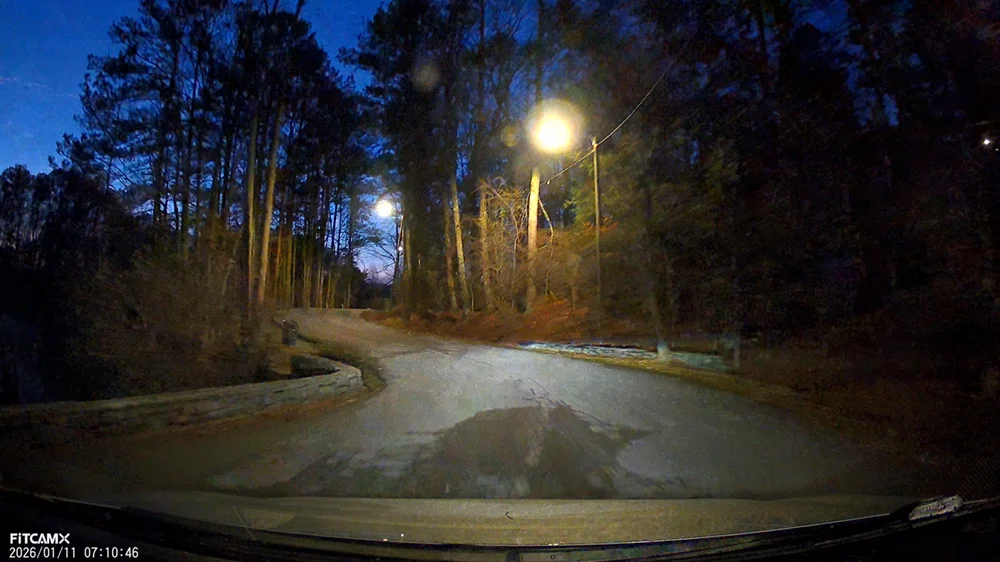
And finally, driving down a side road just as dawn breaks, the image turns into noise and smear. There is no usable detail left.
I tried everything to fix the image
I went back and forth with FitcamX on this. We tried different settings, different resolutions, even firmware updates, but the underlying image processing never really changed. I want to give credit to FitcamX for trying to help troubleshoot. They always responded quickly and answered all my questions.
In good conditions the footage can look acceptable. But the moment you add motion, distance, or low light, the video quality does not hold up. And for a dash cam, that is more or less the whole point.
The footage where it struggles
- Heavy processing and haloing even in daylight
- License plates unreadable at distance or off-angle
- Noise and smear at highway speed and at night
- Wi-Fi stays on the entire time
- CPL filter and a larger card cost extra
The design where it shines
- Completely stock, OEM-style appearance
- No wires to route anywhere in the car
- About a five-minute installation
- Powered off the car's own sensor system
- Solid, factory-grade build quality
So, is the FitcamX dash cam worth it?
The FitcamX is a genuinely interesting product. From a design and installation standpoint, it is one of the cleanest dash cam solutions I have ever used. The OEM-style fit is excellent, the install is fast, and once it is in it truly looks like it came from the factory. If your top priority is a stealthy setup with no visible wiring and nothing cluttering the windshield, FitcamX absolutely delivers.
Where it falls short is video quality. Despite the 4K label, the footage is heavily processed and real-world detail does not hold up well, especially at night. So it really comes down to your priorities. If you want the best possible footage, something like the VIOFO A229 Plus will serve you better. If you would rather trade the stealth look for more coverage, I have also tested the 4-channel Botslab G980H. If you want a camera nobody will ever notice, nothing I have tested hides like this one. That call I will leave up to you.
Frequently asked questions
Is FitcamX really an OEM-style dash cam?
Yes. FitcamX replaces your vehicle's factory windshield sensor housing with a shroud that has the camera built in, so it takes on a true OEM-style appearance. Once installed, it blends into the existing sensor cluster and looks completely stock from both inside and outside the car.
Does the FitcamX record in real 4K?
FitcamX advertises 4K recording, but in the real world the footage leans heavily on digital sharpening and processing. The resolution is technically 4K, yet fine detail and clarity do not match what you would expect from a higher-end 4K dash cam, especially in motion or in low light.
Is FitcamX good for night driving?
Night performance is mixed. Plates can be readable when you are stopped and close to another vehicle, but noise, motion blur, and haloing around lights become prominent as soon as the car is moving. That makes it less reliable for capturing detail during nighttime driving.
Can FitcamX read license plates clearly?
It depends heavily on distance, lighting, and motion. Plates are often readable when you are stopped in good light, but clarity drops quickly once vehicles are moving or the lighting worsens, and distant or off-angle plates are frequently unreadable.
Does FitcamX require hardwiring or running cables?
No. One of its biggest advantages is that it draws power directly from the vehicle's existing sensor module, so there are no cables to run through the headliner or down the A-pillars.
Is FitcamX easy to install?
Yes. The install is straightforward and took me about five minutes, generally well under ten. You remove the factory sensor cover, transfer two fasteners, install the FitcamX shroud, and connect the included power splitter. No cable routing is involved.
What size SD card does FitcamX use, and how much does it hold?
FitcamX includes a 64GB microSD card, which holds a little over five hours of footage at 4K. For a longer recording history, a larger high-endurance or Pro-grade microSD card is recommended.
Is the FitcamX Wi-Fi always on?
Yes. The camera's Wi-Fi stays active while the vehicle is on, and you connect directly to its network to view footage. That also means your phone temporarily loses cellular data while you are connected to the camera.
Does FitcamX work with Android and iPhone?
Yes. The FitcamX app is available on both the Google Play Store and the Apple App Store. It lets you view the live feed, play back clips, and download footage, though the configuration options are limited.
Can the FitcamX be stolen easily?
Because the camera is fully integrated into the factory sensor housing, it is far less obvious than a traditional windshield-mounted dash cam. That stealth design significantly reduces the likelihood of theft.