
VIOFO A229 Plus: Finally Upgrading After 6 Years
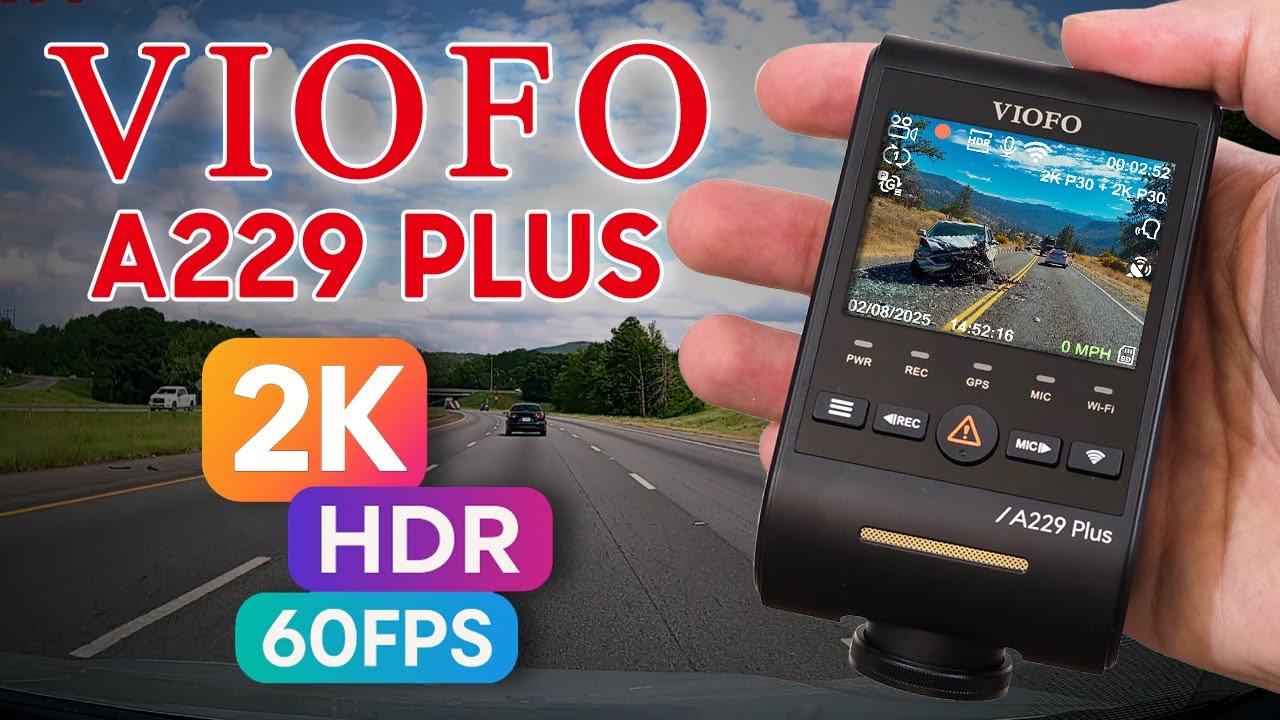
After six years on the same Aukey dashcams, I moved up to the VIOFO A229 Plus: dual 2K STARVIS 2 sensors, 60FPS, and GPS built into the mount. Here is the full install, the real-world footage against my old camera, and whether it earns the upgrade.
Plays via YouTube. Google may set cookies when the player loads. Privacy policy
The short version
Coming off six years of Aukey dashcams, the A229 Plus is a clear step up. The dual STARVIS 2 sensors deliver cleaner 2K footage day and night, 60FPS is genuinely smooth, and GPS is baked right into the mount. Two catches worth budgeting for: the glare-killing CPL filter and a microSD card are both sold separately, and you will want both. My rating: 5/5.
Verdict: 5/5, a worthy upgradeSix years on one dashcam
I have been running the same Aukey dashcams since 2019, and they have been absolute tanks. My Aukey DR02 and DRS2 both survived brutal Southern summers, freezing winters, and years of baking in the sun. The problem is that Aukey does not even make dashcams anymore. No updates, no support, no new models.
So after six years, it was finally time for an upgrade. I wanted better image quality, faster transfers, and no more ancient USB mini-B cables. That is where the VIOFO A229 Plus comes in. This is the full story: installing it, testing it side by side against my old Aukey, and deciding whether it is a worthy successor to my old workhorse.
Disclosure: This post contains affiliate links. As an Amazon Associate I earn from qualifying purchases, at no extra cost to you.
The camera tested
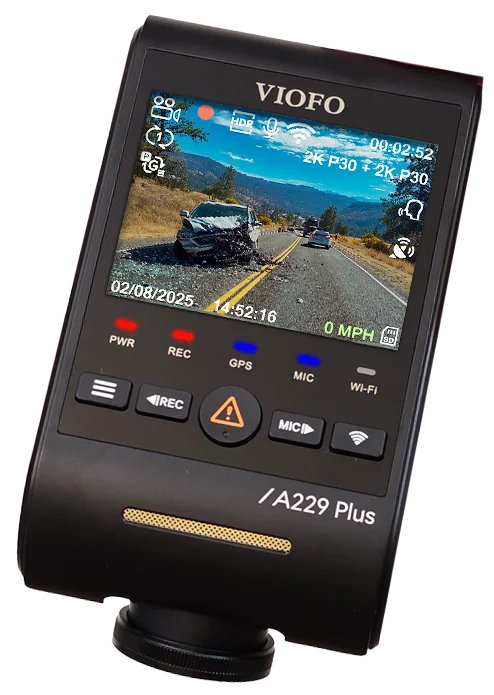
VIOFO A229 Plus
Dual STARVIS 2 sensors, 2K front and rear, 60FPS with HDR off, built-in GPS and 5GHz Wi-Fi: the exact camera behind every clip and test in this article.
What is inside the A229 Plus
One of the main reasons I went with this dashcam is the Sony STARVIS 2 IMX675 sensor, released in mid-2022. It is a 5.12-megapixel, high-dynamic-range chip that records 2K 1440p at up to 60FPS, but only with HDR off. Turn HDR on and it drops to 30FPS. We will get to whether that trade-off is worth it later. And if the sensor name itself is doing a lot of work in that sentence, I have since written up what a STARVIS 2 badge does and does not guarantee, and why the processor behind it decides more of the picture.
The GPS module is built right into the mount, so there is no extra antenna to stick on the glass, which I appreciate. You also get 5GHz Wi-Fi for faster transfers to the VIOFO app, plus voice controls, assuming they work.
Storage tops out at a 512GB microSD, which is not included. You will want at least a Class 10 or UHS-1 card, and it is worth knowing that the class printed on a card is a claim rather than a measurement: I bench them on CKBench and publish what they actually sustain. VIOFO sell their own High Endurance cards for this camera, and I put both capacities on the bench: the 32GB and the 128GB turned out to come from two different manufacturers, and only one of them is the card I would put in this camera. I stick with Samsung Pro and SanDisk Extreme cards for all my camera work, and the 512GB Extreme has now been through the bench. So has the SanDisk High Endurance 512GB that spent months in this camera: it holds V60 and still stops writing for seconds at a time, which is the kind of behavior the slow-card warning on this camera is about.
What you get in the box
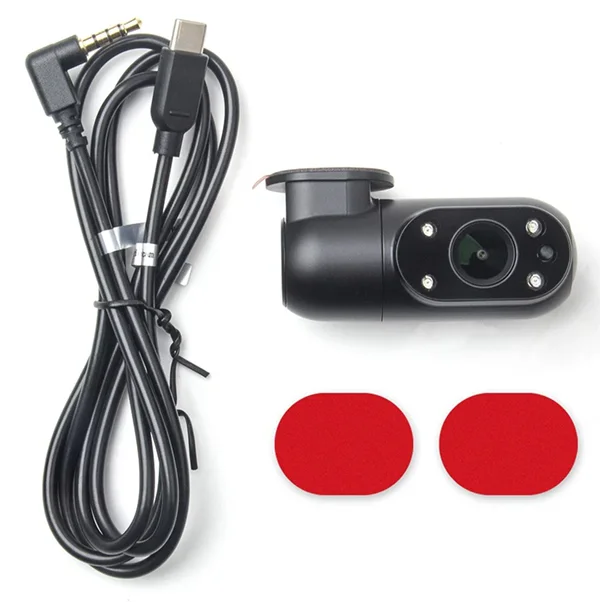
Let's see what you actually get. First there is a semi-transparent diagram sheet for, well, reasons. Then the two cameras, which we will get to in a moment. Underneath is a surprisingly well-written user manual with no weird translations, plus a ziplock bag with replacement adhesive pads, three windshield static stickers, a warranty card, and a theft-warning sticker that practically says, "please steal my brand-new dashcam."
In the lower compartment, you will find:
- A dual USB-A car charger.
- A short USB-A to USB-C cable, likely for computer transfers.
- A beefy 6 m (20 ft) USB-C to USB-C cable for the rear camera, with a nice right-angle plug.
- A 3.5 m (11.5 ft) USB-A to USB-C main power cable, also right-angled, which we will see later is not ideal since the power port is on top.
- And a basic trim removal tool.
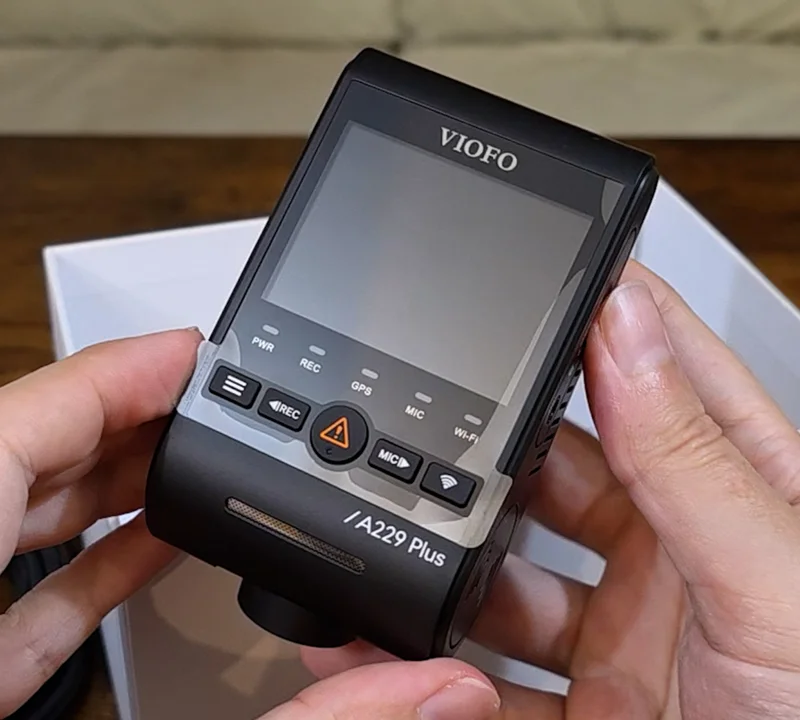
The main unit feels genuinely premium. Power comes in through the removable GPS module, which lets you detach the camera without pulling off the adhesive. There are two extra camera ports: a USB-C on the left and a proprietary barrel connector next to the microSD slot. The kit includes one remote camera, but if you want a third to serve as an interior camera, you will need a proprietary barrel-to-USB-C cable that VIOFO only sells on their website, something Reddit users are understandably annoyed about. If you would rather have more coverage out of the box than piece together a third channel, I also tested the 4-channel Botslab G980H, which ships with an interior camera in the kit.
The remote camera rotates a full 360°, though it does not have the same locking mechanism as the main unit. Hopefully it holds its position over time.
VIOFO did not include cable clips, something my old Aukey dashcams always came with. You can get five from VIOFO's site, which is blatantly overpriced, or grab a 20-pack on Amazon for a fraction of that. That is the better deal, though you probably do not need 20.
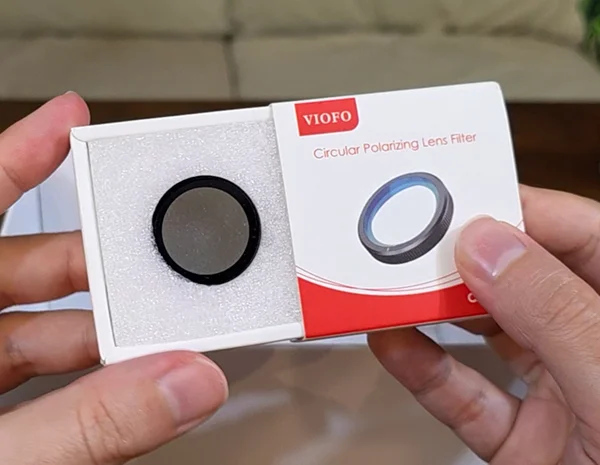
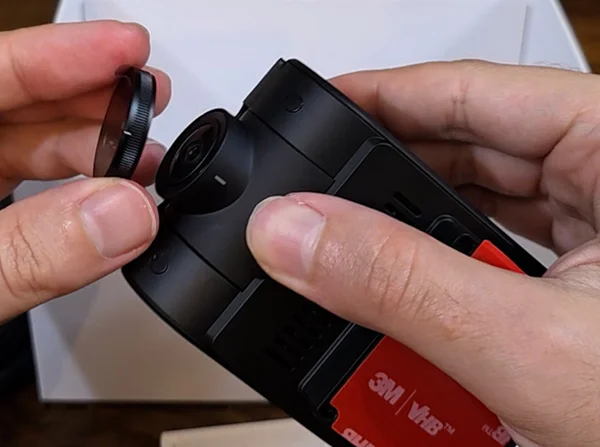
I also picked up the optional circular polarizing filter for the main lens to cut down on glare and reflections. This is another thing that really should be included on a dashcam at this price. Installing it is simple: line up the white marks on the camera and filter, then slide it on snug. We will see how much it helps later. Find the CPL filter on Amazon.
Installing the front camera
First, clean your windshield. This is where you decide whether to use the static stickers: they make removal easier and protect tint, but they can lose grip in extreme heat. Since I am in the South where summers are brutal, I am skipping them.
I started by sticking the GPS module on first, then sliding the camera into place. In my 2023 Corolla hatch, I positioned it just to the right of the sensor cluster behind the rear-view mirror, mostly out of the driver's line of sight. I also like that VIOFO used black VHB tape; it blends in far better than the gray tape on my old Aukey. If you would rather the camera not be visible at all, an OEM-style unit like the Mangoal replaces the mirror shroud instead of mounting to the glass.
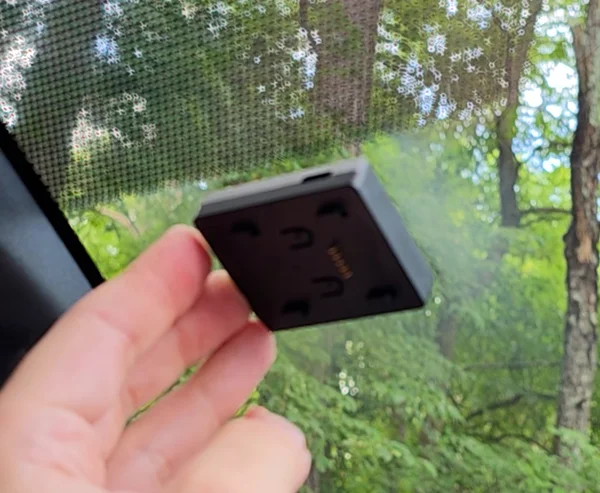
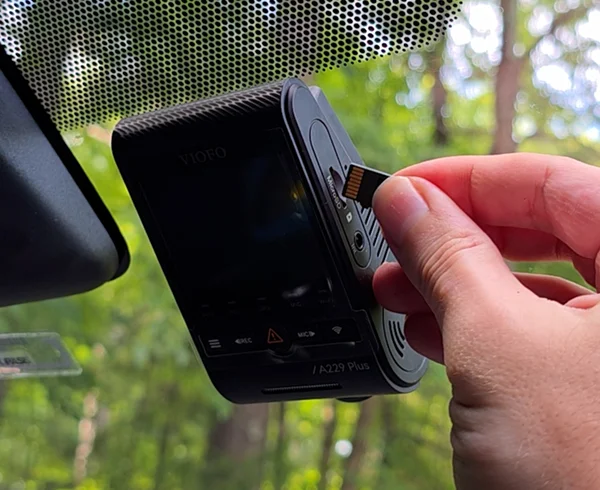
Plug in the power cable. This is where I wish the main cable had a straight plug instead of a right-angle one, since it needs to go straight up into the headliner anyway. From here, tuck the cable along the windshield under the headliner, then down the A-pillar. I used one of my leftover Aukey cable clips near the bottom of the A-pillar, but you can also tuck it into the trim, though that is a bit tricky without clips.
For the next steps it is easier to remove the glove box to reach behind it. In most cars you can unclip the spring shock on one side, then press the sides inward until the stoppers clear the dash panel and it pops right out. I ran the cable down behind the weather stripping in the door jamb, under the side of the dash panel, and into the space behind the glove box, then across and behind another panel so it exits underneath.
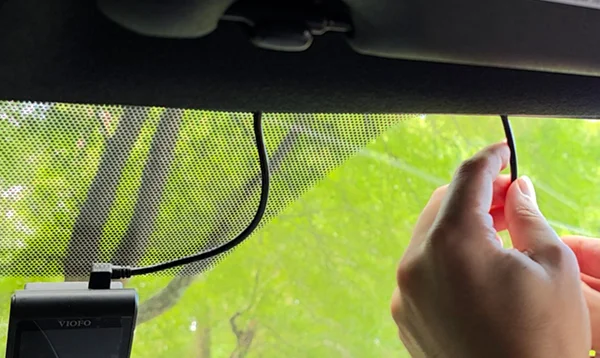
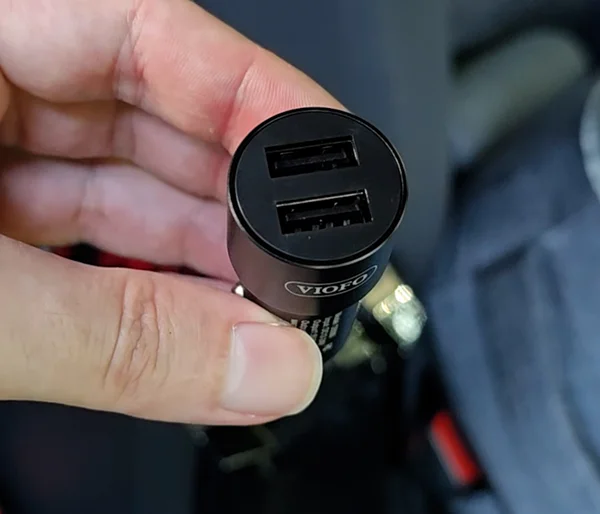
Since my 12-volt outlet is in the center-console armrest, I tucked the cable behind the panel next to the passenger seat and routed it into the compartment with the outlet. Plug in the adapter, connect the cable, reinstall the glove box, and you are done. If your outlet is on the dash instead, you can simply tuck any extra slack behind the glove box.
Running the rear camera
To install the rear camera, plug the cable into the left side of the main unit. This is where the right-angle plug is actually useful. VIOFO recommends routing the rear cable along the driver's side, but I prefer running it the same way as the power cable to keep the wires out of my view. It is a little tighter tucking two cables in some spots, and this is where extra cable ties would have been nice for a cleaner look.
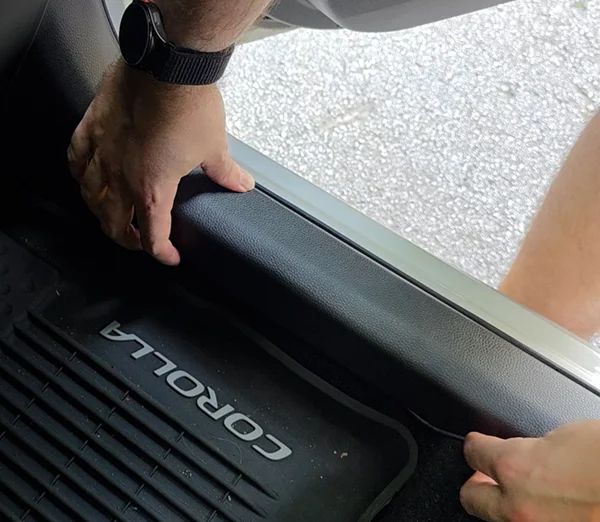
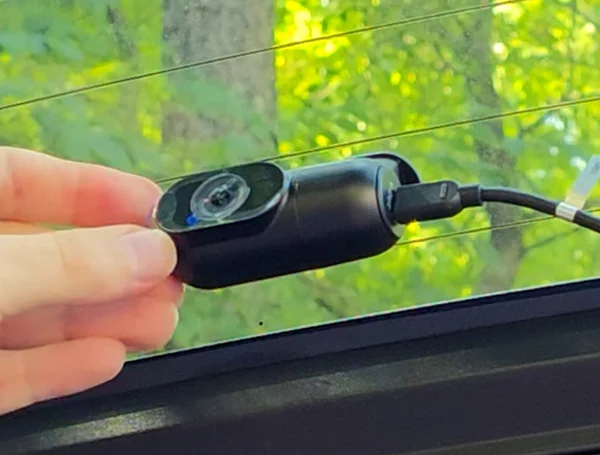
I followed the same path down to the footwell, tucked the cable under the kick panel all the way to the back, then up behind the rear seat cushion. With my hatchback, I had to leave enough slack so the hatch can open without pulling on the cable. I mounted the rear camera at the top of the window, positioned between the rear defroster lines so they do not obstruct the view, then used a clip to guide the cable to the side with just enough slack for smooth hatch movement.
How the rear camera actually performs
Install aside, the rear camera is not the same instrument as the front one, and that is worth knowing before you rely on it. Two things came out of measuring all 318 clips I have shot on this camera.
First, the rear camera records at 30FPS in every single clip. Turning HDR on halves the front camera from 60FPS to 30FPS, but the setting never reaches the rear at all. Whatever you choose in the menu, the rear runs at 30FPS.
Second, and this is the one you can actually see: the rear camera is sharpened much harder than the front. I measured sharpening halos, the bright rim a camera paints along a hard edge, across eight separate drives on different days and routes. The rear read heavier every single time, with no overlap between the two cameras on any drive. On the largest sample, 46 clips from each camera on one long drive, the rear camera's lightest reading was the same as the front camera's typical one.
In practice the rear footage looks crisp at a glance and a little more processed when you look closely. It is perfectly usable as evidence, which is what a rear camera is for, and I would still rather have it than not. It is just not the front camera's equal, and "dual 2K" does rather imply that it is. Worth knowing that the two channels are 2K in resolution, not in quality.
Fair caveat. The two cameras point in opposite directions, so they never see the same scene, and they are different sensors behind different lenses. This is a whole-camera result rather than proof about any one component. What makes me confident in the direction is that it held on eight separate drives in different light on different roads.
First power-on and setup
With everything installed, it is time to fire up the dashcam for the first time. The initial setup is simple: pick your language, accidentally set the wrong timezone because you forgot your offset from GMT, choose your speed units, and format the SD card. I also went into the menus to confirm both cameras were set to 2K resolution, HDR was enabled, and to browse a few other settings.
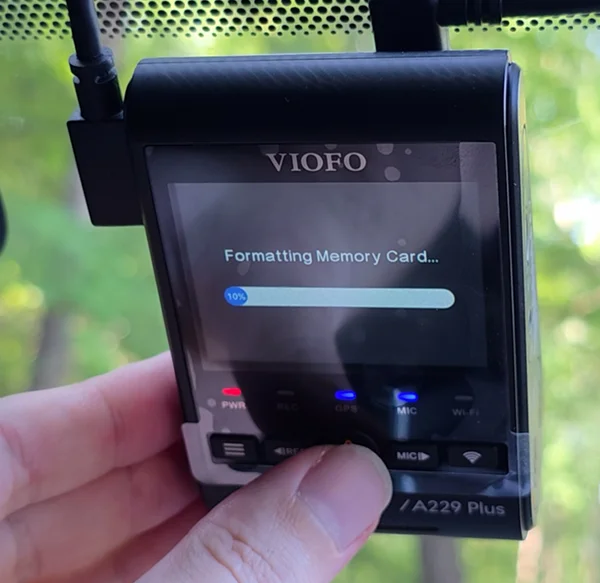
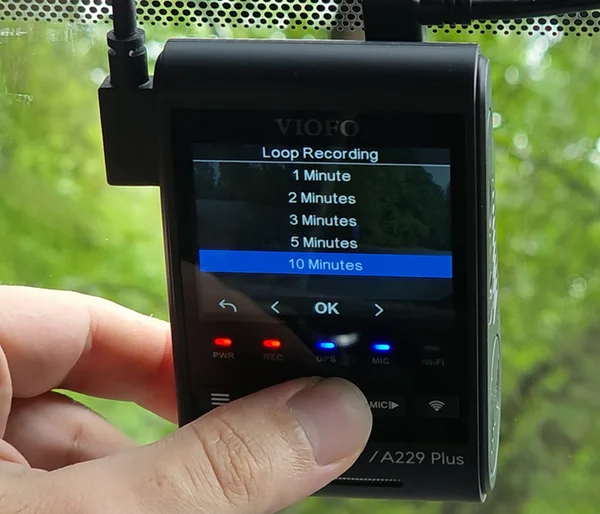
By default the clip length is only 1 minute. You will want to bump that up to 10 minutes, otherwise a 15-minute drive gives you 30 separate files: 15 from the front and 15 from the rear camera.
One thing that took me way too long to figure out: to re-enter the menu you have to stop recording first by pressing the record button, then hit the menu button. If you try to open it while recording, the camera just takes a still photo. It would have been nice if the manual made that clearer.
First impressions of the footage
Let's get to the footage. I tried to cover as many real-world conditions as possible: midday sun, early mornings, nighttime, harsh light, and even rain. I kept the Aukey DRS2 installed alongside the VIOFO A229 so I could do direct, side-by-side comparisons and really see where the improvements are. I am also putting together a separate companion video that is nothing but raw footage across a variety of lighting conditions and settings, so you can see exactly what they look like.
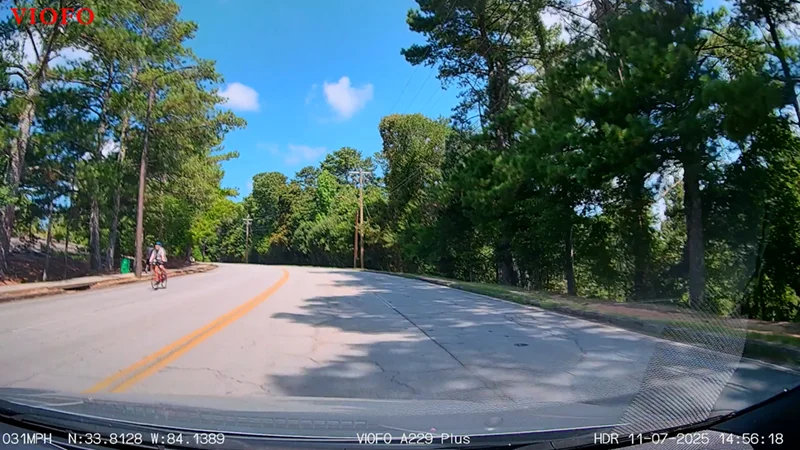
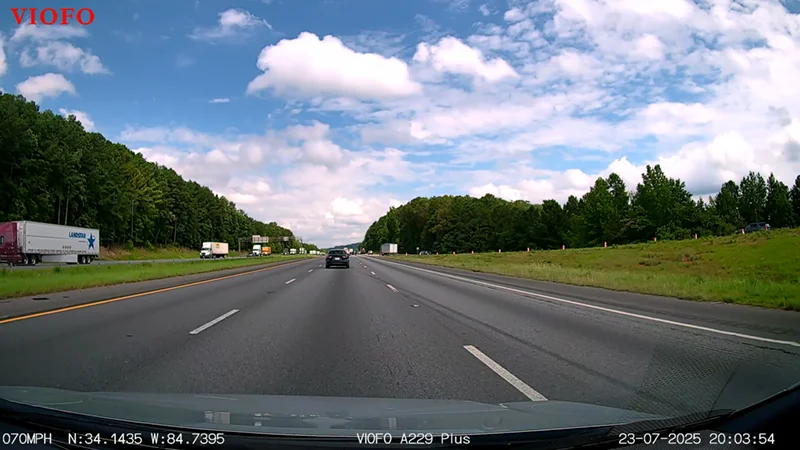
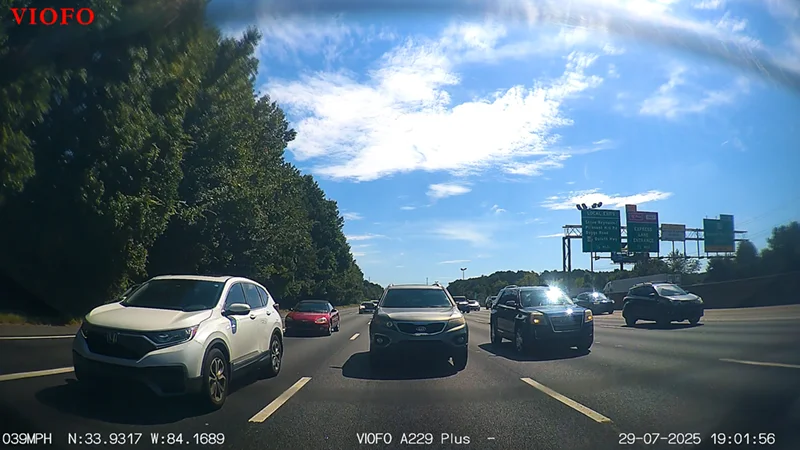
Right away, the A229 Plus makes a strong case for itself. The colors are rich and natural, the dynamic range is excellent, and HDR really helps balance bright skies and deep shadows at the same time. I like the clean on-screen overlay with speed and GPS coordinates, though I could do without the oversized VIOFO logo.
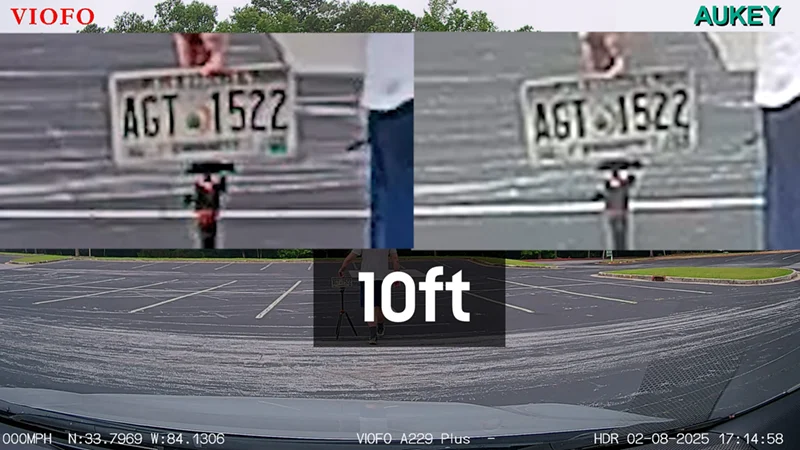
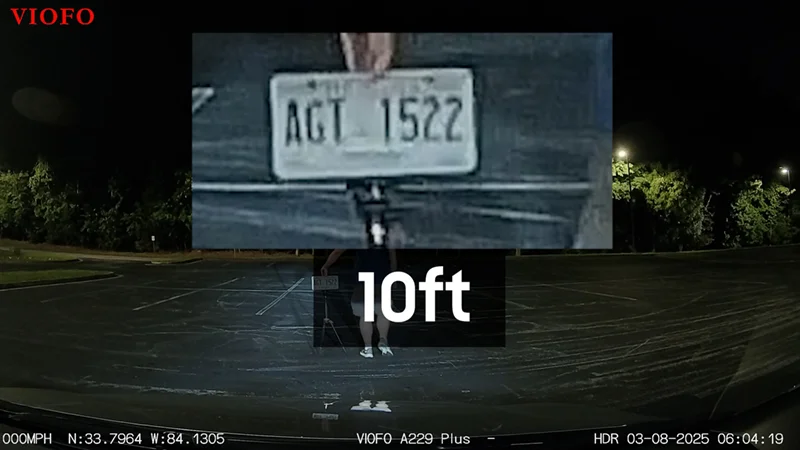
For a license-plate clarity test I set up an old plate and measured out millimeter-perfect 5-foot intervals:
- 5, 10, and 15 feet: clearly readable when zoomed in.
- 20 feet: still legible but starting to soften.
- Beyond 20 feet: blurs out.
Against the Aukey at the same distances, the VIOFO is an upgrade. Not massive, but definitely noticeable. Running the same test at night, the plate stays clear up to about 15 feet and gets too soft to read reliably beyond that. Still, compared to the Aukey, the VIOFO holds sharper detail and better contrast in low light.
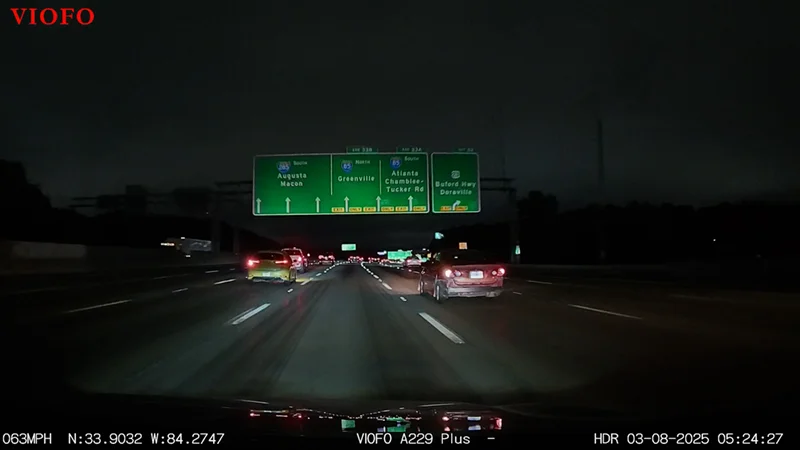
At night the A229 is noticeably cleaner than the Aukey, with less noise and better overall clarity. On darker, moonless nights there is only so much any dashcam can do, but other cars and reflective highway signs still come through clearly and remain legible. After more than a month of testing, going back to the Aukey footage makes the difference obvious: the older camera looks duller, softer, and noisier, and its bright areas, especially headlights, streetlights, and midday skies, blow out completely.
The rear camera records at the same 2K resolution as the main unit, so image quality is very similar, with good detail, vibrant color, and solid dynamic range. That said, with a hatchback, keeping the rear glass clean is a constant battle. Dust, road grime, and water spots cut into clarity, so the footage is not quite as pristine as the front camera. In clear conditions, though, it is impressive and matches the front cam.
Aukey DRS2 2019
- 1080p front and rear
- 30 FPS ceiling
- Older IMX323 sensor
- Grainy, noisier night footage
- Basic connectivity, no app
VIOFO A229 Plus 2025
- 2K 1440p front and rear
- 60 FPS with HDR off
- STARVIS 2 IMX675 sensor
- Cleaner, more legible low light
- Dual-band Wi-Fi and app support
How close do you have to be to read a plate?
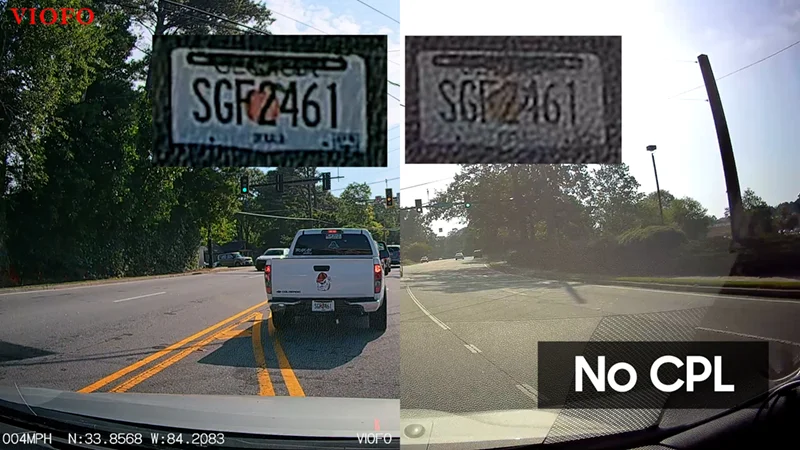
This is the question a dashcam actually has to answer, and most reviews answer it with a screenshot and a shrug. I found a better test sitting in my own footage: a frame taken while stopped at a red light, with four vehicles at different distances in it. Standing still means the light, the exposure and the motion blur are identical for all of them, so the only thing that changes between one plate and the next is how far away it is.
Here are three of them, straight out of the file at full resolution with no sharpening or clean-up, magnified so you can see the pixels:
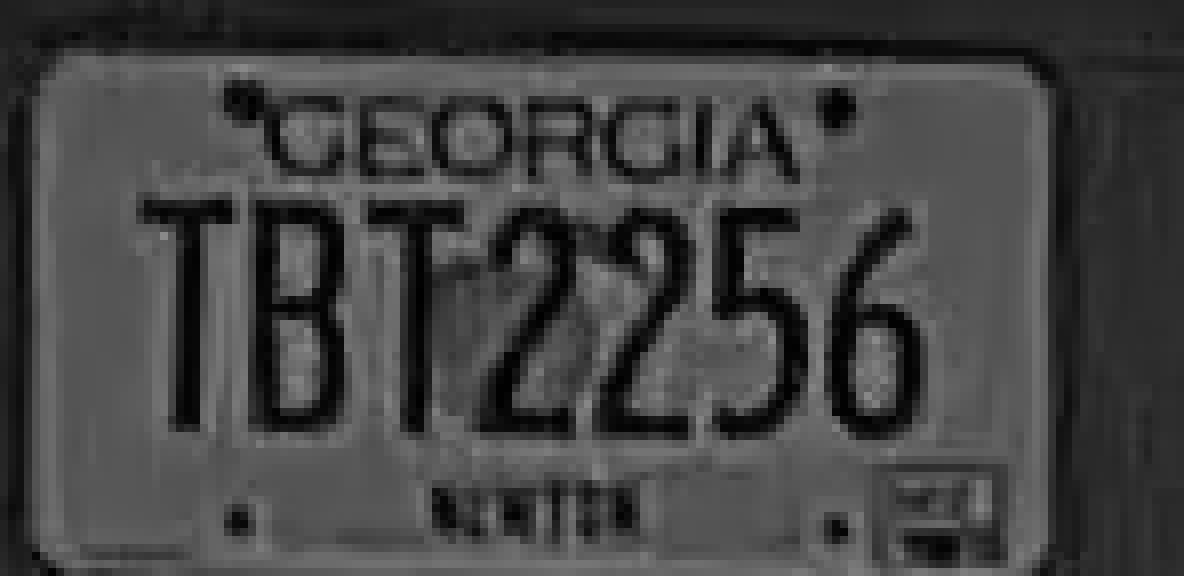
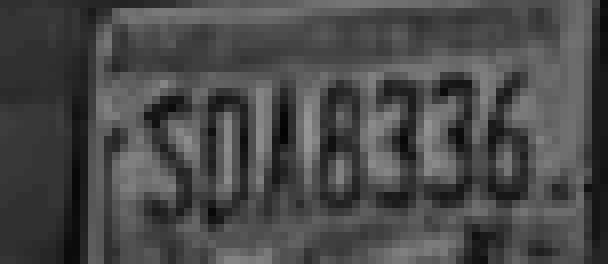

So the useful threshold sits somewhere between 36 and 76 pixels of plate width. Above about 70 pixels you have something you could give an insurer. Below about 40 you have a rectangle. There is no clever recovery in between, and no amount of zooming in afterwards changes it.
The other thing that frame shows is what the failure looks like. None of those three plates were blown out by glare; all three sat at zero percent clipped. In daylight this camera does not lose plates to brightness, it loses them to distance. Which is the good failure to have, because distance is something you control by following at a sensible gap.
Worth being straight about the limits of this test: those are three different cars with three different plates at three different angles, so it is an illustration of the threshold rather than a precise measurement of it. And I cannot turn pixels into feet without measuring this camera's field of view, which I have not done yet.
What the CPL filter actually does
I originally called the CPL a must-have and left it at that. Going back through the footage I found something I had honestly forgotten doing: on one drive I pulled into a parking lot, stopped recording, unscrewed the filter, and carried on. Then a few minutes later I pulled back in and put it on again. I remember taking my time over it because I did not want to shift the lens while unscrewing the filter.
That accident of thoroughness left me with about the cleanest test I could have designed. The camera was sitting still in the same parking space, pointed at the same trees, 103 seconds apart, with nothing changed but the filter. No difference in route, weather, sun angle or composition to argue about.
Filter on 18:32:58
- Sky brightness 119
- Foliage brightness 64
- Deep, saturated blue sky
Filter off 18:34:41
- Sky brightness 176, up 48 percent
- Foliage brightness 72, up 14 percent
- Sky washed out and pale
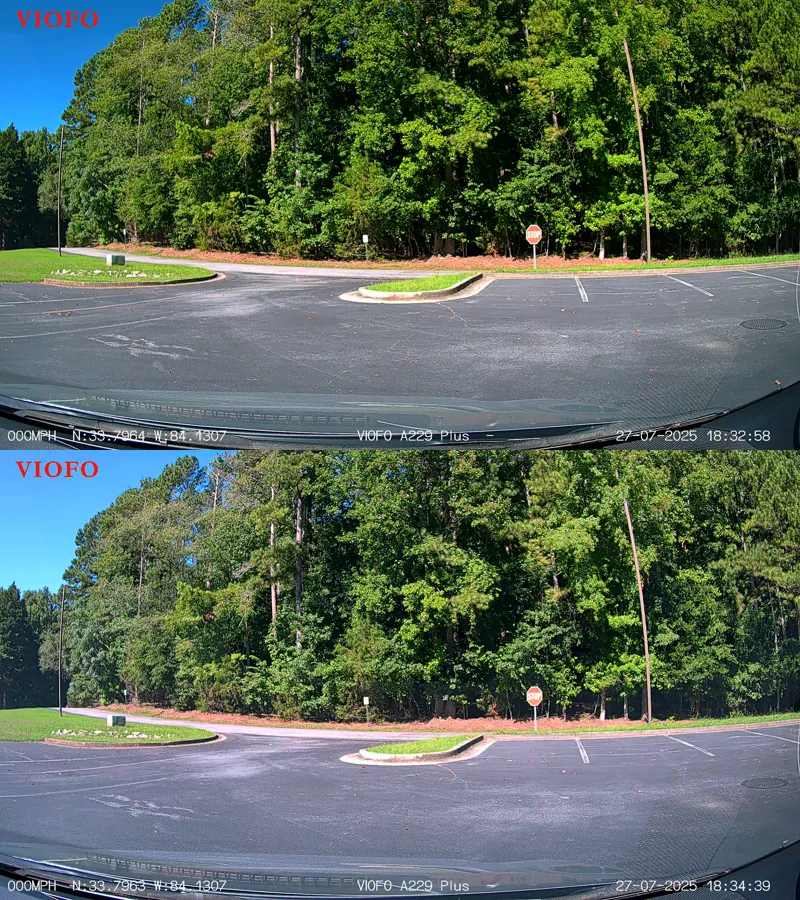
Everything got a little brighter with the filter off, which is expected: a CPL costs you a stop or two of light and the camera's auto-exposure does not fully make that back. The interesting part is that the brightening is not even. The sky jumped more than three times as hard as the foliage did. That gap is the polarising filter doing precisely the job it is sold for, cutting polarised skylight while leaving ordinary diffuse light more or less alone. Measured against the rest of the scene rather than in absolute terms, the sky is about 30 percent brighter once the filter comes off.
In plain terms: with the filter fitted you get a deeper blue sky, more cloud definition and a picture that holds its colour instead of going pale in bright sun. That is real, it is repeatable, and it is the reason I keep one on the camera.
Where I have to walk back my original claim
The first version of this review said the CPL erases dashboard reflections and that the difference is night and day. When I measured the windshield area in that same before-and-after, I found no difference at all: 126 with the filter, 122 without, which is nothing.
I do not think the filter is failing, I think I over-generalised from the shots where it worked. That parked test was in partial shade with a dimly lit dash, and there was not much reflection to remove. The comparison shot further down this page, taken out on an open road with low sun hitting the dash directly, does show an obvious difference. So the reflection benefit is situational rather than constant: it scales with how brightly the sun is lighting your dashboard, and on a dull day or in shade you will not notice it.
I also claimed it helps plates stay readable in high-glare scenes. I have not measured that yet, so treat it as an impression rather than a finding until I have.
Being straight about the limits. This is one before-and-after pair, and the camera's aim shifted very slightly when I refitted the filter, so the two frames are not pixel-for-pixel identical. I also used foliage as the comparison rather than road surface, because asphalt at a shallow angle is itself partly polarised and makes a poor control. The direction and the rough size of the effect are solid. The exact percentages are indicative. A proper test needs two identical cameras side by side, one filtered and one not, and that is on my list.
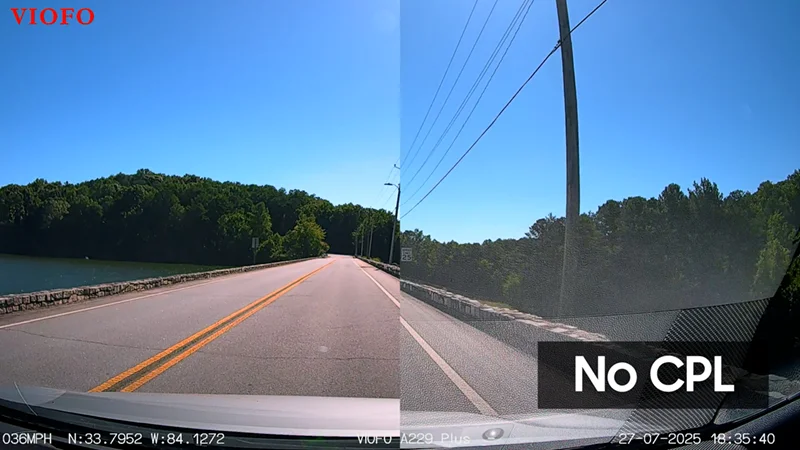
The sky brightened three times harder than the foliage when I took the filter off. That gap is the polariser doing its job.
What HDR actually changes, measured
When I first wrote this review I said HDR was promising but inconsistent, and I left it there. That bothered me, so I went back and put every clip I shot on this camera through my own analysis tool: 318 clips, 27.6 hours of driving, including three drives where I stopped and flipped the setting mid-session so the only thing that changed was HDR itself.
Two things make that possible on this camera. Turning HDR on halves the front camera from 60FPS to 30FPS, so the frame rate tells you which mode a clip is in. Better still, the camera stamps it into the video itself: the on-screen bar reads VIOFO A229 Plus HDR with it on and VIOFO A229 Plus - with it off. No guessing.
In daylight it genuinely saves the sky
The cleanest test is three back-to-back clips from one drive, sixteen minutes end to end, with HDR on, then off, then on again. I measured what percentage of each frame was driven to pure white, the point where there is no detail left to recover:
With HDR on, the typical frame had no blown highlights at all and the worst frame in ten minutes lost 0.64 percent of itself. With it off, the typical frame lost 3.69 percent and the worst frame lost nearly a fifth of the image. I pulled that frame to look at it: the sky is a flat white shape with no cloud structure in it whatsoever. A second toggle on a different day landed in the same place, so this is not a one-off.
At night it does nothing for highlights
I ran the same test on a night drive, five clips with it on and five with it off, alternating. Every single one of the ten came back at 0.00 percent blown highlights and near zero crushed shadows. There is no benefit and no penalty. If you drive at night and you turned HDR on hoping it would tame headlights, it is not doing that.
The part nobody mentions: it turns sharpening up
This is the finding I did not expect. Alongside highlights I measured sharpening halos, the bright rim a camera paints along a hard edge to make footage look crisper. On that same night drive, every clip with HDR on had heavier halos than every clip with it off, with no overlap between the two groups at all. A second set of ten clips shot months later showed the same thing.
So part of what this switch does is not capture more range, it processes the picture harder. That is the source of the artifacts I described in the original review, and it is why HDR footage can look sharper and slightly more artificial at the same time.
HDR on 30FPS
- Highlights held: 0.00 percent blown in a typical daylight frame
- Sharpening halos roughly four times heavier
- Bitrate pinned at 28.7 Mbps, so twice the data per frame
- No measurable benefit at night
- No loss of real detail
HDR off 60FPS
- Worst daylight frame lost 19.9 percent to blown sky
- Cleanest, least processed image of the two
- Bitrate climbs as high as 43.8 Mbps on busy scenes
- Identical night performance
- Twice the frame rate, noticeably smoother
What it costs you
The trade is frame rate. HDR on means 30FPS, and the difference is obvious rewatching mountain roads. What surprised me is that the file size does not change the way you would expect: with HDR on the camera sits pinned at 28.7 Mbps, while with it off it climbs as high as 43.8 Mbps on a busy scene. Same ceiling, half the frames, so each HDR frame is carrying roughly twice the data. Real detail is unaffected either way, which I checked separately.
One thing worth knowing if you run the rear camera: it records at 30FPS in every single one of the 318 clips I analysed. The HDR setting never reaches it. Whatever you pick, the rear camera behaves the same way.
An honest limit on these numbers. The clips either side of a toggle are consecutive segments of one drive, so they cover different stretches of road, and how much sky happens to be in shot moves the highlight figures on its own. The direction is consistent across three separate toggles and matches what the setting is supposed to do, but treat the daylight percentages as a strong indication rather than a precise number. The sharpening result is the firmer of the two, because it barely depends on what the camera is pointed at.
My own verdict has not changed, but now I can say why. I leave HDR off, because I would rather have 60FPS and a less processed image, and because the situations where it saves a sky are rarer than the situations where I want smooth motion. If you mostly drive into low sun, turn it on. I walk through the ghosting and the night results in more detail in why I turn HDR off on this dashcam.
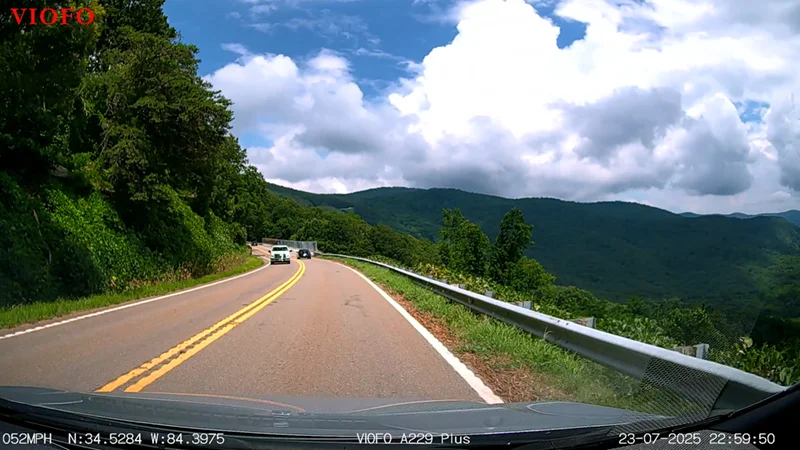
With all this footage, it is worth knowing how much you can actually store. I went back and measured this properly rather than trusting the spec sheet. At the highest bitrate a single 10-minute clip from one camera comes out at 2.15 GB, and with both cameras running the pair costs about 24 GB for every hour you actually drive. On a 512GB card that is roughly 21 hours of loop, which is plenty for a round trip from Atlanta to Chicago without overwriting anything. If you want to size a card to your own commute, I built a dash cam storage calculator that does the math for you.
The part nobody warns you about: locked clips never go away
Here is something I only found by pulling a completely full 512GB card and looking at every file on it. When the camera locks a clip, either because you pressed the button or because the impact sensor fired, it moves that clip into a protected folder. Protected means it is never recycled. It sits there forever, and every locked clip you make permanently shrinks the loop you have left.
On my card that had quietly grown to 7.2 percent of the entire 512GB, at a rate of about 5GB a month the way I drive. The loop had shrunk from 21 hours to 19.3 and was still falling. And the locked clips reached a long way back: the loop covered the previous six weeks, while the protected folder held clips from more than seven months earlier, over five times further back in time.
What to do about it. Nothing is broken here, and I would rather the camera protected a clip too eagerly than not at all. But it does mean the protected folder is yours to manage. Once or twice a year, copy anything you actually want off the card and clear the rest. Otherwise a card that held 21 hours when it was new will quietly be holding fifteen a couple of years later, and the first you will know about it is when the footage you wanted has already looped away.
Using the VIOFO app
The VIOFO app is available in both major app stores. To connect, hold the Wi-Fi button on the dashcam until it turns on, confirmed by an on-screen icon and a voice alert, then follow the app's pairing instructions. Once connected, you can:
- View live feeds from the front and rear cameras.
- Play back and download saved clips.
- Change all dashcam settings without touching the tiny screen, from a distance.
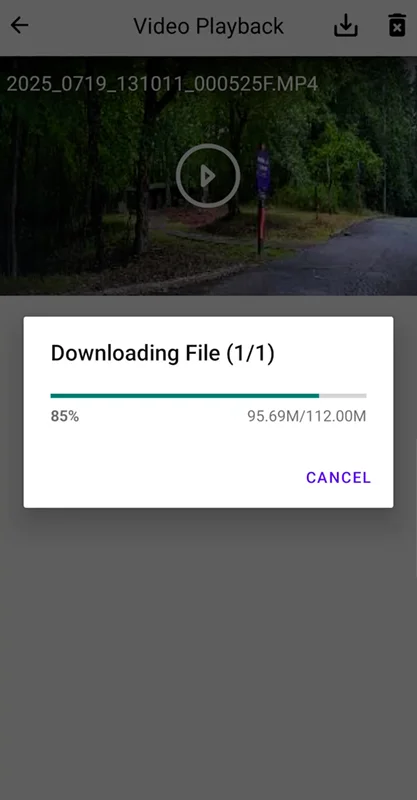
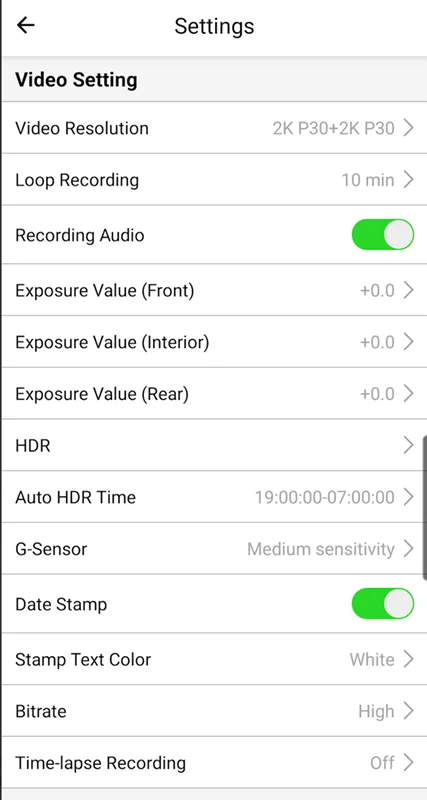
In my testing, the app worked fine, with no connection dropouts or crashes, though that seems to be the exception based on user reviews. Many people report trouble pairing or staying connected, so your mileage may vary. The interface is a bit dated, but it gets the job done.
Voice controls that actually work
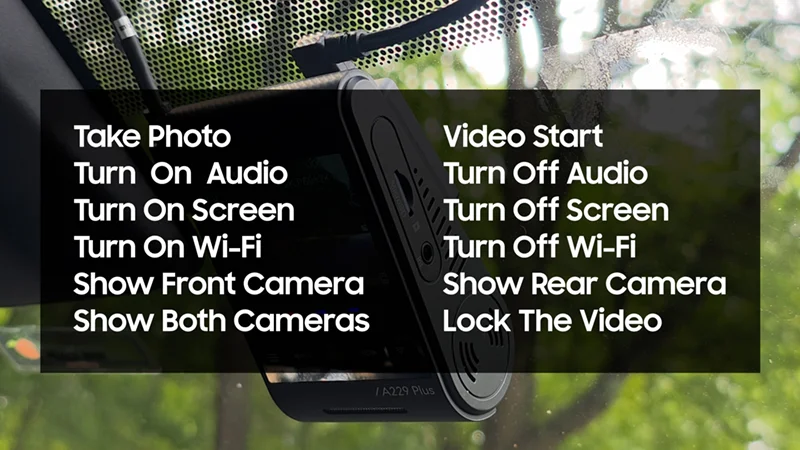
The voice controls worked well. The camera recognized my unaccented commands pretty much perfectly. There are 12 commands available, all fairly useful if you can remember what they are. It works for me, but your experience may vary. I do wish there was a keyword trigger like "Hey VIOFO," because a couple of times I accidentally activated a command during regular conversation.
The bottom line, thirteen months later
When I first published this I said to expect a long-term follow-up in a year or two. This is that follow-up, and I can do better than an impression, because I still have every clip I shot when the camera was new and I put all of them through the same analysis as a fresh batch shot thirteen months later on the same unit.
Did anything degrade? No.
Front and rear sharpening, bitrate, storage cost per hour, frame rate, file integrity, how much footage it loses between clips: all of it landed exactly where it was a year earlier. After thirteen months of baking on a windshield through a Georgia summer, nothing about this camera measured differently. That is not a claim most reviews can make, because it needs the original footage kept and measured the same way.
How reliable are the files themselves?
This is the thing that actually matters and nobody checks it, so I did. Across 27.6 hours of driving, every single one of the 318 clips decoded cleanly. Not one corrupt file, not one unreadable segment, from a camera that had been power-cycled in a car for weeks. A full 512GB card I pulled separately came back the same way, 302 files out of 302.
I also checked whether the bitrate is real. Some cameras pad their files so the number in the spec sheet looks bigger than the picture actually is. This one does not: zero padding on every clip I measured. The bitrate you are told is bitrate you are getting.
The one imperfection is at the joins. A dashcam records in chunks, and about three percent of those joins lose something, always under a second. Most drives stitch together with nothing missing at all, and one 34-clip session was seamless end to end. It is a real gap rather than a rounding artifact, so it is worth knowing, but the odds of an incident landing in that particular half-second are small.
So, would I still buy it?
Yes, and with more confidence than I had when I wrote the original review. Coming from a dashcam that served me well for over six years, I did not expect to be this impressed, and a year of measurement has not turned up a reason to walk that back. The things I would tell a buyer are the ones that took work to find: turn HDR off unless you drive into low sun, do not expect the rear camera to match the front, follow close enough that a plate fills more than about 70 pixels if you want it readable, and clear your locked-clip folder once a year.
Let's hope VIOFO sticks around longer than Aukey did, so we can see what they do with the next generation.
Frequently asked questions
What resolution does the VIOFO A229 Plus record in?
The A229 Plus records at 2K QHD (2560 x 1440) for both the front and rear cameras. The front camera supports 60 frames per second when HDR is off, and 30 FPS when HDR is enabled.
How does the A229 Plus perform at night?
At night the A229 Plus performs significantly better than older dashcams like the Aukey DRS2, thanks to its Sony STARVIS 2 IMX675 sensor. The footage is less noisy, headlights and road signs are easier to read, and reflective signs stay legible even in near-total darkness. Like most dashcams, though, license-plate readability at distance is still limited at night.
Does the VIOFO A229 Plus support HDR, and should I use it?
Yes, and I measured what it actually does. In daylight it genuinely protects highlights: on one drive the worst frame in a ten-minute clip lost 0.6 percent of itself to blown-out sky with HDR on, against 19.9 percent with it off. At night it makes no measurable difference to highlights at all. It also turns sharpening up roughly four times, which is where the over-processed look comes from, and it halves the front camera from 60 FPS to 30. I leave it off and take the frame rate. I break down the testing in the HDR deep dive.
How much footage can a 512GB card hold?
I measured this on my own card rather than trusting the spec sheet. A 10-minute clip from one camera is 2.15GB, and both cameras together cost about 24GB for every hour you actually drive, so a 512GB card holds roughly 21 hours of loop. One thing to watch: locked clips are never recycled. On my full card they had grown to 7.2 percent of the whole thing at about 5GB a month, shrinking the loop as they went, so clear that folder once a year. You can size a card to your own driving with the dash cam storage calculator.
Is the CPL filter worth buying?
Yes, and I can now say why rather than just asserting it. I found a drive where I had removed the filter and refitted it a few minutes later, with the car parked in the same space both times, so nothing changed but the filter. With it off, the sky brightened 48 percent while the foliage brightened only 14 percent. That three-to-one gap is the polariser cutting polarised skylight, which is exactly what it is for, and it means deeper sky and better colour in bright sun. One correction to my original review: I also claimed it erases dashboard reflections, and in that parked test I measured no difference at all. The reflection benefit is real when low sun is striking your dash and absent when it is not, so it is situational rather than constant.
How difficult is it to install the VIOFO A229 Plus?
Installation is fairly straightforward, though it does involve tucking cables behind trim panels. In many cars you will need to remove the glove box to route the power cable cleanly. The rear camera should be mounted between the defroster lines on the back window to avoid obstructing the view. VIOFO includes adhesive mounts, but cable clips are sold separately, which can make the job a bit trickier.
Does the VIOFO A229 Plus have parking mode?
Yes, the A229 Plus supports parking-mode recording when paired with the optional hardwiring kit. That lets the camera record while your vehicle is parked, triggered by motion or impact detection. Without the hardwire kit, the camera only records while the car is running.
What memory cards are recommended?
VIOFO recommends high-endurance microSD cards up to 512GB, at least Class 10 or UHS-1 speed. Brands like Samsung Pro Endurance and SanDisk High Endurance are ideal. Regular consumer cards may wear out faster under constant recording.
How does the A229 Plus compare to the Aukey DRS2?
The Aukey DRS2 and DR02 were reliable and durable, but they are discontinued 1080p dashcams with older tech. The A229 Plus moves up to 2K 1440p front and rear, 60 FPS instead of 30, the STARVIS 2 IMX675 sensor instead of the older IMX323, cleaner and more legible night footage, and dual-band Wi-Fi with app support. It is a clear upgrade in almost every category.
Do other VIOFO dashcams use the same IMX675 sensor?
Yes. VIOFO uses the IMX675 STARVIS 2 sensor across several models: the VS1 Mini (compact 2K HDR front-only), the A119 Mini 2 (slim front-only 2K with HDR, Wi-Fi, and voice), the A229 Plus (dual 2K front and rear), the A229 Pro (IMX678 front, IMX675 rear), and the A329 series (multi-channel setups with IMX678 up front). So you can find the IMX675 in both compact single-channel cameras and higher-end multi-camera systems.